
You hear a drip over the television, look up, and notice a brown ring spreading across the ceiling. Outside, rain is still coming down. You need to know whether to grab a bucket, shut off the lights, or call someone immediately.
A leaking ceiling from rain requires three separate jobs: stabilize the room, identify the entry point, and dry the building materials. Don't collapse those jobs into a tube of caulk and a fresh coat of paint. Stay off the wet roof, protect the people inside, and treat the stain as evidence.
Table of Contents
- First Ten Minutes When Water Is Coming Through the Ceiling
- Why the Stain Is Rarely Under the Leak
- How a Roofer Actually Diagnoses the Source
- The Usual Suspects on a Central Ohio Roof
- Drying the Ceiling Assembly Without Creating a Mold Problem
- When to Stop DIY and Call a Central Ohio Roofer
- Insurance, Documentation, and What Comes Next
First Ten Minutes When Water Is Coming Through the Ceiling
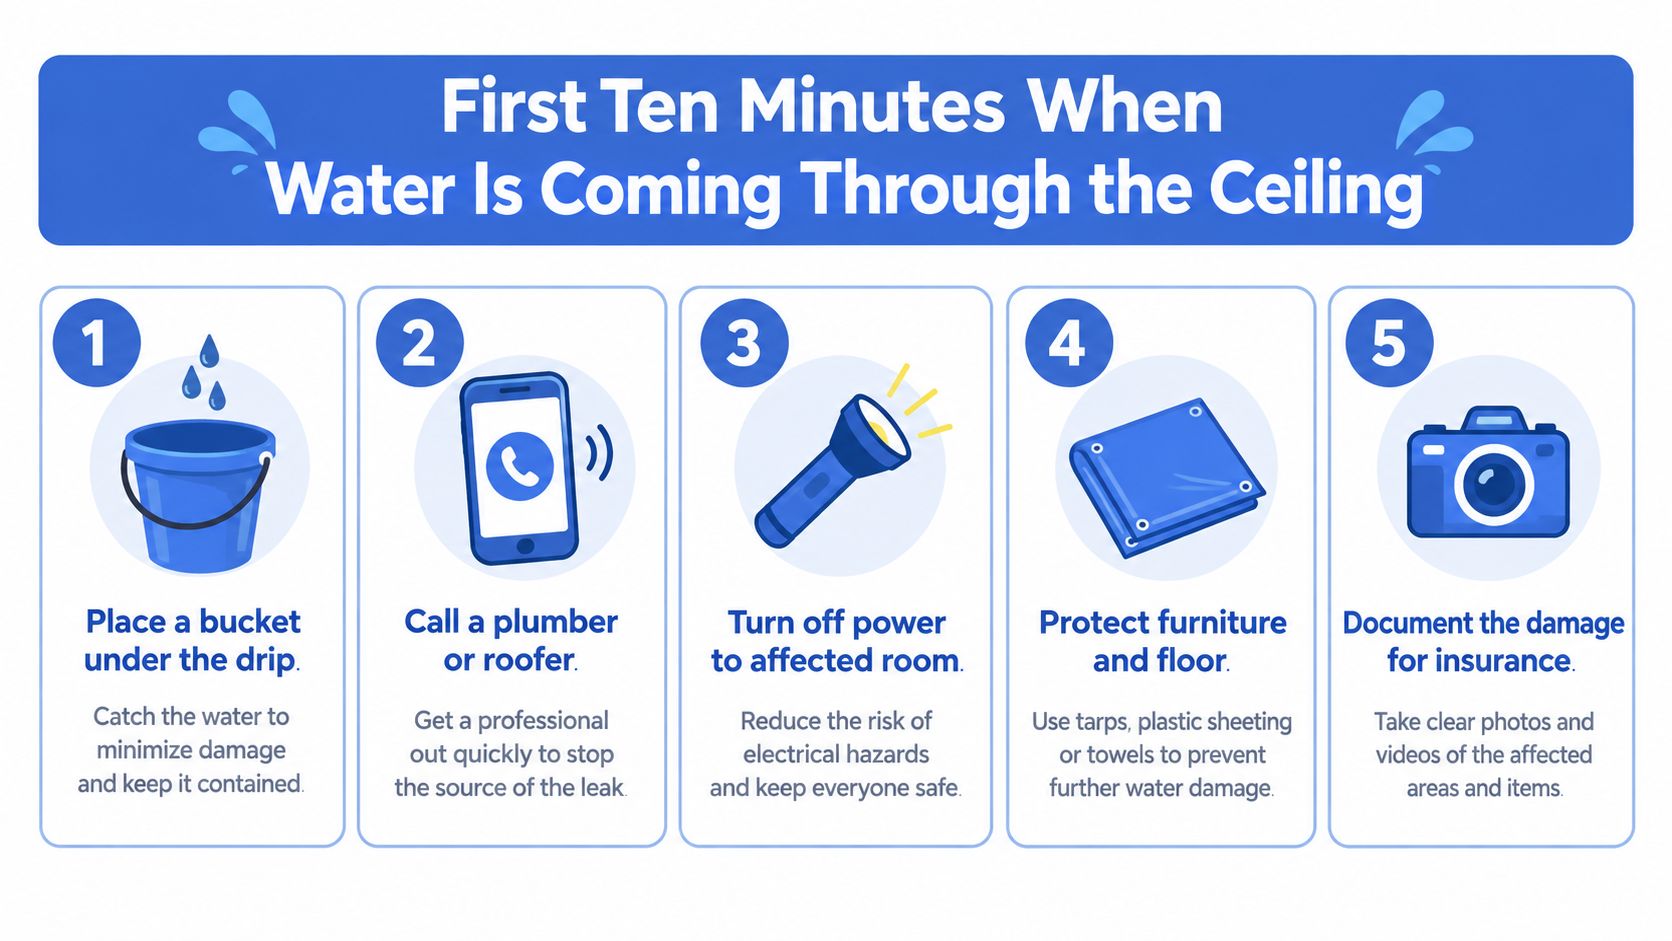
Drip. Drip. Then another spot starts beside the light fixture. Before you move furniture or reach for a ladder, look for wet electrical fixtures and sagging ceiling material. Those conditions change what you can safely do.
Make the room safe first
- Keep people clear. Move children, pets, and anyone sleeping in the room away from the affected area. Don't stand beneath a bulge to inspect it.
- Isolate electrical hazards. If you can reach a dry electrical panel by a dry route, shut off the affected circuit. Don't touch a wet fixture, switch, or appliance. If the panel or route is wet, stay away and call for professional help.
- Contain accessible drips. Place a bucket beneath water only where the ceiling appears stable. Protect the floor with plastic sheeting without creating a slippery walking route.
- Photograph before cleanup. Capture the whole room, the ceiling mark, affected belongings, and the drip itself. Safety comes before getting the perfect picture.
- Arrange help. Call a roofer for apparent rain intrusion. If the source is uncertain or near plumbing, explain that when you call.
Protect life and documentation first. The rest is a building material problem.
Leave dangerous temporary work to a professional
Don't punch a hole in a bulging ceiling yourself. A controlled drain opening may be appropriate when a professional determines that accumulated water needs releasing, but that requires checking electrical hazards and planning for falling material. Your job is to isolate the area, not stand underneath it with a screwdriver.
Don't climb onto wet shingles, attempt rooftop tarping during the storm, or try to mop saturated attic insulation. Temporary exterior protection belongs with someone equipped to access the roof safely.
For organizing the broader cleanup, H-Towne & Around Remodelers, Inc. provides a resource on home recovery after flood or storm damage. Keep that recovery work separate from the immediate safety decisions. Federal mold and moisture guidance also supports addressing wet materials promptly rather than stopping at drip containment.
Why the Stain Is Rarely Under the Leak
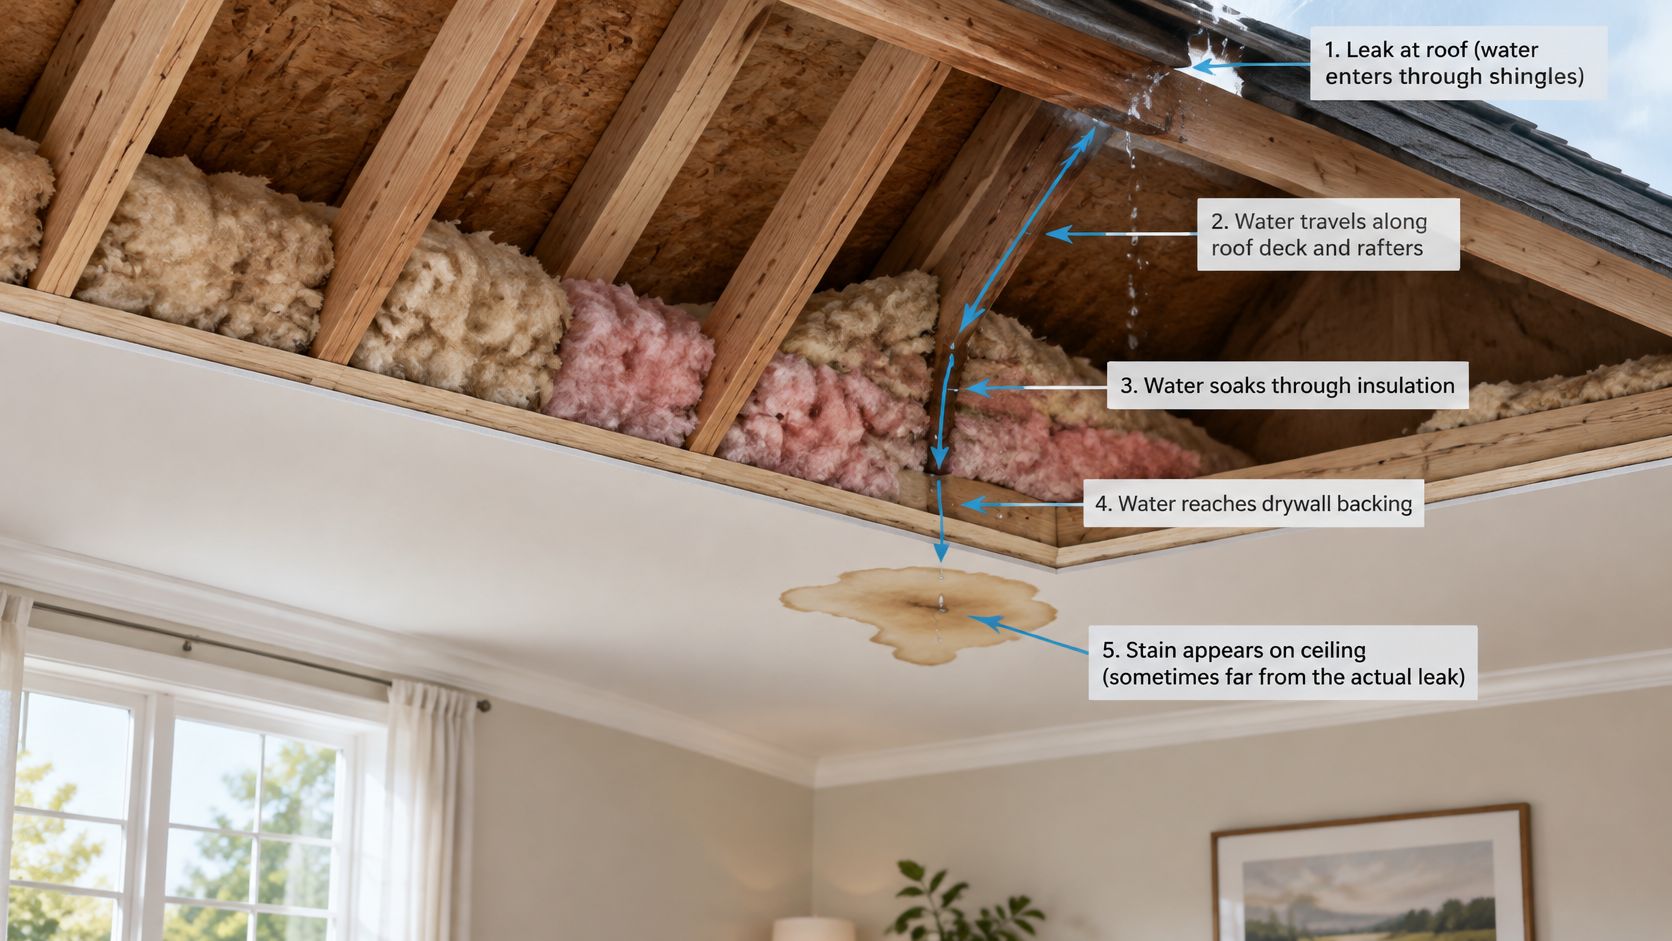
The stain is a witness, not the entry point. Rainwater can enter higher on the roof, follow decking or framing, soak insulation, and finally reach the drywall somewhere else. Patching directly above the mark without tracing that route is guesswork.
Federal roof and ceiling repair guidance also identifies wind-driven moisture entering through unbaffled vents. That matters because a ceiling leak can involve a ventilation detail rather than an obvious hole in the shingles.
Use the timing to narrow the search
Start with observations, not conclusions:
- Only during wind-driven rain? Have the roofer investigate exposed transitions, flashing, and vent details. Record the wind direction if you know it.
- After rain regardless of wind? Roof intrusion remains a candidate. Note whether the response is immediate or delayed.
- Near a bathroom or plumbing stack? Ask whether fixture use and the leak coincide. A nearby pipe is a reason to investigate plumbing, not proof that plumbing caused it.
- During air-conditioning operation? Request a check of HVAC condensate equipment and drainage before authorizing roof work.
- During cold weather without rain? Ask about condensation, attic ventilation, and air leakage. Include snow or thaw conditions in your notes.
Wet attic insulation helps locate the affected assembly, but it doesn't identify the source by itself. Similarly, a stain near a chimney doesn't prove the chimney flashing failed. Each clue needs to fit the timing and the physical water trail.
Diagnostic rule: A repair should explain both where the water entered and why it appeared when it did.
For a Columbus homeowner, the useful distinction isn't “roof problem or no roof problem.” It's rain entry, plumbing, HVAC condensate, condensation, or ice-related moisture. Those possibilities call for different trades and different repairs. Correct the source that the evidence supports, not the symptom that's easiest to paint.
How a Roofer Actually Diagnoses the Source
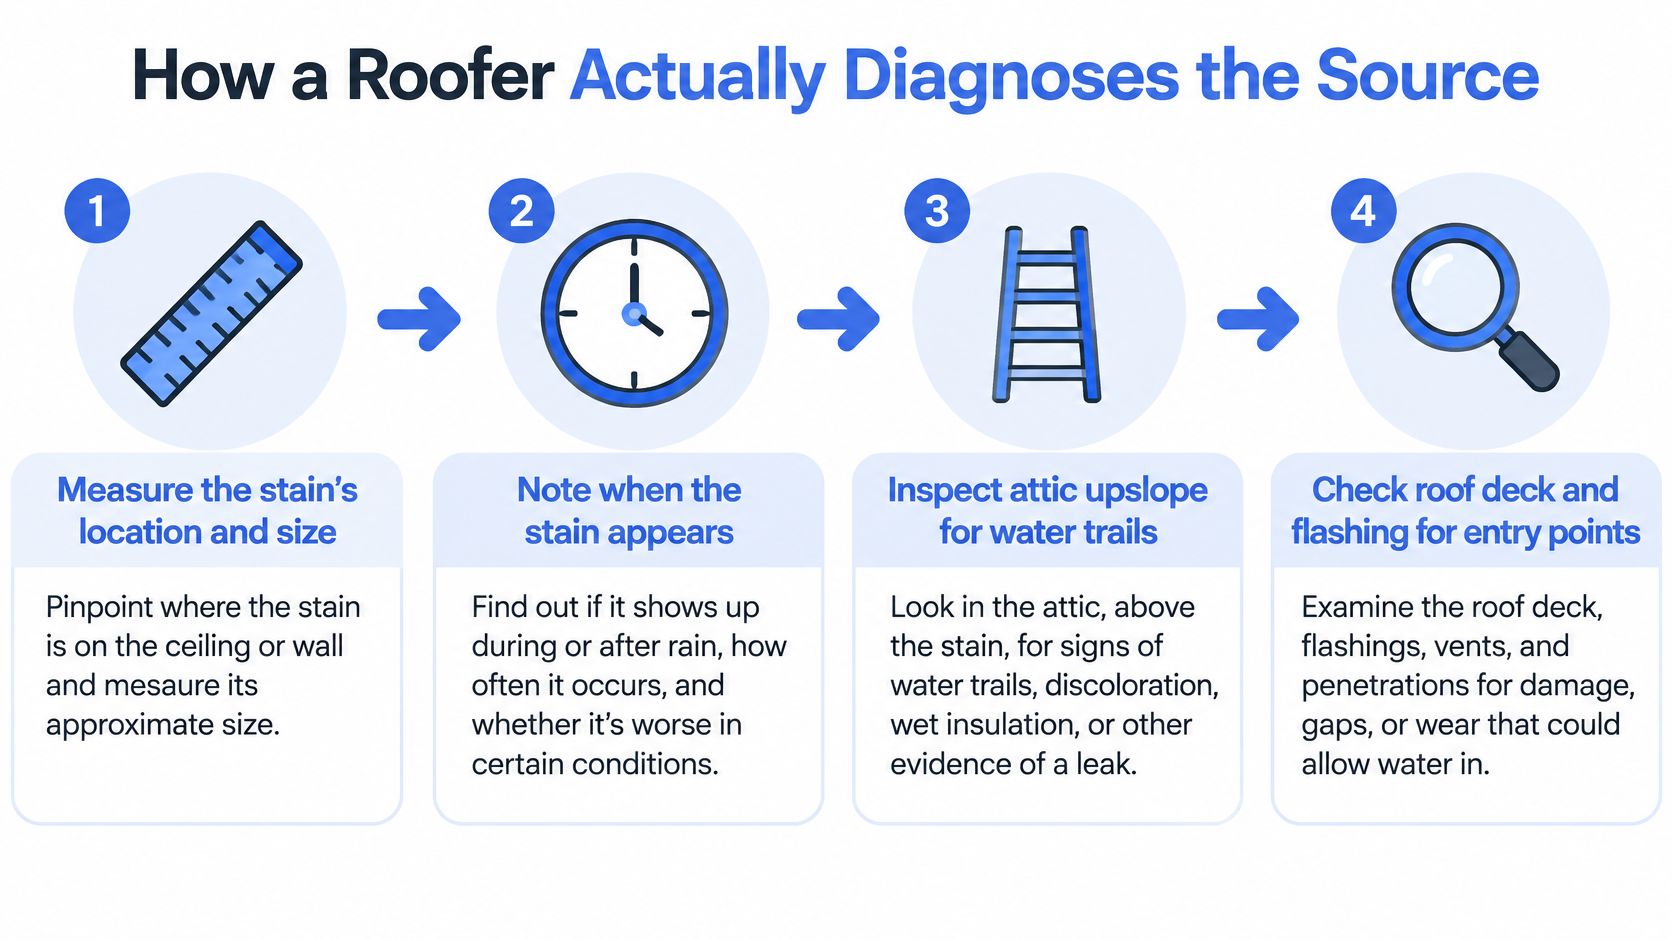
A proper diagnosis starts inside, with a flashlight and a record of what happened. A glance at the shingles from the driveway isn't enough to justify replacing your ceiling.
Give the contractor photographs, the stain's location and approximate size, and notes about rainfall and wind. Mark the affected room on a simple floor sketch so the interior evidence can be related to exterior roof features.
Follow a controlled inspection sequence
- Inspect the attic safely. From suitable access and supported walking surfaces, the contractor checks sheathing, framing, insulation, and penetrations. They trace active wetness and water trails upslope rather than assuming the entry is overhead.
- Compare interior and exterior findings. Chimneys, skylights, wall intersections, vents, and valleys should be checked against the interior trail. Old dark staining alone doesn't establish an active leak.
- Test only when needed. If visual evidence is inconclusive, a trained crew can wet small exterior sections while an observer monitors inside.
- Document the result. The contractor should distinguish a confirmed source from a suspected defect and explain any remaining uncertainty.
FEMA's roof inspection guidance supports checking attic and ceiling staining, inspecting projections such as chimneys and skylights, and arranging prompt repairs after high winds. Its general maintenance recommendation is roof inspection at least twice annually.
Don't turn a hose test into another leak
A controlled test starts at the lowest suspected component and moves upslope, with pauses between sections. The observer records when water is applied and when, if at all, moisture appears inside.
High-pressure spraying and soaking the whole roof at once defeat the purpose. They can force water into places ordinary rainfall wouldn't reach and leave the crew unable to distinguish one suspect area from another. Treat testing as contractor work, not a reason to climb onto the roof yourself.
When comparing a roof leak detection service, ask how the contractor will verify the diagnosis. After repair, the crew should repeat the same localized test where appropriate and arrange an attic and ceiling check after the next significant rainfall. Don't authorize cosmetic closure while the source remains unconfirmed.
The Usual Suspects on a Central Ohio Roof
Don't let an intact-looking shingle field end the inspection. On an asphalt-shingle home, the roofer needs to examine the places where roofing meets walls, pipes, skylights, and drainage channels.
I'd put those transitions high on the inspection list, but I wouldn't declare one the culprit without evidence. A separated flashing joint, split pipe collar, or debris-filled valley deserves attention even when no shingle has blown into the yard.
Common Rain Entry Points on a Residential Roof
| Entry Point | Typical Failure | Likely Fix |
|---|---|---|
| Step and counterflashing | Gaps, damaged metal, or failed integration at walls and chimneys | Repair a localized defect or replace the affected flashing assembly |
| Plumbing vent boot | Cracked collar or separation around the pipe | Replace the boot and integrate it with surrounding roofing |
| Skylight flashing | Failed joints or incorrect roof-to-skylight detailing | Repair the flashing system or replace the unit when warranted |
| Valley | Debris, damaged lining, or defective adjoining shingles | Clear debris and repair or re-flash the affected valley |
| Headwall | Poor transition where a roof meets an uphill wall | Rebuild the water-shedding flashing detail |
| Shingles | Lifted, displaced, cracked, or deteriorated material | Targeted replacement or broader replacement if deterioration is widespread |
| Gutters and downspouts | Blocked or inadequate drainage | Clear obstructions and correct damaged or unsuitable components |
| Roof vents | Wind-driven entry through vulnerable openings | Correct the vent detail without obstructing required ventilation |
Ask the roofer to photograph the defect and explain why the proposed fix matches it. Sealant can address an appropriate localized joint; it isn't a substitute for rebuilding incorrectly layered flashing. Likewise, a boot replacement shouldn't become an unexplained recommendation for an entire roof.
Match the defect to the storm
A leak tied to a particular wind direction warrants attention to exposed openings and transitions. A leak that appears during sustained heavy rainfall warrants a close look at drainage and concentrated flow paths. For maintenance planning, gutter advice from Hayes Painting, from Hayes Painting and Decorating, is a separate resource to consider alongside the roof inspection.
A NOAA-published precipitation analysis found that annual maximum single-day precipitation increased approximately 15% to 25% over the last century in the eastern United States. That regional finding isn't a forecast for your street. It's a sound reason for central Ohio homeowners to take drainage and weatherproofing seriously instead of looking only for missing shingles.
Drying the Ceiling Assembly Without Creating a Mold Problem
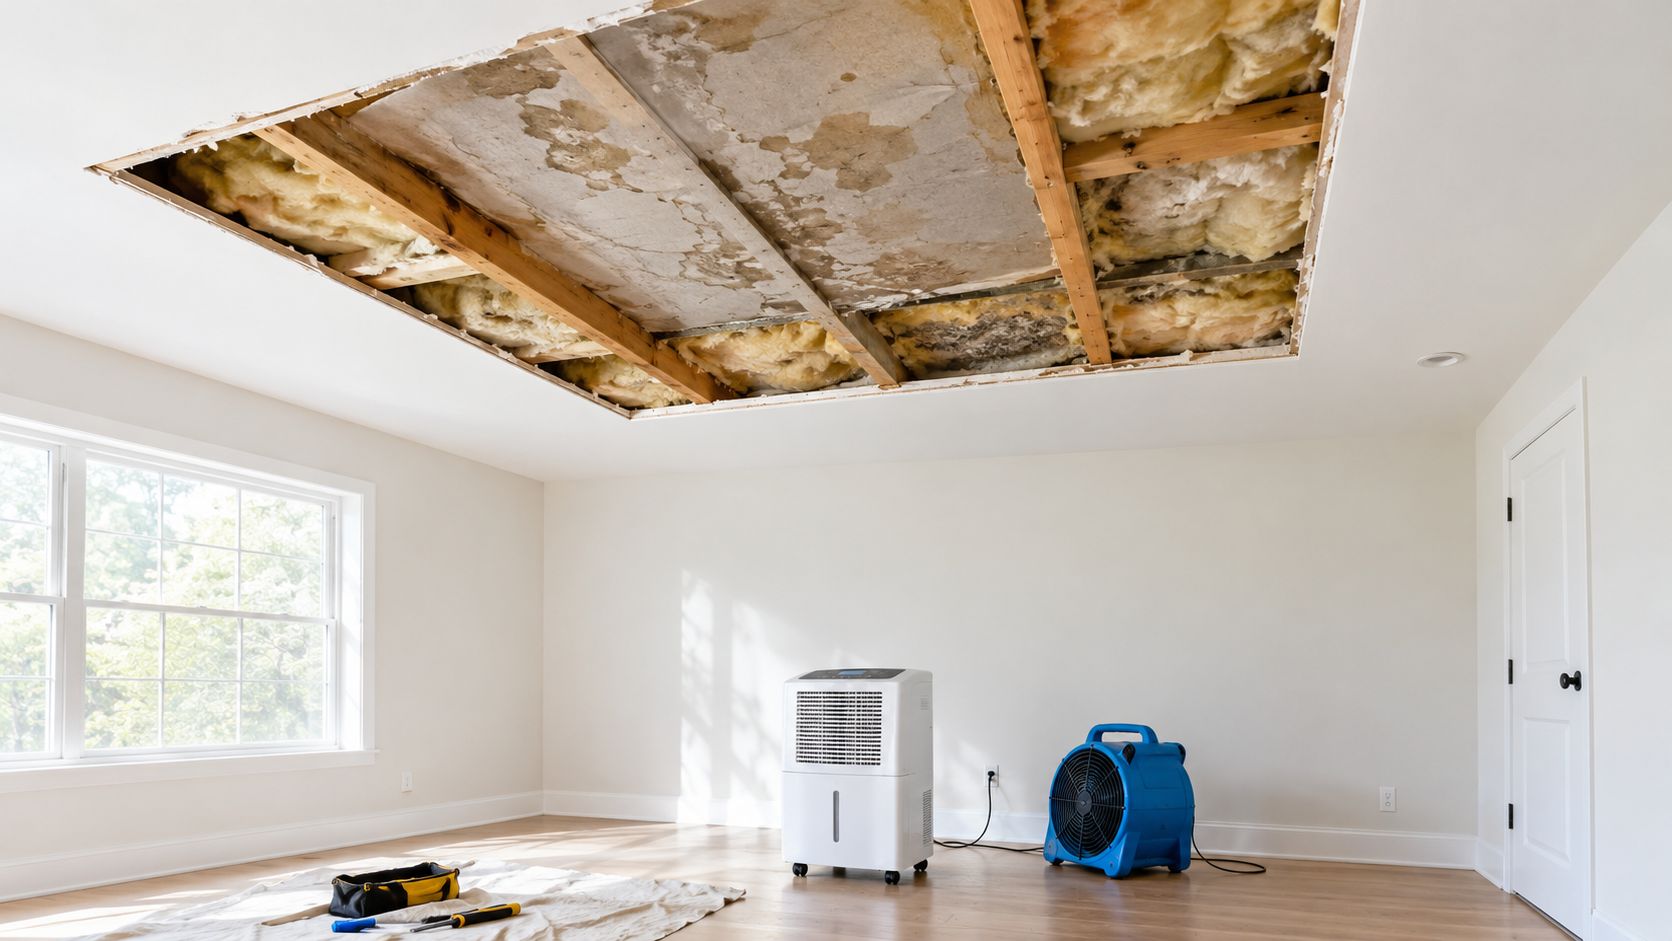
Stopping rain entry doesn't make the ceiling dry. Insulation, framing cavities, and drywall backing can remain wet after the painted surface looks normal. Don't approve paint as the final repair until someone has checked the assembly.
The drying target is 24–48 hours where possible, according to EPA moisture-control guidance. The same guidance recommends indoor relative humidity below 60%, ideally 30–50%. Use a hygrometer to track room humidity rather than guessing from how the air feels.
Compare wet materials with a dry baseline
Massachusetts guidance on moisture-measuring devices recommends comparing suspect materials with unaffected controls. Have the person taking readings use a meter suitable for the substrate, then measure comparable affected and unaffected locations.
Record the same points daily until the affected readings approach the control and remain stable. Don't accept a universal “dry” number without asking which material, meter scale, and baseline support it.
- Dry deliberately. Use dehumidification and air movement after electrical and ceiling-stability hazards have been addressed.
- Open assemblies when warranted. A closed cavity may prevent adequate access to wet insulation or backing paper. Don't aim a heater at it and assume that solves the problem.
- Replace unsuitable materials. Porous materials that can't be cleaned and dried adequately need removal, not stain-blocking primer.
Keep a drying record
NIH moisture-infiltration guidance says to treat infiltration of unknown duration as lasting more than 48 hours. It also calls for affected ceiling tiles to be discarded and warns that glued tiles may need professional analysis because some contain asbestos.
For the contractor and insurance file, retain dated photographs, affected-material notes, meter readings and locations, humidity readings, equipment records, and disposal documentation. Include the confirmed source and repair date so the drying record has a clear starting point.
A separate attic moisture-control assessment is appropriate when the investigation identifies condensation or ventilation concerns. Don't let anyone sleep beneath a wet, sagging ceiling while waiting for those decisions.
When to Stop DIY and Call a Central Ohio Roofer
DIY stops where safe observation ends. Buckets, photographs, and moving dry belongings are reasonable homeowner tasks. Roof access, unstable drywall, and concealed electrical hazards aren't.
An active drip deserves a prompt call even if you've contained it. Repeated staining after storms deserves a diagnosis, not another application of roof cement.
Match the response to the risk
- Active dripping or ceiling sag. Request urgent assessment and keep the affected area unoccupied.
- New leakage after hail or wind. Ask for a documented storm-damage inspection rather than assuming the visible stain represents all the damage.
- A roof around 15 to 20 years old. Request a condition-based repair-versus-replacement assessment. Treat age as a reason to inspect, not an automatic replacement verdict.
- Chimney involvement. Ask whether roofing, masonry, or both need evaluation.
- Smoke, sparks, burning smells, or fire. Leave the hazardous area and contact emergency services. A roofing appointment comes later.
A contractor should explain whether safe attic access is available, inspect exterior conditions, and provide photographs that connect the proposed work to the findings. Ask for a written scope, including temporary protection, permanent repairs, material replacement, exclusions, and verification.
Choose evidence over sales pressure
A door knock after a storm isn't proof of wrongdoing, but it isn't a qualification either. Verify the business address, insurance, applicable licensing, references, and written terms before authorizing work. Walk away from cash-only pressure or a demand to sign before you receive a clear scope.
A useful estimate explains what failed, what will change, and how the contractor will check the result.
Manufacturer credentials can be part of your comparison, but they don't replace a careful diagnosis. Ask who will perform the work, who supervises it, and who responds if the ceiling gets wet again.
For a central Ohio repair, I'd request a free inspection and free written estimate before authorizing permanent work. Confirm those terms when scheduling rather than assuming every contractor offers them, and ask separately about charges for emergency protection or specialized testing. Clear terms are more valuable than a reassuring verbal promise.
Insurance, Documentation, and What Comes Next
Separate the payment decision from the repair decision. You still need to prevent further damage while determining whether to pay out of pocket or pursue a claim.
Read your policy's wind or hail deductible, coverage terms, and reporting requirements. If the applicable deductible exceeds the covered repair cost, a claim may provide no payment, but don't guess at either amount. Get a written scope and ask your insurer or agent how your policy applies; a contractor can document conditions, not guarantee coverage.
Build a usable file
- Preserve evidence. Keep timestamped photographs of the stain, accessible wet insulation, damaged contents, and exterior conditions photographed safely.
- Collect contractor findings. Request the identified source, supporting photographs, recommended work, and any limits on the inspection.
- Keep receipts. Save records for temporary protection, drying, and repairs, along with relevant correspondence.
A homeowner insurance-claims overview can help organize questions before speaking with the carrier. Rental owners managing follow-up work can also consult the commercial maintenance planning guide from Painters North Shore as a planning resource, not an authority on Ohio insurance coverage.
Schedule the inspection, obtain the written scope, compare the payment options, and authorize appropriate temporary protection. Then set the permanent repair date and a follow-up attic check after significant rain. Close the file only when the entry point is repaired and the affected materials are ready for restoration.
HIBCO ROOF LLC offers roof leak inspections, targeted repairs, storm-damage documentation, and free written estimates for Columbus and central Ohio homeowners. Visit HIBCO ROOF LLC to schedule an inspection and get a clear repair plan for the source of your ceiling leak, not just the stain.