You wake up after a Central Ohio hailstorm to the sound of water ticking into a bucket. The shingles look intact from the driveway, but a ceiling stain has appeared over the hallway, the gutters are peppered with dents, and your phone is filling with messages from roofers offering a “free inspection.” You're left asking the practical question: how do insurance claims work when the damage isn't obvious yet?
A roof claim turns a storm event into a documented coverage decision. You report the loss, preserve evidence, let the insurer investigate, compare the written scope with the work your home needs, and track payment through completion. The policy controls the result, but your documentation and timing determine how clearly that result can be evaluated.
Table of Contents
- Filing an Insurance Claim After Roof or Storm Damage
- How Do Insurance Claims Work From First Call to Final Payment
- Meeting the Adjuster and Protecting Your Estimate
- Choosing the Right Contractor for an Insurance Claim
- Common Reasons Claims Get Denied or Underpaid
- How Long Roof Claims Take and How to Speed Them Up
- Putting Your Claim Back Together After the Storm
Filing an Insurance Claim After Roof or Storm Damage
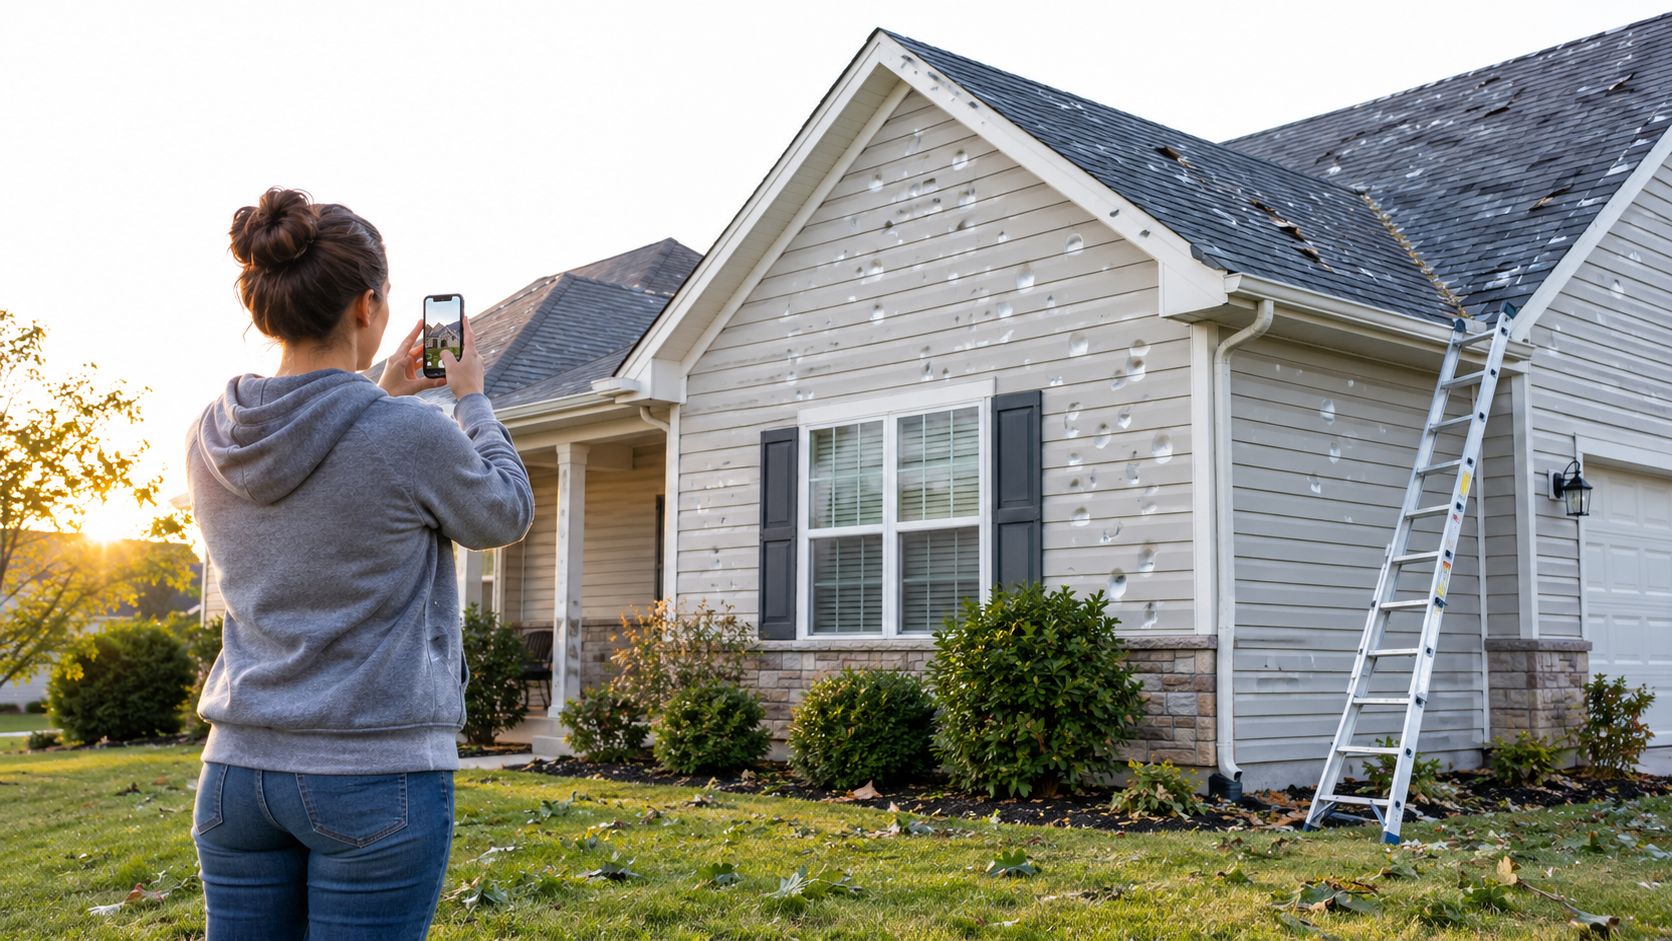
The first morning after a hailstorm is not the time to climb onto a wet roof. Walk the property from the ground, check for downed wires and unstable trees, and look for active leaks in the attic and upper floors. If water is entering, place containers under the drip and move belongings away from it. A temporary tarp or emergency repair can prevent additional damage, but keep receipts and photograph the condition before and after the work.
Build evidence before the surface changes
Start a dated damage diary. Record the storm date, approximate time, wind or hail you observed, rooms affected, visible exterior damage, emergency calls, temporary repairs, and every conversation with the insurer or contractor. Take wide photos that establish location, then closer images of shingles, metal vents, gutters, siding, window screens, fascia, and interior staining. In the attic, photograph wet insulation, darkened decking, rafters, and the path of water, but don't step on damaged ceiling materials or unsafe framing.
The Insurance Information Institute reports that about one in 18 insured homes has a claim in a typical year, and 97.3% of homeowners insurance claims in 2023 involved property damage, including theft. Wind made up 32.6% of claims and hail 15.5% in 2023, according to the same homeowners and renters insurance claim data. In Central Ohio, that makes roof, siding, and exterior documentation a normal part of homeownership risk, not an unusual event.
Read the policy before the phone call
Pull out the declarations page and locate the dwelling coverage limit, other structures coverage, roof or wind and hail deductible, and endorsements affecting roof settlement. Look for exclusions or limitations involving wind, hail, wear and tear, maintenance, cosmetic damage, and matching materials. The declarations page tells you the financial framework, but the policy wording determines what the carrier can accept, exclude, depreciate, or pay after repairs.
Call the insurer promptly and provide the facts without guessing at the cause or repair cost. The First Notice of Loss, often called the FNOL, creates the claim file and gives you a claim number. A desk adjuster may review documents remotely and manage communication, while a field adjuster visits the property to inspect the damage. Save the claim number, assigned adjuster's name, email address, and every requested document in one folder.
Practical rule: Mitigate active damage, but don't begin permanent repairs or discard damaged materials before the insurer has a reasonable opportunity to inspect them.
How Do Insurance Claims Work From First Call to Final Payment
A roof claim usually follows a recognizable sequence, although the exact paperwork and deadlines depend on the policy and jurisdiction. The carrier isn't paying because you made a phone call. It pays, or denies payment, after connecting the reported event, policy coverage, observed damage, and documented repair cost.
The seven checkpoints
First notice of loss. You report the storm, date the loss, describe visible damage, and receive a claim number. Ask what photos, receipts, statements, and inspections the carrier needs.
Claim assignment. The insurer assigns a desk or field adjuster and confirms the inspection process. Keep the FNOL confirmation and policy correspondence together.
Adjuster inspection. The adjuster records damage, measurements, affected components, and potential causes. Your contractor can attend if the carrier permits it, but the adjuster remains responsible for the insurer's evaluation.
Written estimate. The carrier issues an itemized estimate, often distinguishing Actual Cash Value, or ACV, from Replacement Cost Value, or RCV. ACV reflects depreciation, while RCV pays the cost to repair or replace without depreciation under the policy terms. The NAIC post-disaster claims guide explains that a deductible is subtracted from the settlement, not from the policy limit.
Scope review and supplement. Compare the carrier's estimate with the contractor's build-up. If tear-off reveals concealed decking damage, additional layers, code requirements, or missing components, submit a supplement supported by photos, measurements, and an itemized estimate. Do not assume an unlisted item is covered solely because it appears during construction.
Repair and depreciation release. Under an RCV policy, the initial payment may be the ACV amount, with recoverable depreciation released after qualifying work is completed and documented. Some depreciation may be non-recoverable under the policy. Read the settlement letter before signing a contract.
Final payment and closure. The final payment may go directly to you, jointly to you and the mortgage company, or through a mortgage servicer's disbursement process. A certificate of completion, final invoice, paid receipts, lien waiver, photos, and mortgage check endorsement may all be requested.
The mortgage company may hold claim funds in an escrow process and release them in stages. That can protect the lender's interest, but it also creates another administrative queue. Confirm endorsement rules before the check arrives, rather than discovering afterward that a signature, inspection, or completion document is missing.
For homeowners comparing coverage outside Ohio, a separate resource on how to compare California home insurance quotes can help explain why policy structure matters before a loss. For roof-specific policy language, review actual cash value versus replacement cost for a roof before treating the first payment as the full repair budget.
Meeting the Adjuster and Protecting Your Estimate
The field adjuster isn't just looking for a damaged-looking roof. They're evaluating whether the observed conditions are consistent with a covered event, whether the damage affects performance, and whether deterioration or poor maintenance better explains what they see. On shingles, that may include hail impact marks, exposed mat, granule loss, and wind creases. On metal, the inspection may include dents on vents, flashing, valleys, gutters, and downspouts. Soft metals and collateral damage can support the storm narrative, but every item still needs clear documentation.
Wear and tear, blistering, thermal cracking, installation defects, and long-term neglect can be treated differently from sudden storm damage. A contractor should describe observable conditions and explain the repair implications, not coach you to make a coverage conclusion.
What the estimate leaves out
Carrier estimates commonly use estimating software such as Xactimate. Line items can include roof squares, tear-off, disposal, underlayment, starter strip, ridge cap, flashing, ventilation, labor, equipment, tax, and depreciation. Measurements and waste factors matter because a roof isn't priced as a flat rectangle. Valleys, hips, ridges, cut-up sections, access, and material handling affect the build-up.
| Line Item | Typical Carrier Estimate | Actual Build-Up |
|---|---|---|
| Roof covering | Shingles and basic installation | Correct product, layout, starter, ridge cap, and installation method |
| Tear-off | Removal of listed roofing layer | Actual layer count, handwork, protection, and disposal |
| Metal components | Visible flashing or vents | Required replacement of damaged or incompatible components |
| Labor | Standard installation code | Labor for access, detail work, steep areas, and system integration |
| Waste and disposal | Standard allowance | Measured material waste and documented haul-off requirements |
You have three useful opportunities to correct the file. Raise discrepancies during the walkthrough, review the estimate immediately after inspection, and send a formal written rebuttal when the scope remains incomplete. Include labeled photos, a roof diagram, measurements, manufacturer instructions, building-code requirements, and a line-by-line comparison.
A roofer can identify damage, measure the roof, explain construction, and provide a repair estimate. They can't promise coverage, alter policy language, or guarantee that the carrier will approve a supplement. This guide to working with a roof damage insurance adjuster is useful when you want a more detailed inspection checklist.
Choosing the Right Contractor for an Insurance Claim
A general roofer can install a roof. An insurance-focused contractor must also translate field conditions into a defensible scope of work. That distinction matters after a hailstorm because the insurer's estimate and the construction reality often begin as two different documents.
Look for a contractor who can attend the inspection, identify damage without overstating it, prepare an itemized estimate, and support supplements with photographs and measurements. Manufacturer certifications matter because they show familiarity with specified installation systems. References from completed claim projects matter more than a polished website, particularly when you want to know whether the contractor communicated clearly, handled change orders, and finished the paperwork needed for recoverable depreciation.
Screen out pressure before it starts
Be cautious if a contractor:
- Demands the insurance check upfront: You should understand what the payment covers, what remains payable, and how the deductible is handled before transferring funds.
- Pushes a same-day signature: Storm damage deserves a documented inspection and a written scope, not a rushed commitment.
- Refuses to meet the adjuster: The absence of the person who measured and priced the roof can leave important details unaddressed.
- Promises approval: No contractor can guarantee coverage or override exclusions in your policy.
- Offers an unexplained price difference: A low bid may omit ventilation, disposal, flashing, starter, code work, or necessary preparation.
Before signing, demand the proposed materials, installation scope, payment schedule, workmanship warranty, manufacturer warranty requirements, change-order process, cleanup responsibilities, permit responsibilities, and cancellation terms in writing. Ask how the contractor handles hidden damage discovered after tear-off and whether work pauses until a supplement is documented.
A written agreement should also state who owns responsibility for scheduling, inspections, mortgage disbursement paperwork, and final completion documents. Use this roofing contractor selection checklist to organize those questions before authorizing work.
Common Reasons Claims Get Denied or Underpaid
Most claim denials aren't mysterious. They usually connect to a policy exclusion, a documentation gap, a delay, or a condition the insurer characterizes as maintenance rather than storm damage. Guidance on common home insurance claim denials identifies excluded perils, neglect, late notice, missing paperwork, nonpayment, and misrepresentation among recurring failure points.
Five preventable breakdowns
Late reporting gives the carrier less opportunity to inspect conditions before weather, repairs, or time changes the evidence. Report the loss promptly, then record the date, claim number, and communication trail.
Pre-existing wear gets confused with storm damage when an aging roof already has brittle shingles, moss, prior patches, or long-term leaks. Photograph the entire roof and separate sudden impact or wind damage from maintenance concerns. Don't claim every defect as storm-related.
Missed collateral damage weakens the file when the inspection focuses only on shingles. Check soft metals, vents, gutters, siding, window screens, fences, and interior spaces, then label each image with its location and date.
Improper temporary repairs can create secondary water damage or destroy evidence. Use a qualified mitigation provider or roofer when possible, keep receipts, and photograph the original condition before covering anything.
Incomplete interior inventory leaves the adjuster with an incomplete picture of the loss. List each stained ceiling, wet wall, damaged insulation area, affected finish, and item that required relocation or protection.
Underpayment can happen even when coverage is accepted. An estimate may depreciate items too aggressively, omit starter strip or waste disposal, miss code-required work, or use an incomplete measurement. Compare the carrier's estimate with the actual construction plan before accepting it as final.
Before you sign or deposit a check: Confirm whether it represents ACV, RCV, a partial payment, or a final settlement, and ask what documentation is needed for any remaining amount.
How Long Roof Claims Take and How to Speed Them Up
A claim can move quickly when the file is complete, the damage is accessible, and the scope doesn't require extended review. It can also become a multi-week or multi-month process when evidence is missing, estimates conflict, or mortgage disbursement adds another approval layer.
The available benchmarks show why homeowners should plan for more than a quick check. The 2026 U.S. Property Claims Satisfaction Study reported an average of 40.7 days from first notice of loss to final payment and 29.6 days to complete repairs. A Canadian thematic review reported an average of 127 days to settle a home insurance claim in 2019, while Ontario data recorded average settlement times of 127 days in 2019 and 123 days in 2022, with durations ranging from 47 to 180 days. These figures come from the J.D. Power property claims study and FSRAO's home insurance review, and they describe different markets, so they shouldn't be treated as a guaranteed Central Ohio schedule.
Keep each checkpoint moving
- First call: Report promptly and send the initial photo set, damage diary, and receipts. Ask what the carrier still needs.
- Inspection: Confirm the appointment in writing, provide safe access, and have the roof history and contractor documentation ready.
- Estimate review: Request the written estimate, read every line, and respond to omissions with labeled evidence rather than a general objection.
- Payment: Ask whether the check is ACV or RCV, whether depreciation is recoverable, and what the mortgage servicer requires before release.
- Repair closeout: Submit the final invoice, completion certificate, paid receipts, photos, and any requested lien or endorsement documents.
Unread email, unsigned checks, missing invoices, and unclear mortgage procedures create avoidable holds. For a broader discussion of insurance holds and payment compliance, focus on the documentation and approval controls that can delay funds even after the scope is accepted.
Putting Your Claim Back Together After the Storm
Once the scope is approved, the homeowner becomes the project manager. Confirm the shingle product, color, ventilation components, flashing approach, gutters, siding, and other exterior work before materials arrive. If tear-off may reveal concealed decking or other hidden conditions, agree in advance on how the contractor will photograph, price, and submit that work for review.
Don't let construction outrun the paperwork. Confirm supplement approval before permanent work proceeds when the carrier requires approval, coordinate the build with any insurer inspection, and ask the mortgage company how escrow funds will be released. A contractor may be ready to schedule, but the payment process can still depend on endorsements, inspections, and completed documentation.
Finish with a written closeout
At the final walkthrough, check that the roof system is complete, ventilation corrections are visible, code-related work is documented, flashing is properly integrated, and debris has been removed. Photograph completed elevations, roof penetrations, gutters, attic areas affected by leaks, and any repaired interior surfaces.
The most important decision happens before you sign the contractor agreement. Make sure you understand the carrier's scope of loss and the ACV or RCV payment structure in writing, including the deductible, depreciation, recoverable amounts, exclusions, and process for supplements. That clarity prevents the repair budget from shifting after work begins.
For flood damage, the process has additional requirements. FEMA materials state that the policyholder should notify the insurer or adjuster promptly, provide supporting documents and a contractor's detailed estimate, and file a signed, sworn Proof of Loss within 60 days after the loss unless FEMA waives that deadline, as described in the NFIP claims manual. The Philadelphia Federal Reserve similarly describes notice, adjuster contact, and documented proof of loss as steps before flood payment, not substitutes for one another, in its flood insurance payment timing explanation.
HIBCO ROOF LLC offers Central Ohio homeowners storm-damage inspections, photo documentation, roof repairs, and full replacements, along with assistance communicating with the insurer during a claim. Visit HIBCO ROOF LLC to request a free written estimate and discuss the next practical step for your roof.