A Columbus homeowner often notices the problem in a familiar order. Snow settles across the roof, icicles appear along the eaves, and a sunny afternoon brings a brown ceiling stain near an exterior wall. By the time water shows indoors, the ice dam may have been forming through several melt-and-freeze cycles.
The important question isn't just how to remove the ice. It's what causes ice dams in the first place, and why do some roofs develop them while nearby homes stay clear? The answer usually starts in the attic, where escaping heat warms part of the roof deck while the eaves remain cold. Fixing that temperature imbalance before winter is more reliable than replacing gutters after the damage begins.
Table of Contents
- Why Columbus Homeowners Discover Leaks After a Thaw
- How Ice Dams Form on a Cold Roof
- The Four Heat Loss Drivers That Warm Your Roof Deck
- Why Ohio Winters and Columbus Roof Designs Raise the Risk
- Prevention That Actually Works From Attic to Eave
- Safe Removal and What Never to Do to Your Roof
- Your Next Steps to a Cold Roof and Dry Ceilings
Why Columbus Homeowners Discover Leaks After a Thaw
A roof leak after a thaw can feel sudden, but the conditions usually develop gradually. Snow melts over the warmer upper roof, runs toward the colder edge, and freezes there. Each cycle adds more ice to the ridge, while later meltwater collects behind it instead of draining freely.
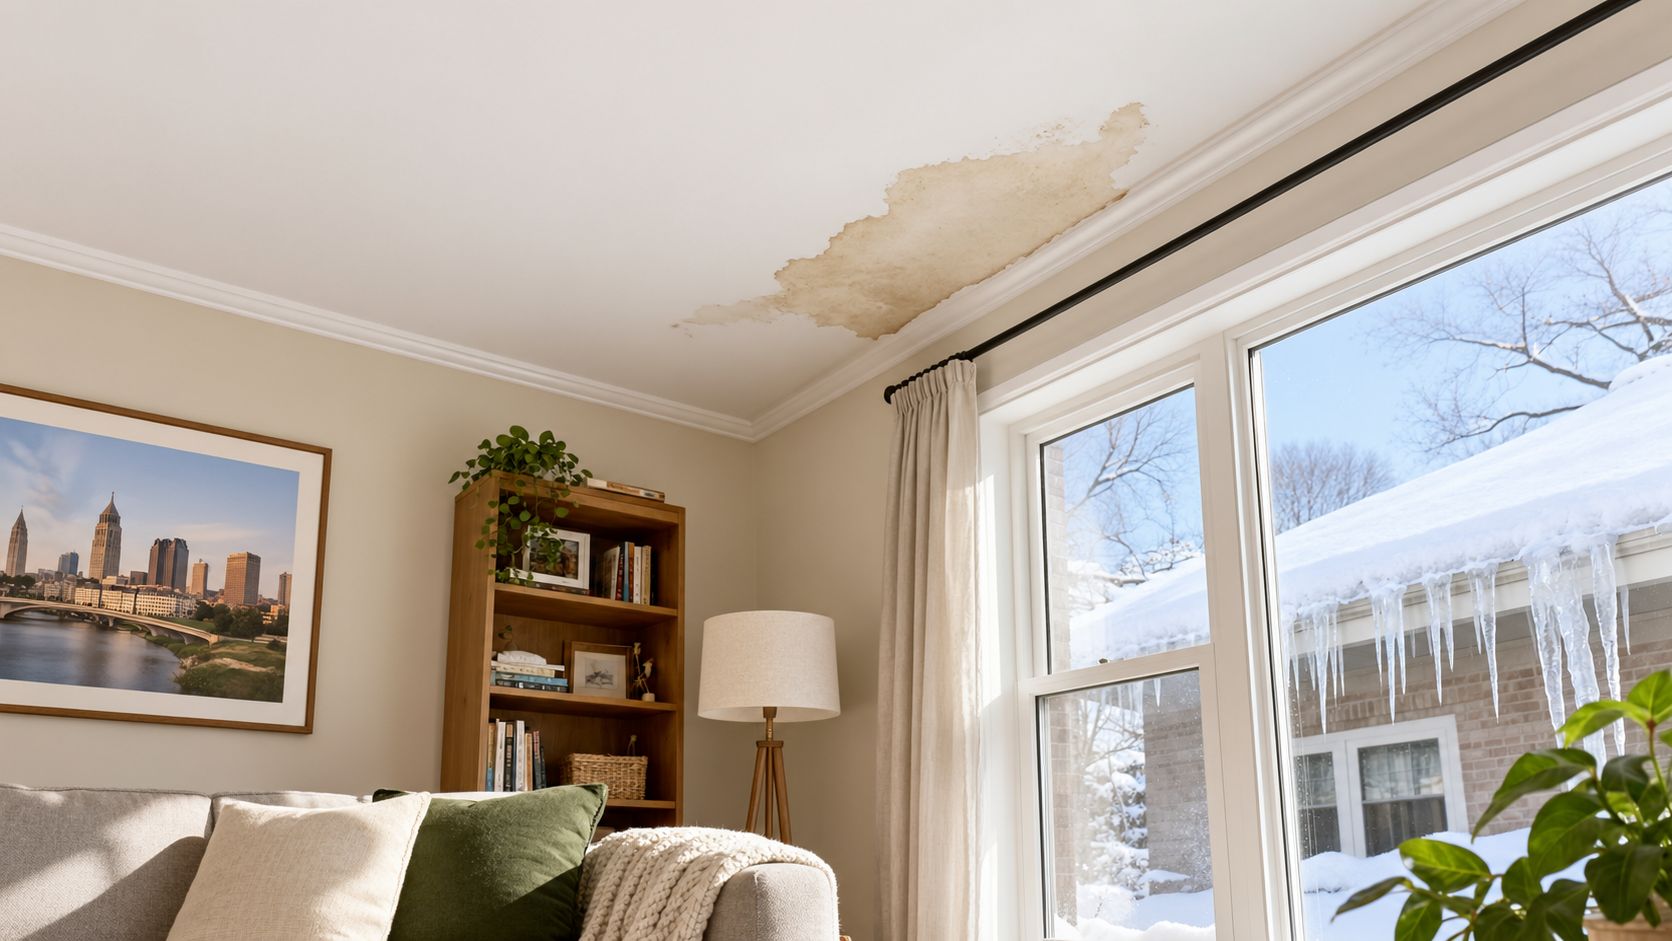
The first indoor sign may be a ceiling stain, damp drywall, peeling paint, or water tracking down a wall. The leak might appear in a room that isn't directly below the visible ice, because water can travel through roof sheathing, insulation, framing, and wall cavities before entering the living space.
Why the sunny day exposes the problem
A clear afternoon can increase melting on the upper roof, even when the eaves stay below freezing. The roof edge extends beyond the heated part of the house, so it doesn't receive the same warmth that reaches the roof deck above the attic. That contrast turns ordinary meltwater into a drainage problem.
The National Weather Service explains that after several days of melting and freezing, water can work beneath shingles and damage ceilings, walls, and contents. Homeowner guidance citing insurance data reports that from January 2024 through June 2025, more than 20,000 homeowners filed claims for frozen pipes and winter water damage, with paid losses totaling more than $628 million and the average claim exceeding $30,000 (National Weather Service ice-jam guidance).
Those figures aren't a prediction of what your home will lose, but they show why a ceiling stain deserves prompt attention. An ice dam is not just an icicle problem. It can signal a roof assembly that is receiving too much heat from below.
Practical rule: If ice repeatedly forms in the same roof area, investigate the attic temperature and air leakage before assuming the gutter is the root cause.
A Columbus roof can often be improved without dramatic changes. Air sealing, insulation, ventilation, and careful inspection can reduce the uneven heating that starts the chain. The sooner you identify that chain, the more choices you have before the next thaw sends water toward the ceiling.
How Ice Dams Form on a Cold Roof
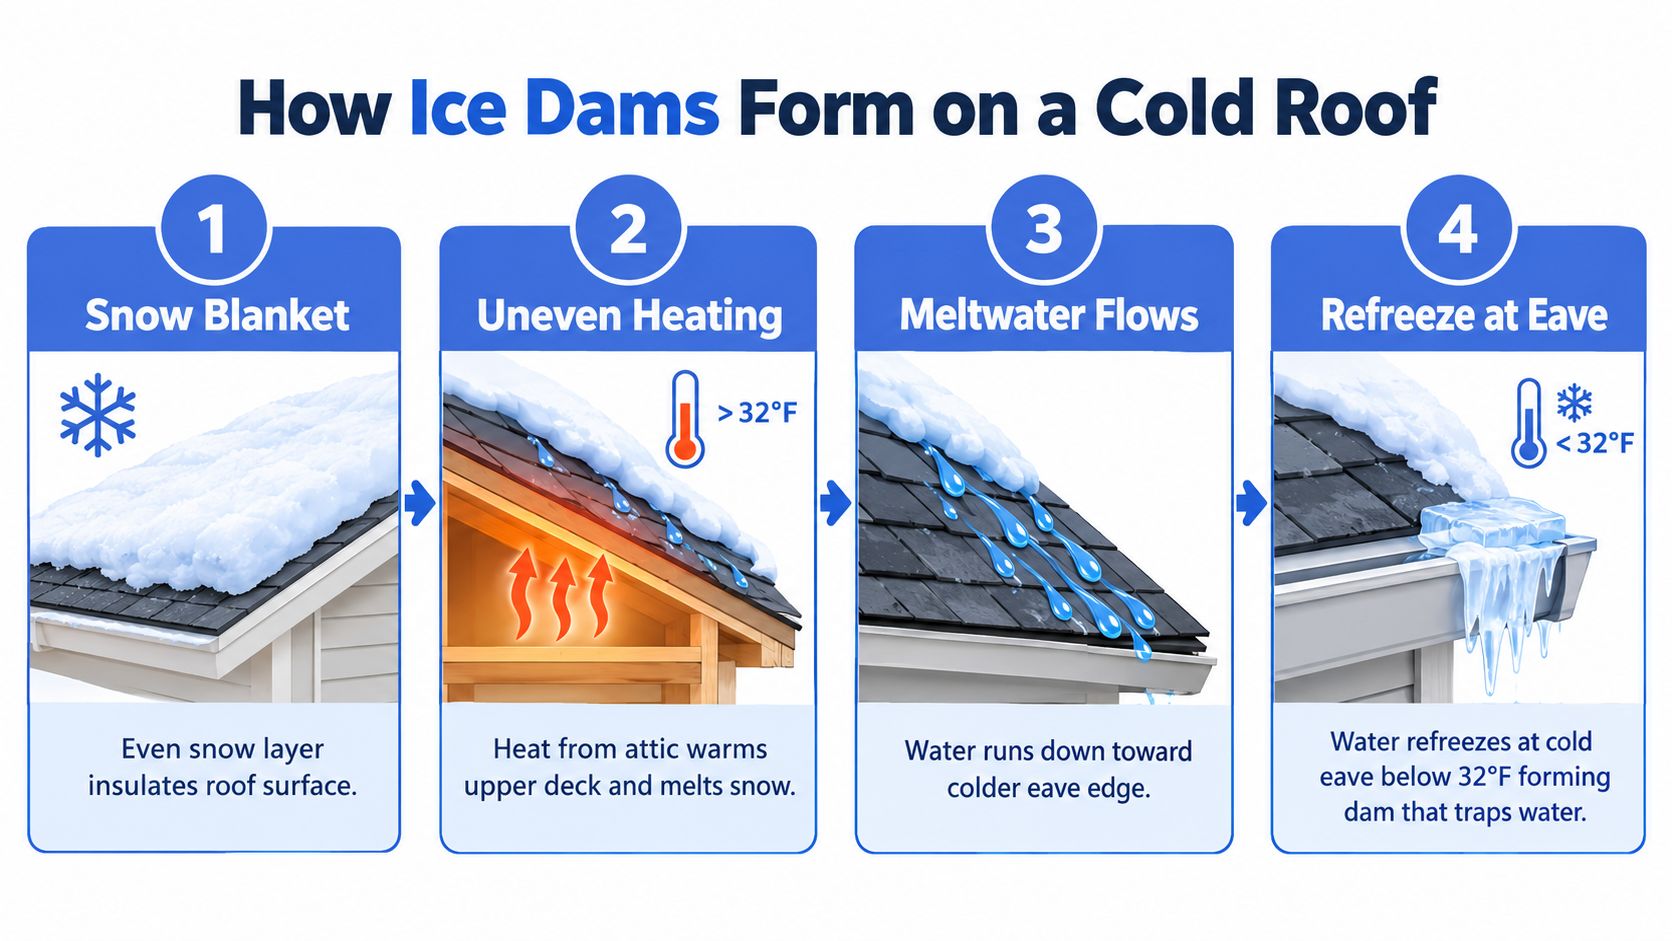
Ice dams need a very specific temperature pattern. Snow must cover the roof, part of the upper roof surface must be warm enough to melt snow, and the eave must remain cold enough to refreeze the water.
The three conditions are simple: snow on the roof, heat that melts the snow, and cold at the eave that refreezes the meltwater.
Think of the roof as a warm blanket that ends over a cold porch. The area under the blanket receives heat from the house, while the porch sits outside the heated envelope. Snow on the blanket begins to melt first. When that water reaches the cold porch, it freezes into a ridge.
The process in four steps
Snow covers the roof. A snow layer can act as insulation over the roof surface, allowing differences below it to persist.
Heat warms the upper deck. Warm air from the attic, heat conducting through weak insulation, or a localized heat source can raise part of the roof surface above 32°F, or 0°C. Snow over that warmer area melts.
Meltwater moves downslope. Gravity carries the water toward the eave. The water may remain liquid while it travels over the warmer section of roof.
The eave refreezes the water. The overhang stays below freezing because it sits outside the heated envelope. The water freezes at the edge, creating an ice ridge that blocks normal drainage.
The ridge changes what happens to the next batch of meltwater. Instead of flowing off the roof, water collects behind the ice. That backed-up water can move sideways and upward, eventually reaching gaps beneath shingles or vulnerable flashing.
Building Science Digest identifies the fundamental cause as a roof-surface temperature split. It connects that split to insufficient insulation, thermal bridging, air leakage into the roof space, heat sources such as poorly insulated ducts or hot-water piping, and solar heating acting on uneven snow cover (Building Science Digest 135 on ice dams).
Why outdoor temperature alone doesn't explain the dam
A homeowner may think a roof is safe if the outdoor air remains below freezing. But the roof surface doesn't have one uniform temperature. Attic heat, framing, ducts, sun exposure, shade, and roof geometry can create warm and cold zones across the same roof.
That's why an ice dam is better understood as a temperature imbalance than as a simple snowfall event. Cold weather supplies the frozen eave, but heat escaping from the home often supplies the meltwater.
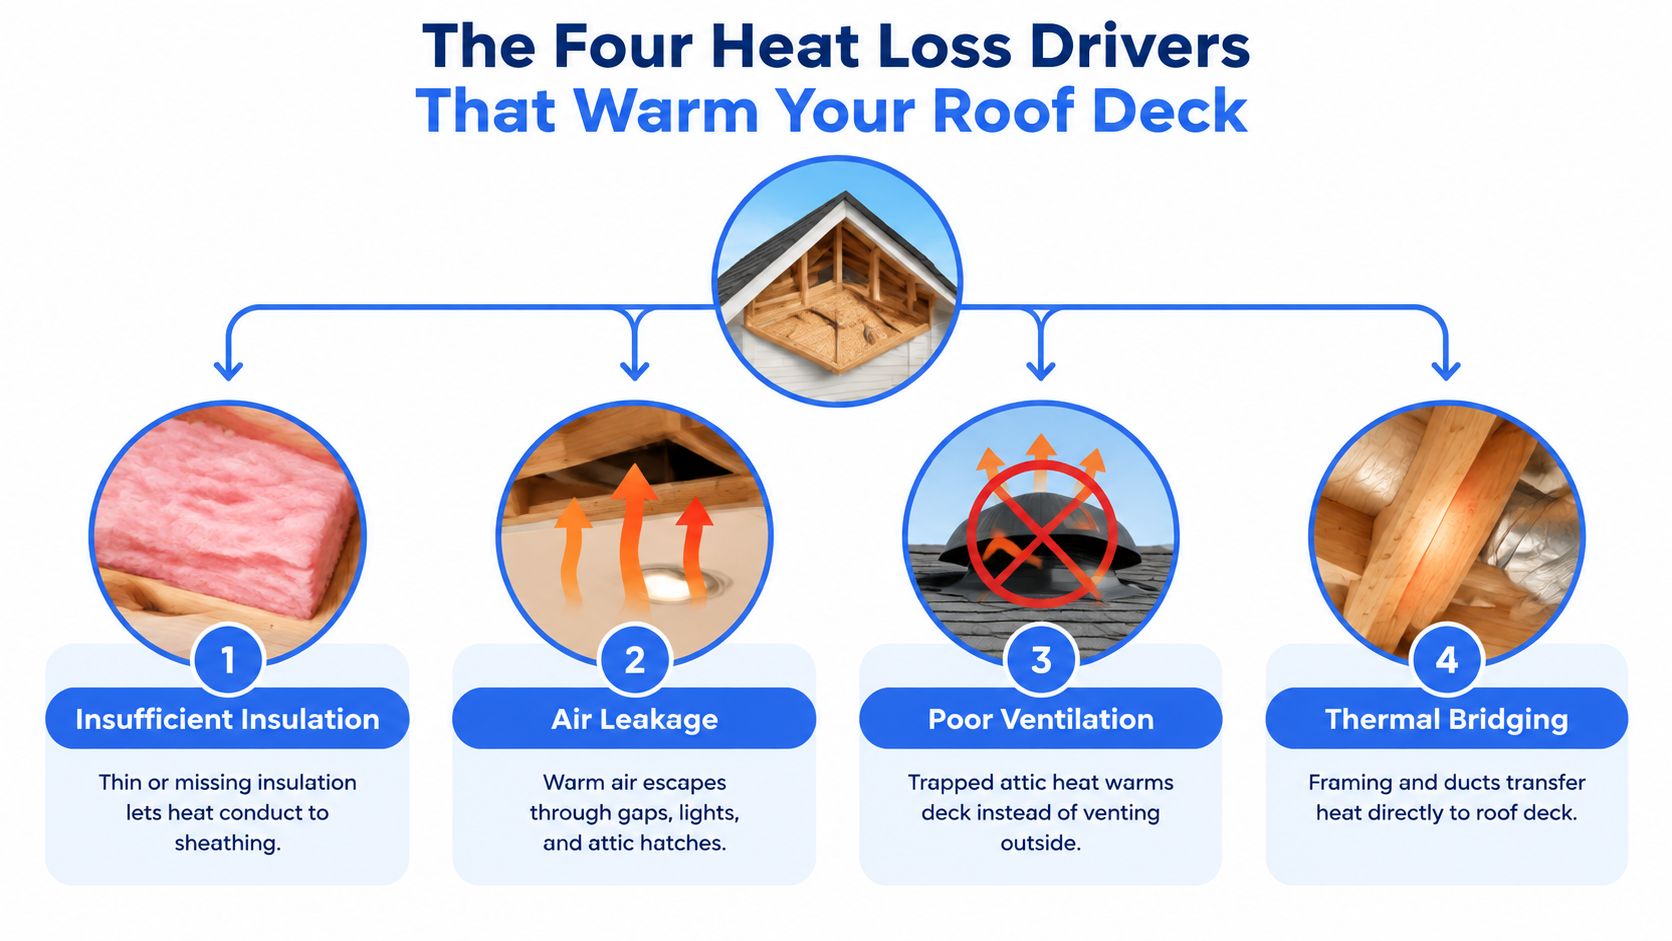
The Four Heat Loss Drivers That Warm Your Roof Deck
The roof deck, also called the roof sheathing, sits directly below the shingles. When heat reaches it unevenly, snow can melt in isolated areas while other sections remain frozen. During attic inspections, the pattern often points toward the source rather than appearing random.
Insufficient insulation and thermal bridging
Thin, missing, compressed, or uneven insulation allows indoor heat to move toward the roof deck. The problem often appears near the attic perimeter, where the ceiling meets the exterior wall and the roof framing becomes harder to insulate continuously.
Thermal bridging creates a more direct path. Wood framing, metal components, ducts, and other materials can transfer heat through areas where the surrounding insulation performs better. That can produce narrow warm bands on the roof, which may explain why dams form over one room or one section of eave.
Air leakage through ceiling bypasses
Air leakage carries heat into the attic through openings that homeowners rarely see from the living space. Common pathways include attic access hatches, recessed lights, bathroom exhaust fans, chimneys, skylights, plumbing stacks, and gaps around electrical or mechanical penetrations.
Adding insulation over an open bypass doesn't close the pathway. Warm air can still move through the gap and heat the roof assembly. A proper inspection looks for both the insulation layer and the air barrier beneath it.
Homeowners comparing insulation approaches may find this guide by Covenant Aire Solutions useful when old or damaged blown insulation needs to be evaluated before air sealing and new insulation work. The right sequence matters because sealing hidden openings is difficult when loose material obscures the ceiling plane.
Localized attic heat
A poorly insulated duct, hot-water pipe, recessed fixture, or bath fan housing can warm a small roof area. The resulting snow pattern may look like a strip, patch, or bare line surrounded by snow. That visual clue can help an inspector connect the exterior melting to a specific attic component.
Ventilation also matters. Blocked soffit openings or poorly functioning exhaust paths allow attic heat to linger near the roof deck instead of moving out. For a closer look at moisture and airflow issues that can accompany attic heat, review this attic moisture control guide.
Solar radiation can amplify the imbalance. Sunlight may warm one roof slope or a thinner section of snow while shaded areas remain frozen, giving meltwater a cold route to the eave. The sun can contribute, but it doesn't remove the need to investigate heat loss and ventilation.
Why Ohio Winters and Columbus Roof Designs Raise the Risk
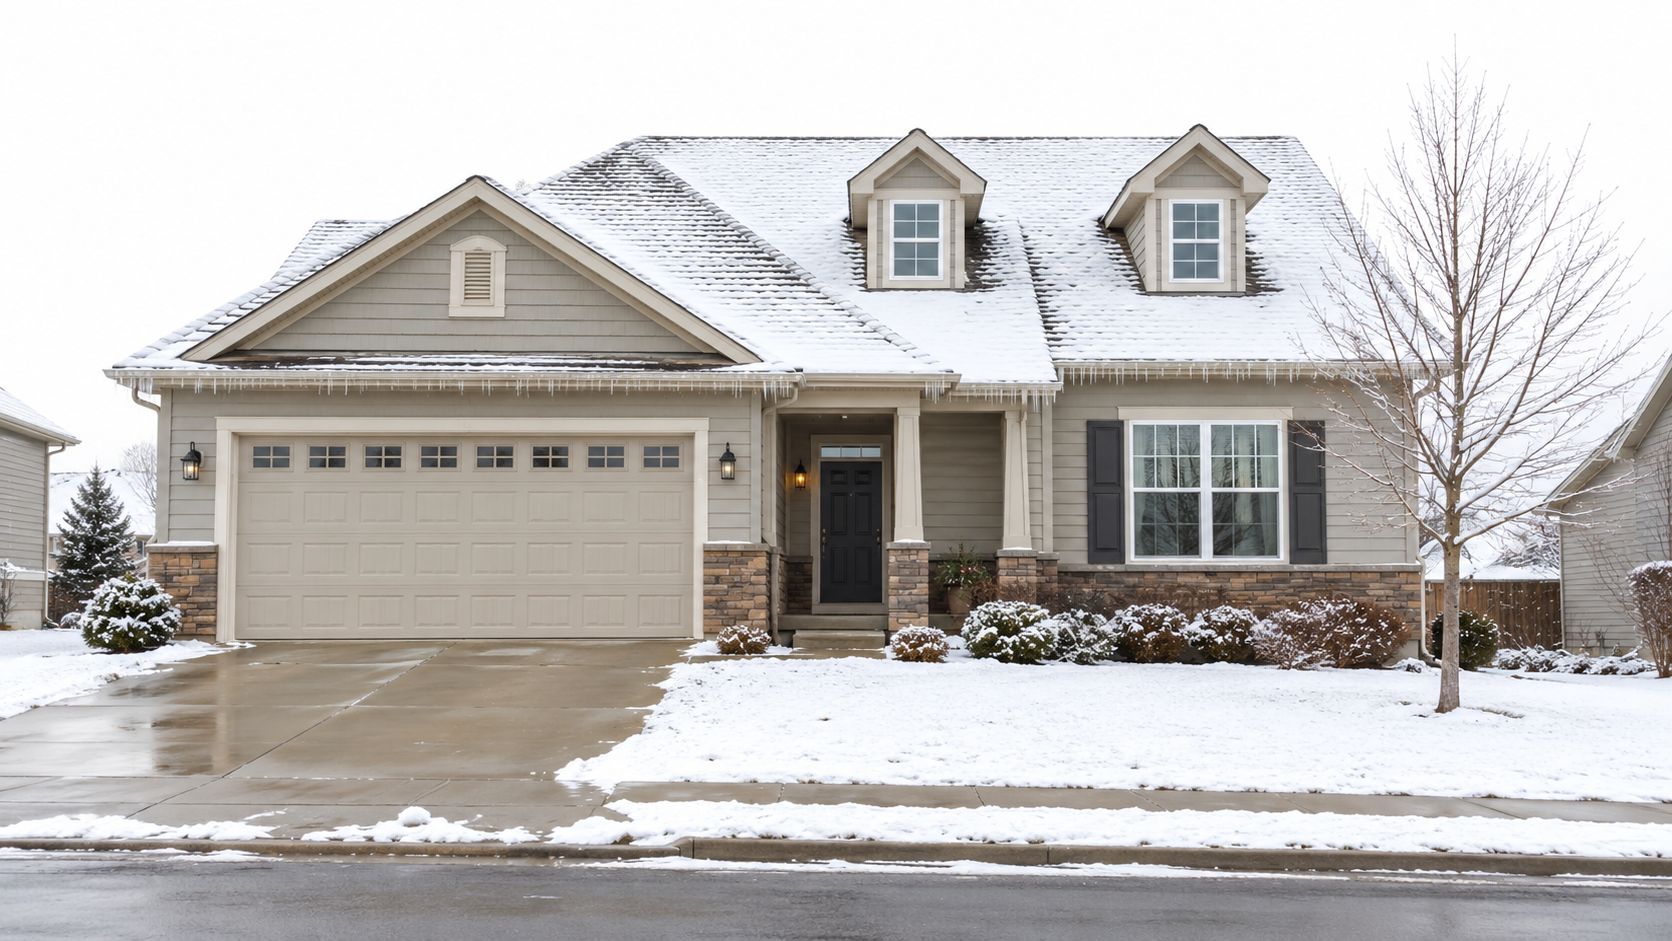
Columbus doesn't need a major blizzard to create ice-dam conditions. A roof only needs snow, enough heat to melt part of it, and a cold edge where the water can freeze. Guidance from the University of Massachusetts notes that dams can form with as little as 1 to 2 inches of snow when sufficient heat leaks into the roof assembly (University of Massachusetts guidance on preventing ice dams).
That makes repeated thaw-refreeze cycles more important than average snowfall alone. A modest snowfall followed by sunlight, a brief thaw, and another freeze can repeatedly feed the same cold eave. The roof may develop a substantial ridge even when the total snow depth never seems dramatic.
Roof features that create uneven temperatures
Certain Columbus roof designs deserve a closer look because they create different exposure, airflow, and drainage conditions across one assembly.
- North-facing eaves can remain shaded and cold while another roof slope receives sun.
- Low-slope sections move meltwater more slowly, giving it more opportunity to encounter frozen areas.
- Valleys collect water and snow from adjoining slopes.
- Dormers create roof intersections where insulation and air sealing can be difficult.
- Skylights and their surrounding framing can produce localized heat patterns.
- Long overhangs stay outside the heated envelope and can provide a broad refreezing surface.
- Blocked soffit vents restrict the airflow needed to keep the roof deck closer to outdoor temperature.
These features don't automatically create an ice dam. They become risky when they combine with heat leakage, uneven insulation, or restricted ventilation.
Why gutters receive the blame
The gutter is where homeowners usually see the ice, so it becomes the obvious suspect. But the gutter often acts as the visible failure point, not the original source. Meltwater from a warmer roof reaches the cold edge, freezes, and then blocks the path that would normally carry water away.
Cleaning gutters remains sensible because debris can obstruct drainage, but replacing a gutter won't correct a warm roof deck. A recurring dam calls for an attic and roof assessment, especially when the same dormer, valley, or eave freezes each winter.
Prevention That Actually Works From Attic to Eave
The most effective prevention plan works from the heated space upward. Start by finding where heat escapes, then protect the roof assembly with continuous insulation and functioning ventilation. Gutters support the system, but they shouldn't be the first response to a temperature problem.
The National Roofing Contractors Association identifies air leaks around access hatches, recessed lights, bathroom exhaust fans, chimneys, skylights, plumbing stacks, and blocked ventilation openings as contributors that allow heat to reach the roof deck (National Roofing Contractors Association roofing guidance).
Compare the main prevention choices
| Strategy | What It Fixes | Impact on Ice Dams |
|---|---|---|
| Air sealing | Closes openings between living space and attic | Reduces direct warm-air movement into the roof assembly |
| Insulation improvement | Limits heat conduction through the ceiling | Helps keep the roof deck more uniform |
| Ventilation correction | Restores airflow through soffit and exhaust paths | Helps remove attic heat and reduce warm spots |
| Duct and fixture treatment | Addresses concentrated heat sources | Prevents localized melting over specific roof areas |
| Gutter cleaning or replacement | Improves drainage at the roof edge | Supports drainage but doesn't cure an overheated roof deck |
| Heat cables | Keeps selected edge paths open | Can provide limited spot protection, but doesn't repair the building envelope |
Put air sealing before adding more insulation
A contractor should inspect the attic floor for gaps before covering the area with additional blown-in insulation. Sealing the attic hatch, top plates, plumbing penetrations, chimney gaps, and light fixtures can stop warm air at its entry point.
The material choice depends on the location. Rigid covers, compatible sealants, weatherstripping, and carefully applied spray foam may all have a role, but recessed lights and chimneys require products and clearances appropriate for those components.
Build a continuous insulation and ventilation layer
Insulation works best when it covers the ceiling evenly and doesn't leave thin areas near exterior walls. Ventilation baffles should keep soffit intake paths open so insulation doesn't block airflow at the eaves. The exhaust side also needs inspection rather than assuming a roof vent is functioning.
Ducts and bathroom fans deserve special attention. A bathroom exhaust fan should discharge outdoors through a suitable termination, not into the attic, and ducts running near the roof should be properly insulated and supported.
Gutters still matter after the attic work. Remove seasonal debris and verify that downspouts carry water away from the foundation. If the system is undersized, damaged, or failing, homeowners can review options to upgrade your home's gutters. A practical winter gutter maintenance checklist can also help protect the drainage side of the assembly.
Safe Removal and What Never to Do to Your Roof
Once an ice dam has formed, the immediate goal is to limit water entry without damaging shingles, flashing, gutters, or the roof deck. Removal is a short-term response. It won't stop the next dam if attic heat continues to warm the upper roof.
A qualified contractor may use low-pressure steam to melt a controlled channel through the ice or remove the ridge without striking the roofing surface. The method should account for nearby shingles, gutter attachments, electrical equipment, landscaping, and people below.
Avoid force and improvised chemicals
Don't chop an ice dam with an axe, hatchet, shovel, or pick. Those tools can cut shingles and expose the roof to leaks after the ice disappears. Salt and other deicing chemicals can damage metal components, vegetation, masonry, and roofing materials, while hot water may refreeze farther downslope and create another blockage.
Don't climb onto an icy roof without the equipment and training to work safely. Large ice can fall from the edge, and a slick surface makes a small mistake more serious.
If water is already entering the home, protect the room first. Move furniture, place containers beneath active drips, and contact a roofing professional promptly.
Know when removal becomes urgent
Water can move beneath shingles after repeated melting and freezing, damaging ceilings, walls, and contents. If a ceiling bulges, electrical fixtures are wet, or water is spreading along a wall, keep clear of the affected area and arrange an urgent inspection.
After the immediate hazard is controlled, document stains, damaged materials, and visible exterior conditions for your records. A roof professional can determine whether the issue involves shingles, flashing, underlayment, insulation, sheathing, or the attic air barrier. Homeowners looking for a focused response can review these ice dam repair options before choosing a remedy.
Your Next Steps to a Cold Roof and Dry Ceilings
The answer to what causes ice dams is compact: snow supplies the water source, attic or roof heat creates melting, and a cold eave causes refreezing. The prevention goal is a more uniform roof temperature, achieved by stopping unwanted heat movement and preserving clear ventilation from the attic to the exterior.
Use this fall checklist:
- Inspect the attic floor: Look for thin insulation, gaps, compressed areas, and signs of moisture.
- Seal bypasses: Check the attic hatch, recessed lights, plumbing penetrations, chimneys, skylights, and bath fans.
- Protect ventilation: Confirm that soffit openings and exhaust paths aren't blocked by insulation or debris.
- Review roof geometry: Pay special attention to valleys, dormers, low-slope areas, and shaded eaves.
- Maintain drainage: Clean gutters and confirm that downspouts discharge away from the home.
- Plan removal safely: Don't wait until an active leak forces an improvised roof climb.
A free professional inspection makes sense when your home has recurring icicles, a previous winter leak, uneven snow melt, stained ceilings, or an attic that feels noticeably warm during cold weather. An inspection can separate a drainage maintenance issue from a roof-envelope problem that requires air sealing, insulation, ventilation, flashing repair, or roofing work.
HIBCO ROOF LLC serves Columbus and central Ohio with roof inspections, leak diagnosis, repairs, roof replacement, skylight work, and gutter services. The company is a licensed and insured contractor and provides free written estimates before work authorization.
HIBCO ROOF LLC can inspect the roof and attic conditions that allow meltwater to become an ice dam, then recommend practical repair or prevention steps. Visit HIBCO ROOF LLC to request a free Columbus-area inspection and discuss how to keep your roof colder, your eaves draining, and your ceilings dry.