
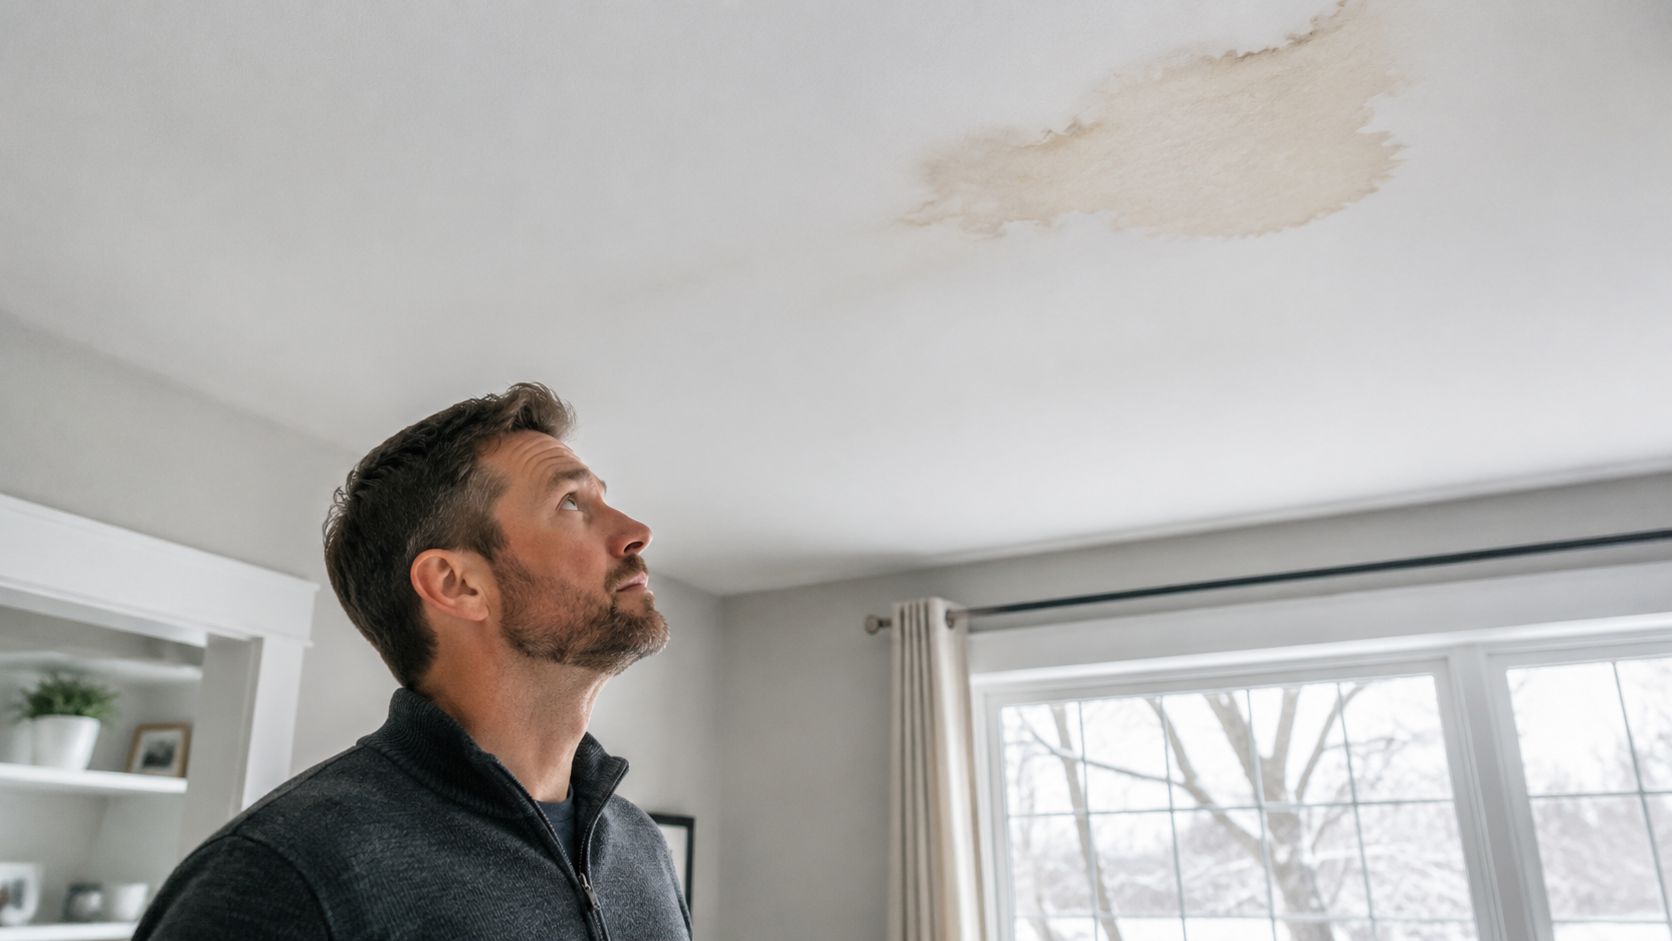
You open the morning blinds after a thaw, and there it is, a brown stain spreading across the ceiling or a damp line along a wall. In Columbus, that's often the first sign of an ice dam, not just a harmless ridge of frozen water at the eave. The damage is usually a warning that heat is escaping into the attic, melting snow from the wrong place, then letting that water refreeze where it can force its way back under the shingles.
Ice dam fixes split into two very different categories, and homeowners feel that difference fast. One side is symptom management, like raking snow or using calcium chloride to open a drainage path. The other side is the lasting cure, the kind that keeps the roof deck cold enough that the problem doesn't keep coming back, which is why building science points back to air sealing, insulation, ventilation, and roof-edge protection as the durable answer. As building science guidance puts it, quick fixes don't solve the root cause and can even create false confidence, while the lasting answer is to keep the sheathing near outdoor temperature with the right envelope work, as outlined by Building Science Corporation.
Table of Contents
- What an Ice Dam Means for Your Ohio Home
- Identifying the Root Causes of Ice Dams
- Emergency Ice Dam Fixes You Can Try Safely
- Permanent Fixes to Prevent Ice Dams for Good
- When to Call a Professional and What to Expect
- Protecting Your Columbus Home Year-Round
What an Ice Dam Means for Your Ohio Home
A lot of Columbus homeowners first notice the problem the same way every winter, a stain appears after a warm spell, or water starts dripping near an exterior wall when the snow is melting. The roof did not suddenly fail. What happened is more specific, the roof edge froze into a ridge of ice, water backed up behind it, and that water found a path under shingles or flashing.
An ice dam is not the icicle itself. It is the roof system telling you that the upper roof is warm enough to melt snow while the eaves stay cold enough to freeze that runoff again. That freeze point is usually at the roof edge, which is why the water does not just drip off, it pools, backs up, and can sneak under the roofing.
Why the leak shows up inside
The interior stain is the symptom homeowners see, but the actual issue usually started in the attic. Heat from the living space rises, escapes through ceiling leaks, and warms the underside of the roof deck. That uneven temperature pattern melts snow higher up on the roof, then the runoff hits the colder eave and refreezes.
Practical rule: if the same house gets ice dams more than once, the roof edge is not the root of the problem. The attic is.
The durable answer is not just getting rid of the ice in front of you. Long-term control comes from keeping the roof sheathing close to outdoor temperature by combining air sealing, insulation, and ventilation, or by building the roof so it can tolerate standing water if dams form, as explained by the University of Massachusetts Building and Construction Technology group. In plain terms, the ice on the eave is only the visible part of a much bigger heat-loss issue.
Identifying the Root Causes of Ice Dams
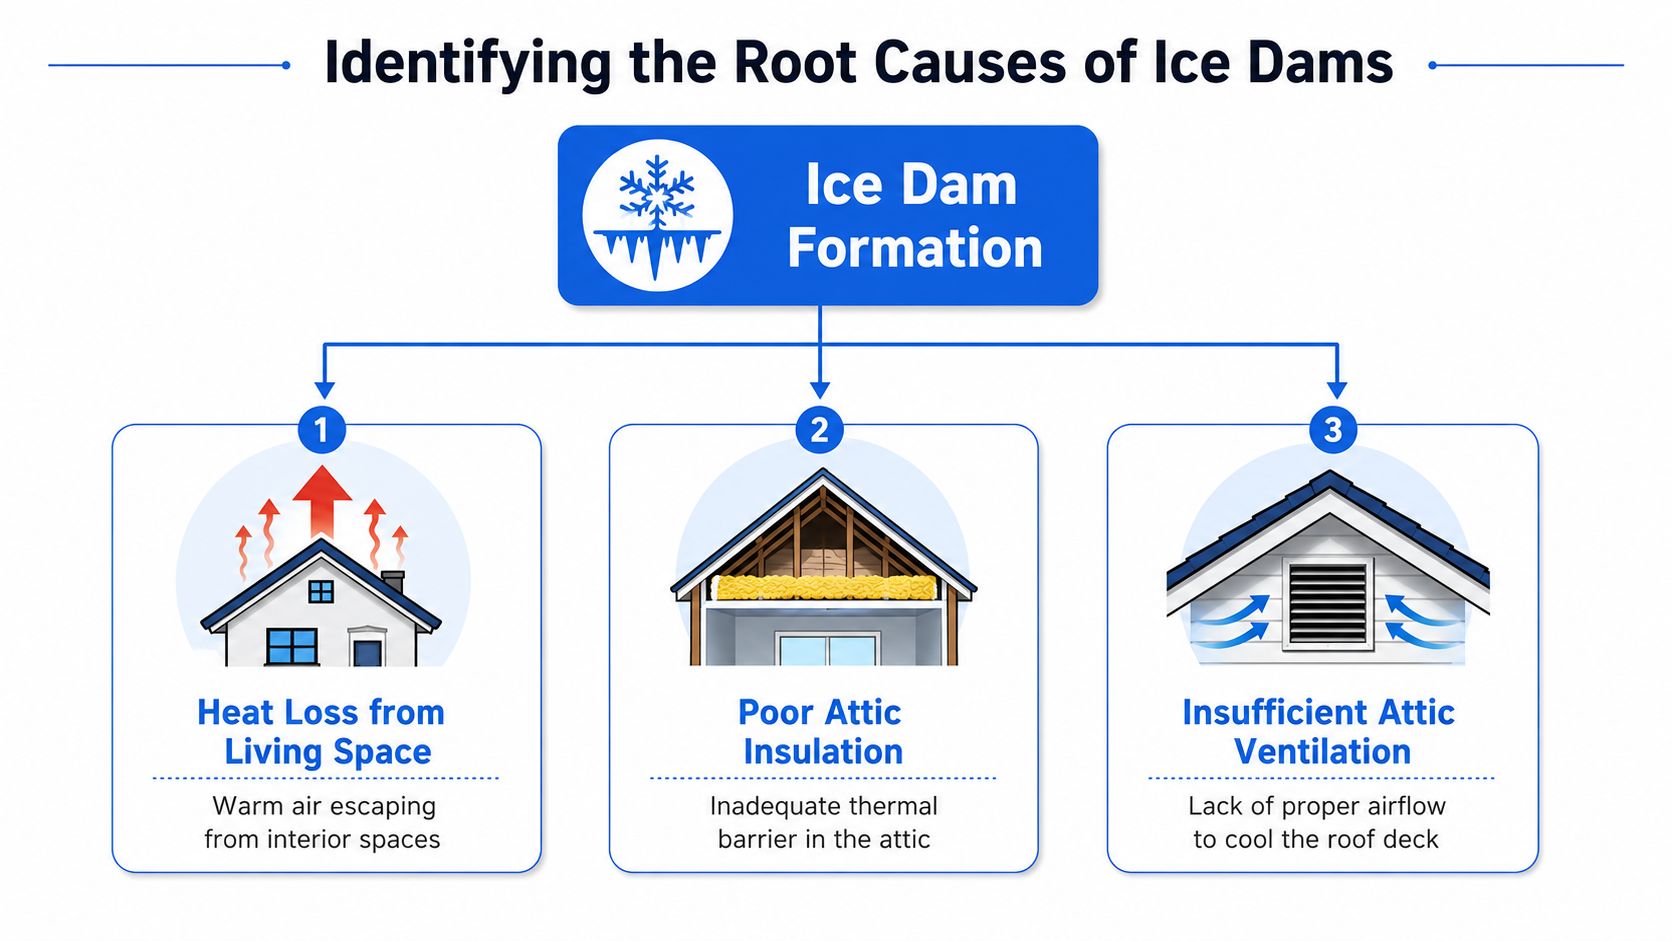
A homeowner usually notices the stain first, but the roof was already failing for a while. Snow on the surface is not the problem by itself. Ice dams form because the roof is holding two different temperatures at once. Warm air in the attic melts snow higher up. The meltwater reaches a colder edge, freezes, and starts building a ridge that backs water up under the shingles.
Heat loss from the living space
The main cause is heat loss from the house. Warm indoor air slips through ceiling penetrations, framing joints, bath fans, chimneys, and other openings, then reaches the attic. Once that air touches the roof deck, it starts melting snow from below while the outside temperature still keeps the eaves cold.
That is why attic leakage matters so much. A leaky ceiling plane turns the roof into part of the heated envelope, even when that is not the intent. The roof surface stops staying evenly cold, and that uneven temperature pattern is what sets up the dam. A diagram illustrating the three main root causes of ice dam formation on residential roofs.
Poor insulation and weak ventilation
Insulation slows heat transfer, but it only works when it is continuous and installed well. Gaps, compressed batts, and thin coverage create thermal bridges that let heat reach the roof deck. UMass guidance points homeowners toward attic insulation levels of at least R-30, with R-38 preferable in northern climates for keeping the attic cold enough to reduce freeze-thaw cycling, per UMass guidance.
Ventilation is the third part of the problem. Soffit-to-ridge airflow helps remove heat that does make its way into the attic and keeps the underside of the roof deck closer to outdoor temperature. Building Science Corporation treats that approach as part of the basic strategy for ice dam control, along with reducing heat flow and using a waterproof membrane where needed, in BSD-135.
Cold eaves plus a warm attic cause trouble. Cold eaves plus a tight ceiling, enough insulation, and real airflow give the roof a better chance to stay even.
The small details matter too. Building science guidance says caulk is fine for small openings, but expanding polyurethane or acrylic foam belongs around gaps larger than about 1 inch. That difference matters because a lot of ice-dam repairs fail when tiny leaks get sealed and bigger bypasses are left open, as noted in BSD-135.
Clogged gutters can make the backup worse, so it helps to keep them clear before winter weather settles in. For homeowners who want to handle that without climbing, this guide to cleaning gutters without a ladder covers a safer approach.
Emergency Ice Dam Fixes You Can Try Safely
When water is already getting inside, the job is to stop the leak path without making the roof worse. Stay off an icy roof if you can avoid it, because the safest fixes are the ones you can do from the ground or from a stable ladder position.
Start with a roof rake and clear snow from the first 3 to 4 feet of the roof edge. That opens the area where the dam is building and cuts down the meltwater feeding the backup, which Travelers recommends. For many homes, that is the fastest useful step you can take.
The calcium chloride sock method
Once the snow is off the edge, lay nylon stockings or socks filled with calcium chloride perpendicular to the dam. A good rule is about one sock for every 4 to 6 feet of dam, so the meltwater can cut a channel downward and drain through the ice over the next 12 to 48 hours, which Travelers recommends. The method works slowly, but it gives the water a controlled path out.
Do not use rock salt on roofing materials. It can damage shingles and nearby components, and it does nothing to solve the actual issue, which is heat loss in the attic. If the dam is large, the roof is steep, or water is already active inside the house, stop with the ground-based steps and get help.
Gutters matter too. If they are packed with debris or buried under snow, water has nowhere to go, and the backup gets worse. Safe access beats improvising from a shaky step stool, so use how to clean gutters without a ladder if you need a safer approach, or call professional gutter cleaning services when the setup is not safe.
Permanent Fixes to Prevent Ice Dams for Good
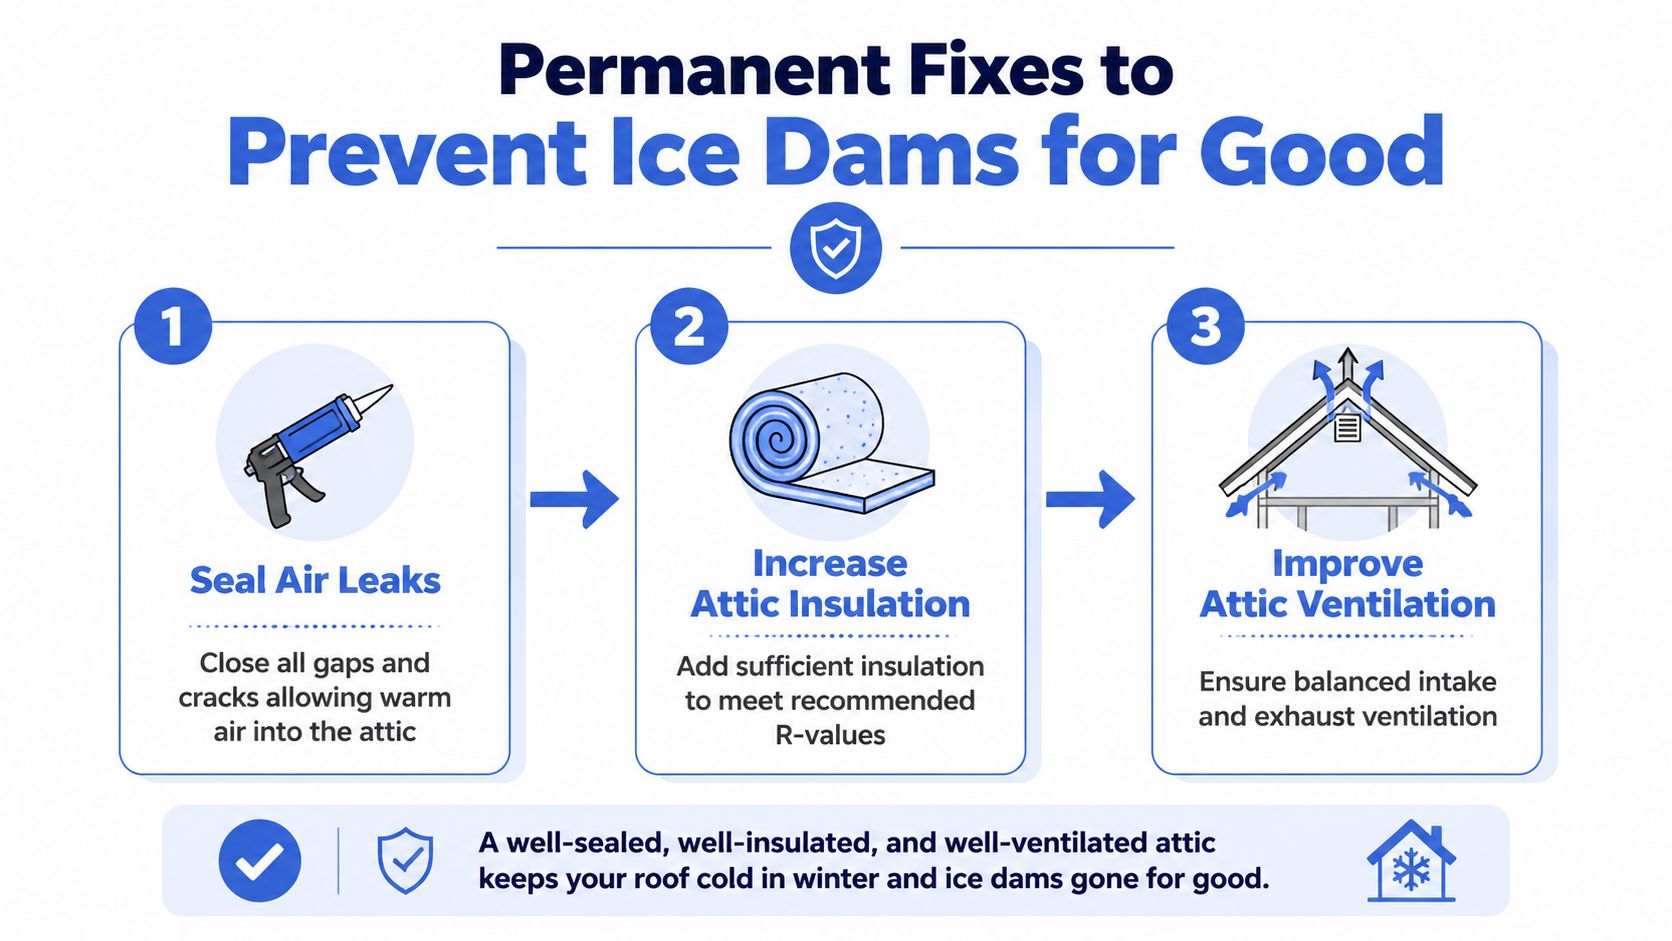
A lasting fix starts in the attic, not at the roof edge. If the roof deck stays warm, snow on the upper roof melts, runs down to the colder eaves, and freezes into a dam. The fundamental cure is to stop that heat from reaching the roof in the first place, then give any remaining heat a way out.
Seal the air leaks first
The ceiling plane has to be airtight. Warm air leaks around bath fans, chimneys, framing gaps, attic hatches, and duct penetrations are the usual starting point for recurring ice dams. If those leaks stay open, insulation and ventilation are only doing part of the job.
The building-science order is straightforward. Seal the ceiling plane, add enough insulation above it, then ventilate the underside of the roof deck with outside air so the roof surface stays colder, as laid out by Building Science Corporation. That sequence is the difference between symptom management and a real correction.
Upgrade insulation and ventilation together
Insulation has to match the attic's actual conditions, not guesswork. Cold-climate guidance points to R-38 as the stronger target, with R-30 as the minimum baseline in the U.S. guidance often used for these problems. More insulation alone will not fix an attic that still leaks air. Ventilation alone will not help if heat is still bleeding into the attic from below.
Balanced soffit-to-ridge ventilation matters just as much. Air needs to enter low, move across the underside of the roof deck, and exit high. That airflow helps keep the deck colder and cuts down the melt-and-refreeze cycle at the eaves.
The roof does not need to be warm in winter. It needs to be even.
For homes that keep seeing leaks or wear at the edge, extra protection at vulnerable areas adds another layer of defense. A waterproof membrane at the roof edge helps the assembly handle water that should not be there in the first place, and a closer look at roof deck protection shows how that detail supports the rest of the system.
If the outside drainage path is part of the problem, keep it clear too. Debris in the gutters gives meltwater nowhere to go, which makes backup worse. Pair attic upgrades with routine maintenance, and professional gutter cleaning services can help keep the eaves and drainage path open so the roof is not fighting its own runoff.
When to Call a Professional and What to Expect
If the ice is reaching higher than you can safely handle from the ground, or the roof pitch makes access risky, call a pro. The same goes for active leaks, torn gutters, or water that has already made it into drywall and insulation. At that point, the problem is no longer just ice on the roof, it is fall risk, hidden moisture, and damage that can keep spreading while you wait.

What professional removal usually looks like
For active leaks or recurring dams, the standard field fix is low-pressure steam removal, then a repair plan that addresses the roof system behind the ice. Steam in the range of about 200 to 240°F can clear ice without beating up shingles, flashing, or the roof deck, as summarized by The Roofing Brief. That approach is slower than chopping at the ice, but it protects the roof and reduces the chance of creating a second problem while fixing the first.
A good crew also looks for the cause, not just the buildup. That can mean blower-door testing, infrared checks, or a close look at attic air leaks and insulation gaps, because the roof will keep freezing at the edge if warm air keeps reaching the deck. The repair work should also confirm that the ice barrier extends at least 24 inches past the interior wall line where code requires it, which helps the roof resist future backup at the eaves.
The cost comparison homeowners should think about
Emergency removal can get expensive fast. One industry source says professional ice-dam removal averages $700 to $900 per hour, while attic air sealing is often estimated at $500 to $1,500 and insulation upgrades at $1,000 to $3,500, according to Ice Dam Removal Guys. That cost gap is why a one-time prevention project usually beats another winter of emergency calls. Temporary symptom management has a place when water is already moving, but it does not change the conditions that caused the dam.
If you are comparing contractors, use the same standards you would use for any roof repair. This guide on how to choose a roofing contractor can help you ask the right questions before anyone starts melting ice or opening up the attic. HIBCO ROOF LLC is one local option for inspections, roof repair, and system-level correction when an ice dam has already caused damage, but the key is choosing someone who will address the attic conditions, not just the visible ice. If you also want to understand how roof damage can affect coverage, find homeowners protection before the next thaw gives you a better idea of what to expect from your policy.
Protecting Your Columbus Home Year-Round
Ice dams are a winter symptom, but they point to a year-round building-envelope issue. If the attic is leaking heat now, it'll do it again next cold snap unless the air sealing, insulation, and ventilation get fixed together. That's the fundamental difference between treating the ice and curing the heat loss.
Columbus homeowners who keep seeing stains, drips, or frozen roof edges should treat that as a maintenance warning, not a one-off storm event. A careful roof and attic inspection tells you whether the problem is a simple leak, a ventilation imbalance, or a broader insulation issue that needs a real repair plan. If you're also thinking about insurance questions after damage, this resource on find homeowners protection can help you think through coverage basics before the next thaw.
The smartest first move is a professional inspection before the next hard freeze. A contractor can tell you whether you need emergency mitigation today, a roof-edge repair, or a full attic correction that keeps the roof deck cold all winter.
If you're seeing stains, recurring icicles, or damp drywall, contact HIBCO ROOF LLC for a free, no-pressure estimate and get a clear plan for stopping the leak and reducing the chance it comes back next winter.