

You usually notice the problem on a day that already feels busy. A spring storm rolls through Columbus, the wind shifts, and later you spot a brown stain near the skylight or a wet corner on the drywall. Most homeowners reach for a tube of caulk, but in a lot of cases the issue is the flashing around the opening, not the skylight glass itself.
That's why skylight flashing installation deserves more attention than it gets. Flashing is the weatherproofing system that moves water away from the opening, and when it's installed right, it can give decades of service, with properly installed skylight flashing often lasting 15 to 25 years nationally and 12 to 18 years in colder, high freeze-thaw regions like Chicago, roughly 25% shorter because repeated freezing and thawing can open joints over time, according to NRCA-based guidance summarized by industry sources (reference). Columbus weather brings its own seasonal stress, so the practical lesson is simple: flashing isn't trim, it's the part doing the essential work.
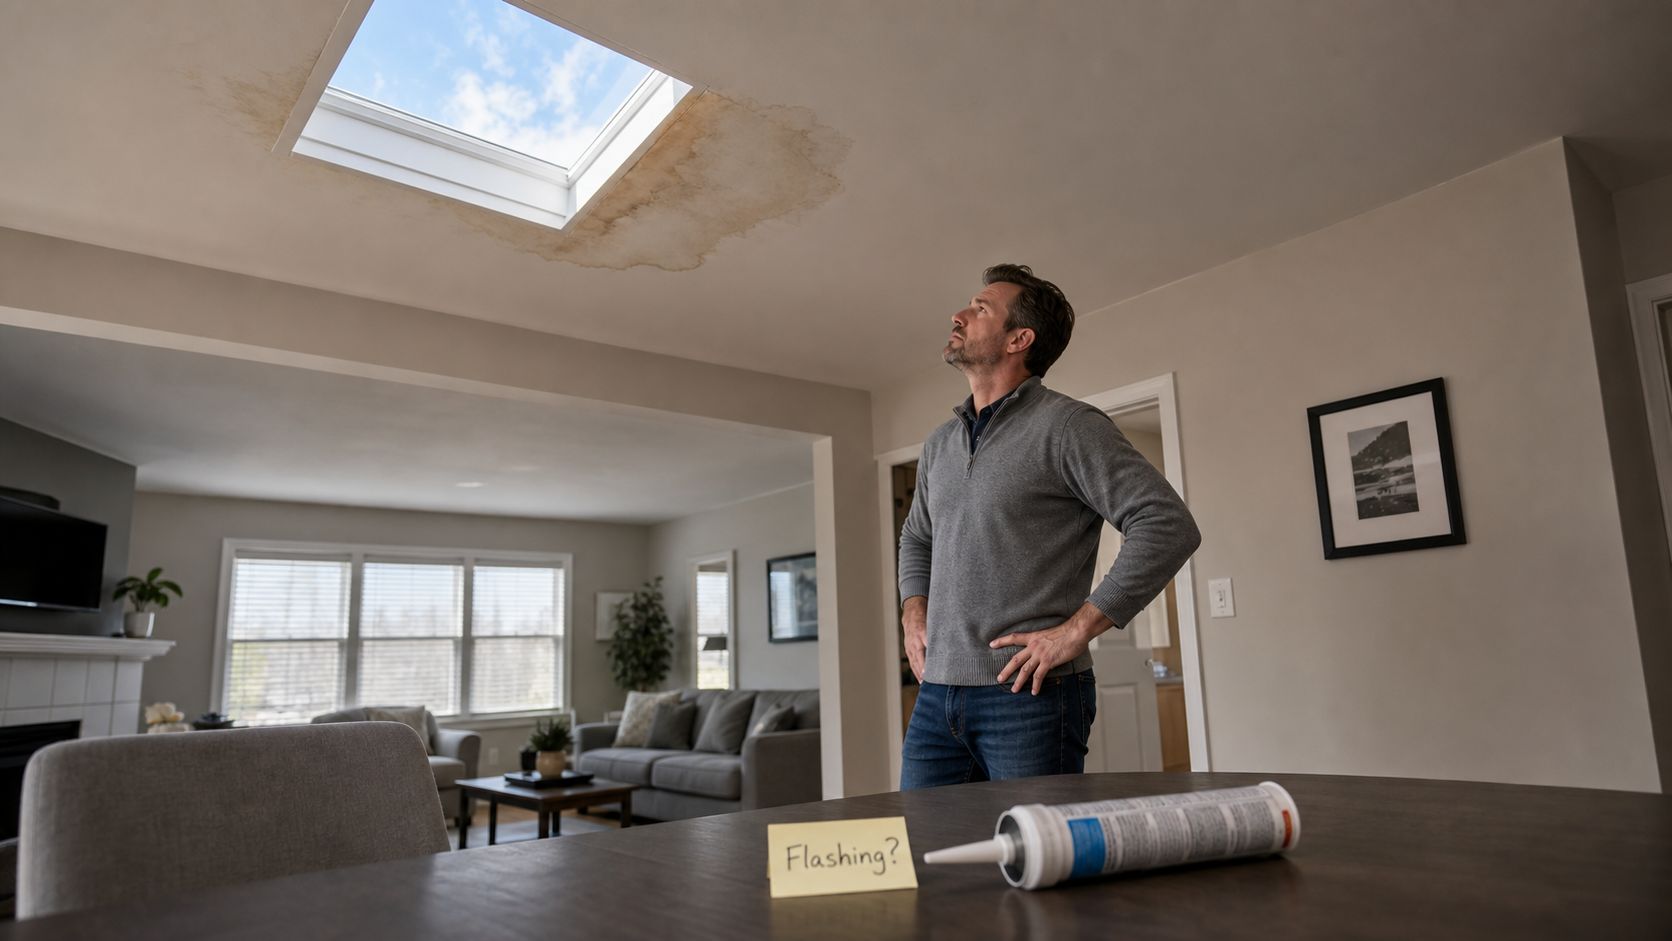
Table of Contents
- Why Proper Flashing Matters More Than You Think
- Types of Skylight Flashing and When to Use Each
- Tools and Materials You Will Need
- Step-by-Step Skylight Flashing Installation Process
- Common Skylight Flashing Mistakes and How to Avoid Them
- When to Call a Licensed Columbus Roofer
Why Proper Flashing Matters More Than You Think
A homeowner in Columbus sees a water stain near a skylight after a hard spring storm and assumes the skylight unit failed. Nine times out of ten, the leak path is somewhere in the flashing detail, the overlap, or the membrane transition around the opening. That's why a skylight can look fine from the room below and still be sending water into the roof system.
Flashing is the weatherproofing, not the decoration
The most important thing to understand is that skylight flashing is a replaceable roof component with a service life measured in decades, not a one-time cosmetic finish. Modern guidance treats it as a layered water-management system, with the flashing doing the heavy lifting and the sealants doing only a supporting job, if any. Patching the visible crack with caulk might buy time, but it doesn't rebuild the drainage path that keeps water out.
Practical rule: if water is reaching the drywall, the problem is already past the “seal the edge and hope” stage.
That's why roofers pay attention to the whole assembly, including underlayment, fastener placement, and how the shingles step over the flashing. The Pacific Northwest National Laboratory guidance on existing skylights repaired or replaced and fully flashed describes a layered system that keeps water shedding over each piece instead of into the opening (PNNL guidance). That approach lines up with code language that requires flashing to prevent moisture entry at roof penetrations and extend upward inboard of the membrane or sheathing used in lieu of it (NYC code language).
Columbus weather makes the details matter
Central Ohio doesn't get to ignore freeze-thaw cycles. Repeated temperature swings open tiny gaps over time, especially at joints and edges that weren't integrated correctly in the first place. A skylight that survived a few mild seasons can start leaking once the roof materials move, settle, and age together.
That's why a leak around a skylight should change how you think about the repair. It's rarely a cosmetic issue. It's usually a roof-detail issue that needs a weatherproofing fix, not a surface patch. For a homeowner trying to sort out whether a stain is isolated or part of a broader roof problem, this roof leak sign guide is a useful starting point.
Types of Skylight Flashing and When to Use Each
The right flashing detail depends on the skylight style, roof slope, and whether the work is part of a reroof or a standalone replacement. That's where a lot of consumer advice falls short. Homeowners get told to “replace the flashing,” but they're not always told which system fits the roof they have.
Curb-mounted skylights
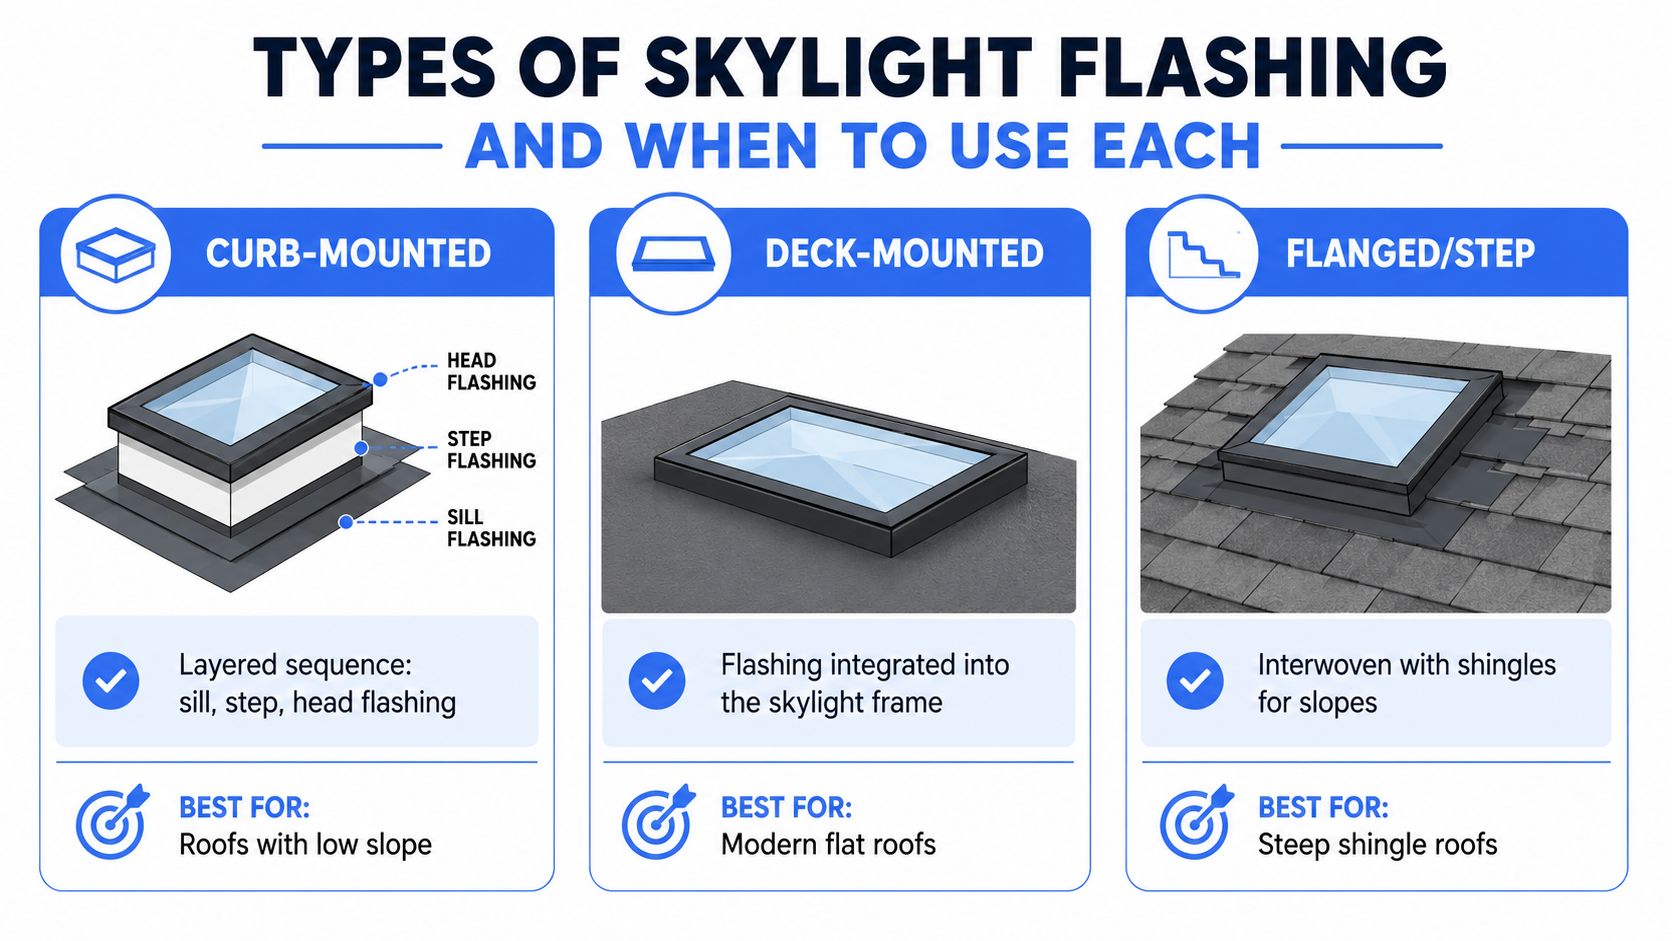
Curb-mounted skylights sit on a raised frame, and that frame is flashed in layers. The standard sequence uses sill flashing, step flashing, and head flashing, with each piece lapping so water sheds down and away from the opening. This style is the most familiar on many roofs because it gives the installer a clear vertical surface to work against.
Curb-mounted systems make the most sense when the roof needs a reliable, serviceable detail and there's enough pitch to shed water cleanly. They also help when the skylight needs to sit above the roof plane for better drainage and easier integration with shingles or other coverings.
Deck-mounted and flanged styles
Deck-mounted skylights sit closer to the roof surface. They're lower profile, and on some roofs that's the right visual choice, but the flashing has to be matched precisely to the unit and the roof angle. Manufacturer instructions often limit the pitch range for specific flashing kits, which is why a one-size-fits-all approach doesn't hold up in the field. One major skylight system, for example, specifies flashing ECL for roof pitches from 10° to 60° and flashing ECW for roof pitches from 14° to 60° (manufacturer pitch limits).
Flanged or step-style details are common where skylight edges need to be woven into shingle courses. That works best on steeper shingle roofs, where the shingle pattern can carry the water away from the opening in a predictable way.
A skylight almost never leaks because the glass failed. It leaks where the roof meets the frame, the curb, or the flashing overlap.
When the roof system changes the answer
Low-slope roofs are different. The International Residential Code requires a curb at least 4 inches above the roof deck when the slope is 3:12 or less, and for flat-glass skylights, a pitched curb needs at least 1:12 slope, with a slope above 3:12 (15 degrees) preferred (IRC guidance summary). That's why the same skylight can need a different flashing strategy on two different roofs.
The practical takeaway is that the skylight model doesn't decide the flashing detail by itself. Roof pitch, roof material, and whether you're tying into an existing roof or building the assembly from scratch all matter. That's the core gap in most homeowner guides, especially during a retrofit.
Tools and Materials You Will Need
A clean skylight flashing job starts before the first shingle comes off. If the materials don't match the skylight model or the roof pitch, the rest of the work becomes guesswork. That's where leaks usually start, not at the final bead of sealant.
What to have on the roof before you begin
- Matched flashing kit, sized for the exact skylight model and roof angle
- Ice-and-water shield membrane, so the opening has a secondary water barrier
- Step flashing pieces, if the detail calls for interwoven shingle courses
- Roofing cement, for selective bedding where the manufacturer allows it
- Utility knife, for cutting membrane and trimming shingles cleanly
- Caulk gun, for controlled sealant application where specified
- Chalk line, for keeping the flashing and shingle runs straight
- Ladder safety equipment, because skylight work happens near roof edges and openings
- Weather-appropriate clothing, since wet or cold conditions make handling materials harder
The membrane matters because a skylight is a roof penetration, and penetrations need layered protection. Manufacturer instructions commonly call for ice-and-water shield around the opening, turned up the curb and carried across the sides and top before the flashing goes in (manufacturer membrane sequence).
What homeowners often forget
Skylight flashing installation requires attention to the small things that make the detail work, like matching the flashing kit to the pitch and ensuring the roof deck is sound before resetting anything. If the deck has rot, the flashing won't solve the problem; it'll just hide it for a while.
Jobsite rule: if the roof deck is soft, swollen, or punky around the opening, stop and fix the substrate first.
For a quick look at the protective layer that belongs under the flashing, roof deck protection basics are worth reviewing before anyone starts tearing into the opening. The point is simple, use the system the skylight maker designed, not a pile of generic parts from the truck.
Step-by-Step Skylight Flashing Installation Process
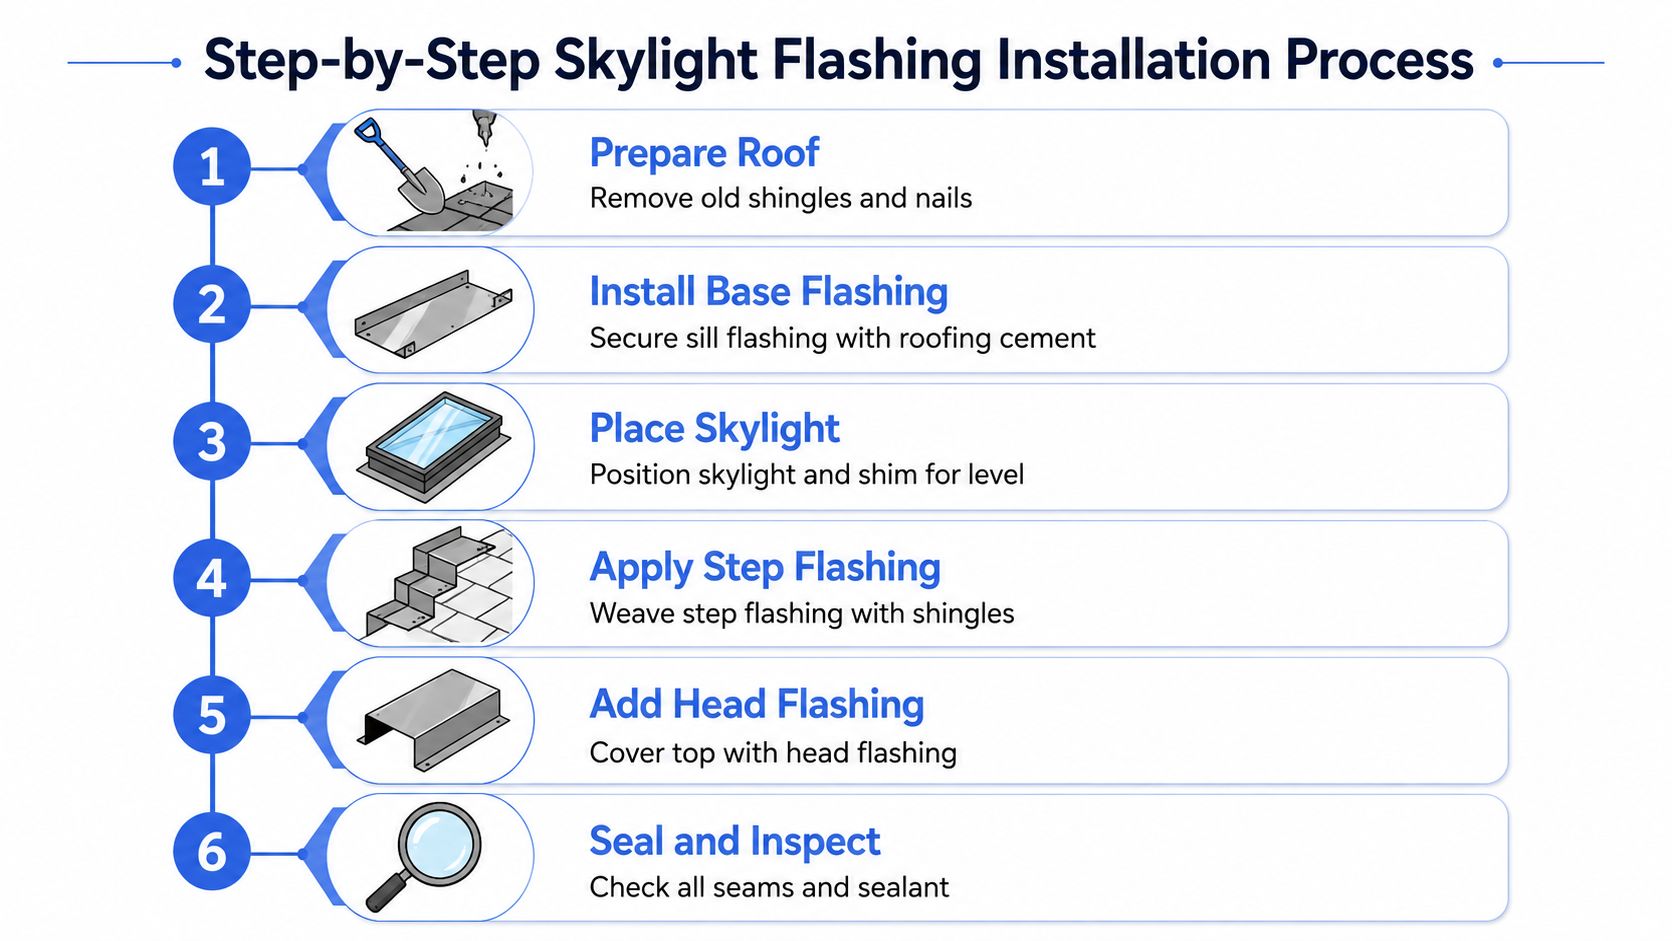
A proper retrofit or replacement follows the water path, from the bottom of the opening to the top. That sequence matters because each layer has to shed onto the next one. If a lower piece goes under the wrong layer, water can end up behind the flashing instead of over it.
Start with roof preparation
Remove the shingles and old flashing around the skylight far enough to expose the fastening points and the roof deck. That's not busywork. You need to see whether the opening is square, whether the deck is solid, and whether the curb or frame needs repair before the new detail goes in.
If the roof is being reroofed, this is the point where the decision gap shows up. A standalone skylight swap on an aging roof may leave old surrounding shingles in place, but a reroof lets the installer rebuild the flashing system cleanly. Public guides often describe the ideal sequence, but they rarely tell homeowners how much roof has to be opened to make the detail work on an old roof. That's why a leak can mean anything from a localized patch to a partial tear-off.
Install the membrane and base flashing
With the opening exposed, install the ice-and-water shield so it overlaps the deck and turns up the outside of the curb. The membrane should bridge the vulnerable corners and continue across the sides and top before the metal flashing is set. That way, if wind-driven rain gets under the shingles, it still lands on a water-shedding barrier.
Then set the sill flashing at the bottom. The bottom piece has to sit so water from above passes over it and away from the opening, not into it. The lower flashing is the first real line of defense, so it has to be straight, flat, and integrated with the roof surface below.
Weave the side flashing and finish at the top
Next comes the step flashing on both sides. Each flashing piece should interweave with the shingles so the water keeps following the roof surface downward in layers. That's the part many DIY jobs get wrong. A side piece that's only nailed on top of shingles can look fine from below and still trap water at the edge.
Finish with the head flashing across the top. It should slip under the upper roofing layer so water runs over it and not behind it. PNNL's guidance on fully flashed skylights describes reinstalling shingles over the head flashing and fastening the skylight according to manufacturer instructions after the flashing layers are in place (PNNL guidance). That layered sequence is what turns a vulnerable opening into a managed drainage detail.
Match the kit to the roof angle
A good installer checks the pitch before the first cut. Manufacturer flashing kits are not universal, and some are limited to specific angle ranges, like the Velux ECL and ECW pitch ranges noted above. That matters because a skylight detail that works on a steep roof may fail on a lower slope if the water moves too slowly across the flashing.
For a practical field reference on flashing layout and overlap, the flashing tips from Superior Home Improvement are helpful because they focus on the sequence that keeps water moving in the right direction. The principle stays the same on almost every roof, the lower piece goes on first, the side pieces interweave, and the upper flashing closes the system.
Common Skylight Flashing Mistakes and How to Avoid Them
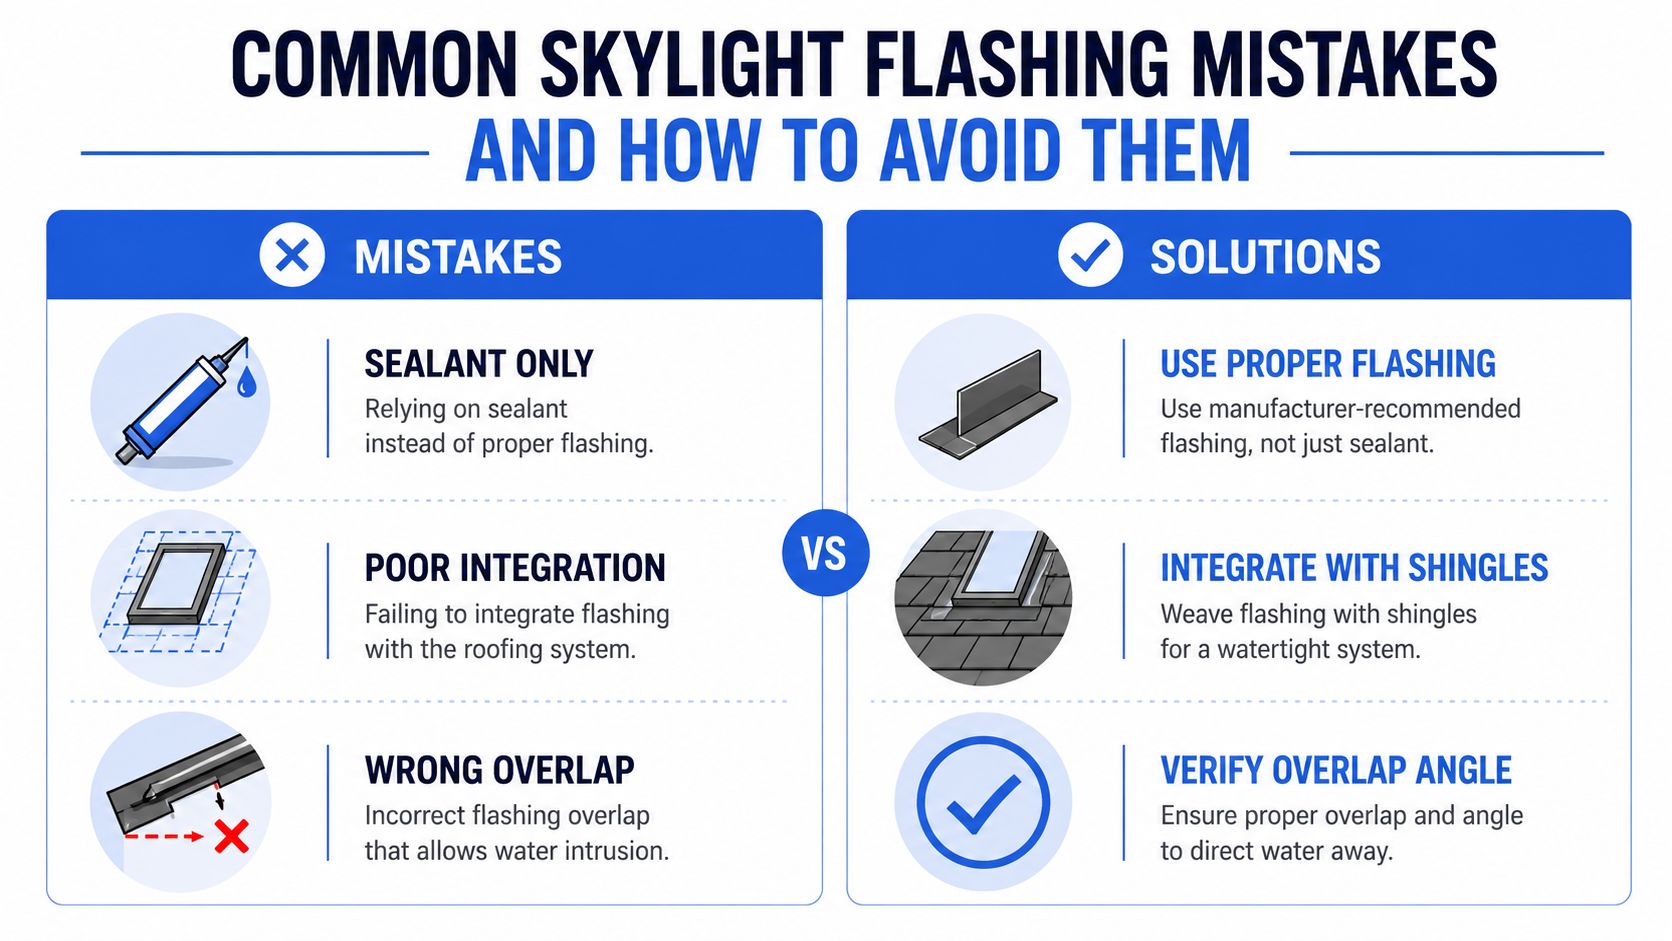
The biggest mistake is thinking more caulk will rescue a bad flashing layout. It won't. Sealant can support a detail, but it can't replace the layered water path that a skylight opening needs, especially where thermal movement and wind-driven rain are part of the equation.
The mistakes that show up on real roofs
- Sealant only: A bead of caulk around the frame can hide gaps, but it doesn't create a drainage system.
- Poor integration: If the membrane, curb, and shingles don't overlap correctly, water finds the weak edge.
- Wrong overlap: Flashing that points against the flow of water works against the roof instead of with it.
Those errors are common because they're easy to miss from the ground. A skylight can look neat for a season or two, then start staining the ceiling when the weather changes. If you're trying to tell whether the leak is a flashing problem or something deeper in the roof assembly, these skylight leak diagnosis tips are useful because they focus on where water usually enters first.
What proper work looks like
A correct installation gives you visible clues. The lower flashing should sit so it sheds onto the shingles below. The side pieces should be woven with the shingle courses, not slapped over them. The top flashing should disappear under the upper course, because that's how the roof keeps water moving downslope.
Practical check: if you can see a path where water would run toward the opening instead of across and away from it, the detail is wrong.
Low-slope roofs deserve extra attention because code and pitch limit the margin for error. The 4-inch curb height requirement for slopes of 3:12 or less isn't an arbitrary number, it's part of the assembly's ability to keep water out (IRC guidance summary). When a skylight is underbuilt for the roof it sits on, no amount of surface sealant fixes that mismatch.
When to Call a Licensed Columbus Roofer
Some skylight jobs are manageable, and some aren't. If the roof is low-slope, the opening needs a curb rebuild, or the work has to happen during a full reroof, that's a professional-level detail because one bad overlap can undo the whole repair. Older roofs are another warning sign, especially if the deck is already brittle and won't tolerate repeated tear-off.
The judgment call that saves time and money
The decision isn't DIY versus professional in the abstract. It's whether the roof can support a clean retrofit without exposing more damage than you can fix in one visit. If the answer is no, the safer choice is to bring in a licensed contractor who can inspect the roof system, verify code clearance, and rebuild the skylight detail with the right materials.
That's where a company like HIBCO ROOF LLC fits naturally into the conversation. It offers skylight replacement with integrated flashing as part of its Columbus roofing work, along with inspections, repairs, and full roof replacements, and it operates as a licensed and insured contractor with free estimates. For homeowners trying to compare repair paths and budget for the work, this skylight flashing repair cost overview is a practical place to start.
When professional help matters most
- Low-slope roofs: Code-sensitive details and curb height matter more here.
- Retrofit during reroofing: The flashing has to tie into new and old materials correctly.
- Aging roofs: Older shingles and fragile decking don't forgive repeated patchwork.
- Storm damage cases: If the leak followed hail or wind, the whole area may need documentation and a broader assessment.
A skilled roofer doesn't just install metal around a hole. They match the flashing detail to the roof pitch, the roof material, and the drainage pattern the home has.
If your skylight is stained, leaking, or due for replacement, HIBCO ROOF LLC can inspect the roof, assess the flashing detail, and explain whether a repair or full skylight replacement makes more sense. Visit HIBCO ROOF LLC to request a free estimate and get a straight answer on your roof.