You walk outside, see a cracked corner post flapping at the edge of the house, and immediately wonder if this is about to turn into a much bigger siding job. In a lot of cases, it doesn’t have to. If the damage is limited to the corner itself, you can often replace it cleanly without taking off surrounding siding panels.
That’s the part most basic guides miss. The fastest repair is usually the overlay method, which keeps the existing J-channel in place and puts a new corner over it. Done right, it looks clean, holds tight, and avoids a lot of unnecessary disassembly. Done wrong, it works loose when the weather swings from summer heat to winter cold.
Table of Contents
- Why Tackle That Damaged Siding Corner Yourself
- Gathering Your Tools and Materials
- Safety and Area Preparation
- Step-by-Step Corner Replacement The Pro Method
- Avoiding Common DIY Pitfalls and Mistakes
- When to Call a Professional Siding Contractor
Why Tackle That Damaged Siding Corner Yourself
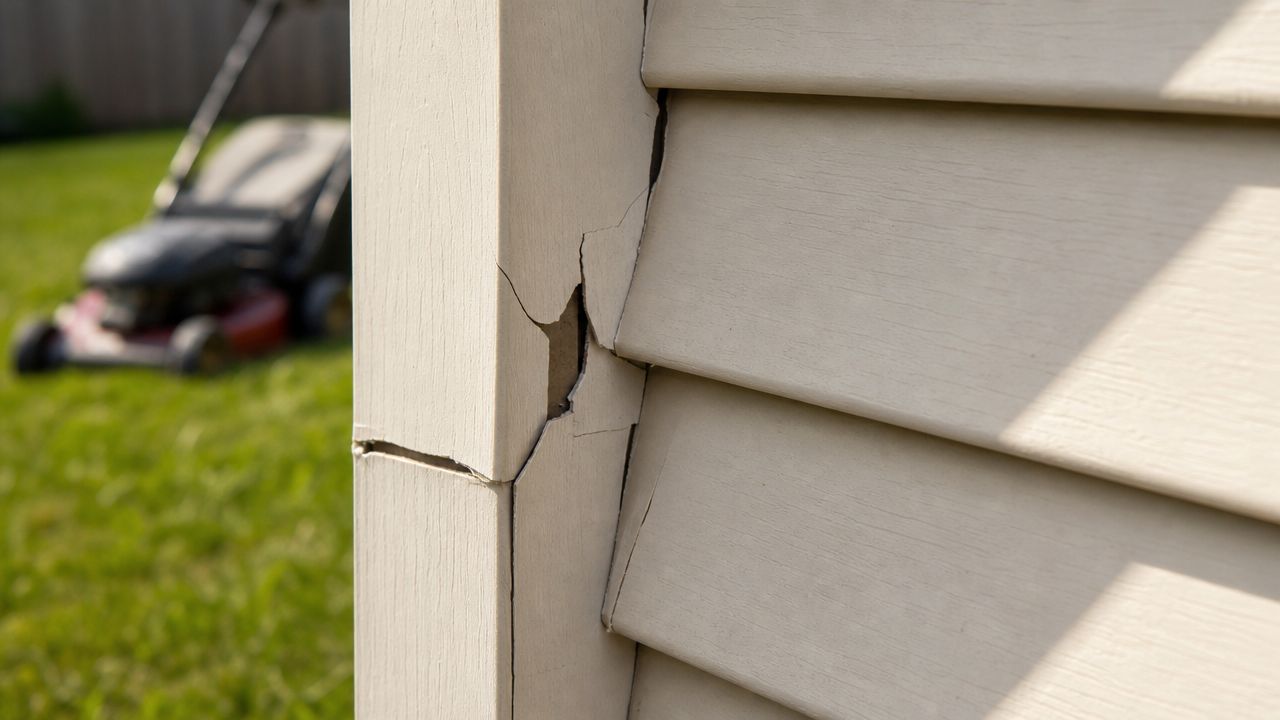
A vinyl corner usually gets broken by something simple. A baseball. A string trimmer. A ladder set in the wrong spot. Sometimes it just gets brittle after years of sun, ice, and temperature swings. Whatever caused it, the result is the same. It looks rough, and it leaves a vulnerable edge on the house.
If you’re dealing with one damaged corner at ground level, this is one of the better exterior repairs to learn. Hiring it out can cost between $100 and $1,000 according to this vinyl siding corner repair demonstration, so there’s real value in handling a straightforward replacement yourself.
The part that makes this project manageable is skipping full panel removal. Instead of unsnapping courses of siding and chasing nails behind the corner post, the pro approach is to keep the hidden channel that already holds the siding edges. That cuts down on mess, reduces the chance of bending older panels, and makes the repair much more realistic for a capable homeowner.
Practical rule: If the siding panels themselves are still in good shape, don’t create a bigger job by tearing into them just to replace one corner.
This repair also gives you a good read on the rest of the exterior. While you’re there, inspect whether the corner damage is isolated or part of a broader wear pattern. If you’re seeing multiple cracked pieces or fading across whole elevations, it may help to compare repair versus replacement using this guide on whether you need to replace your vinyl siding.
Gathering Your Tools and Materials
A clean repair starts before the first cut. Most frustration on this job comes from trying to improvise with the wrong blade, the wrong fastener, or a replacement corner that hasn’t been checked against the original profile.
What to buy before you start
The first item is the replacement corner post. Vinyl siding corner pieces are standardly manufactured at 10 feet in length, so you’ll almost always need to trim one to match the wall height, as shown in this corner replacement video. Bring measurements with you, but also check the face width before buying. A common corner face is 3 inches, while some older or damaged areas may need a 3 1/4-inch solution with some modification.
For cutting and fitting, a utility knife’s importance is often underestimated. Warm vinyl cuts easier, and repeated scoring is usually safer than trying to force a cut in one pass. A siding removal tool, often called a zip tool, helps you move siding just enough to tuck the new piece into place without distorting the courses.
Fasteners are not an afterthought here. White pop rivets or suitable screws are often the cleaner option when you’re securing an overlay. If you need a reliable place to compare essential hardware for home improvement, it’s worth checking fastener options before you start so you don’t end up using whatever happens to be in the garage.
If you’re still deciding whether this repair fits into a broader exterior project, this page on siding replacement services is useful for comparing the single-corner fix against larger siding work.
Required tools and materials checklist
| Item | Purpose | Pro Tip |
|---|---|---|
| Replacement vinyl corner post | Replaces the damaged visible corner | Match face width before you cut length |
| Tape measure | Confirms wall height and cut location | Measure twice from soffit to bottom edge |
| Utility knife | Scores vinyl for controlled cuts | Make multiple passes instead of one hard pass |
| Siding removal tool | Unlocks or shifts siding slightly | Use it gently so you don’t crease older panels |
| 4-inch grinder with 1/8-inch cut wheel | Removes the old corner face quickly | Best used for controlled face removal, not aggressive demolition |
| Drill or rivet tool | Secures the overlay piece | Keep white fasteners on hand for visible edges |
| Screws or white pop rivets | Locks the new corner over the old channel | Keep your finish hardware consistent on the visible face |
| Silicone | Helps create a tighter overlay fit | Use it sparingly so it doesn’t smear onto the face |
| Ladder | Reaches the full repair area | Set it where you can work without twisting |
| Safety glasses and gloves | Protects from shards and sharp edges | Vinyl edges can slice fingers more easily than people expect |
Safety and Area Preparation
This job looks simple from the ground. It gets less simple when you’re holding a grinder on a ladder and trying to make a controlled cut next to finished siding. Set the area properly first.
Protect yourself first
Wear safety glasses the whole time. Cut vinyl throws small shards, and a grinder can send brittle pieces farther than you’d expect. Gloves help too, especially once you start handling trimmed edges and broken corner fragments.
If the repair is above easy reach, give ladder setup the same attention as the repair itself. Stable footing, the right angle, and a position that lets you work square to the corner matter more than speed. For a solid refresher on height-related basics, Safety Space’s Australian guide gives practical reminders that apply to home exterior work too.
Don’t overreach to finish “one last cut.” Move the ladder and keep your shoulders between the rails.
Set up the work area
Clear anything around the base of the corner. Move planters, hoses, lawn tools, and anything that can catch your feet when you step down. If shrubs crowd the wall, tie them back so you can see the full corner edge.
Lay down a tarp or drop cloth. It makes cleanup easier and helps you keep track of small offcuts, screws, or rivets. Before cutting, inspect the corner from top to bottom and confirm the damage is limited to the trim. If the wall behind feels soft or the siding courses are already loose, stop and reassess before you turn a trim repair into a hidden wall repair.
Step-by-Step Corner Replacement The Pro Method
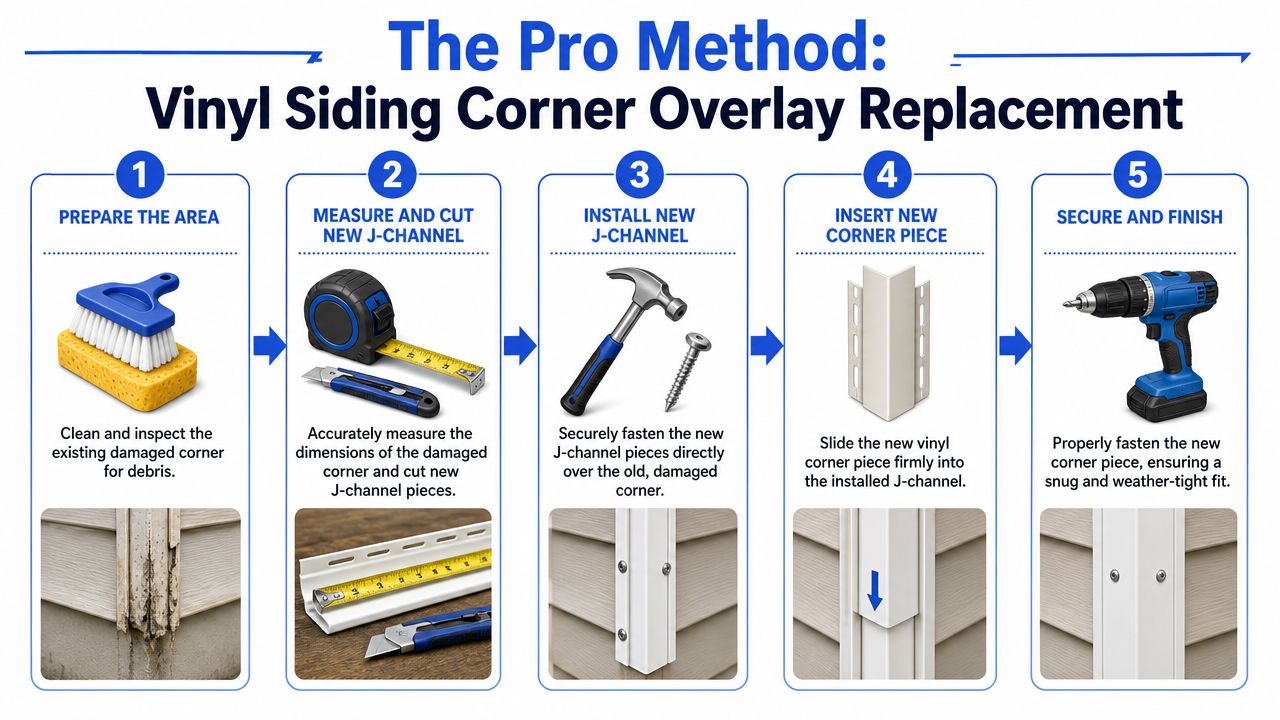
The cleanest way to handle this repair is to preserve what still works. On a vinyl corner, that means keeping the underlying pocket or J-channel area intact while removing only the damaged face and nailing flange sections that are in the way.
Start with the visual sequence below so the order stays clear while you work.
Remove the damaged face and keep the pocket
The first cut is the one that matters most. The goal is not to rip the entire corner off the wall. The goal is to cut away the face of the damaged corner while preserving the underlying nail hem and pocket, which aligns with the PEPA installation guidance for preserving J-channel integrity.
A 4-inch grinder with a 1/8-inch cut wheel is a common way to remove the old face quickly. Used carefully, it lets you score and cut away the visible portion without disturbing the siding panels tucked into the corner. On repairs where the old corner is brittle, many installers remove the bulk of the face first, then make more controlled cuts near the groove.
Work top to bottom and stay deliberate. You want the old corner’s hidden receiving edges to remain in place because those edges are what the new overlay will grab.
Here’s a hands-on demonstration of the process in motion:
Prep the new corner so it can overlay
Now cut the new corner to length. Since new posts come in a standard long stock length, trim it to fit your wall height and dry-fit it before altering anything else.
Next, remove the nailing flange from the new corner. That’s the core of the overlay technique. The new piece isn’t being installed like brand-new construction. It’s being converted into a cap that slides over the old, preserved structure. According to this installer discussion of the overlay method, cutting the nailing flange off the new corner and sliding it over the old one takes about 10 minutes, uses about 6 screws or rivets, and avoids the 2-hour labor of full panel removal.
If your existing corner is 3 1/4 inches and the replacement on the shelf is 3 inches, you may need to modify the new piece rather than forcing it. A common approach is to mark the centerline, score it with multiple passes, and create a custom overlap that lets the new molding lock into the existing position. Don’t rush this part. Most ugly repairs come from trying to make an off-size corner fit by brute force.
A dry fit tells you more than the tape measure does. If the piece binds before it seats, stop and trim again.
Lock it in and finish it clean
Once the new piece fits, slide it over the old corner’s preserved channel. A siding removal tool can help nudge the siding edge back just enough to let the new corner tuck in cleanly and lock into place. The fit should feel snug, not forced.
Secure the new corner with screws or white pop rivets. Keep the fasteners neat and consistent. On edges that won’t wrap fully, rivets are often the cleaner answer because they hold well without making the repair look patched together.
A few details separate a durable repair from one that works loose later:
- Trim for the soffit first: The top of the corner needs to seat cleanly without pushing downward on the whole piece.
- Preserve the return lip where needed: If you cut the wrong edge away, the new piece won’t wrap the old corner properly.
- Use silicone carefully: A light application can help the overlay seat flush and stay pressure-locked without rattling.
When you’re finished, step back and sight down the wall. The corner should run straight, the adjacent siding should still lie flat, and nothing should look pinched or pulled out of line.
Avoiding Common DIY Pitfalls and Mistakes
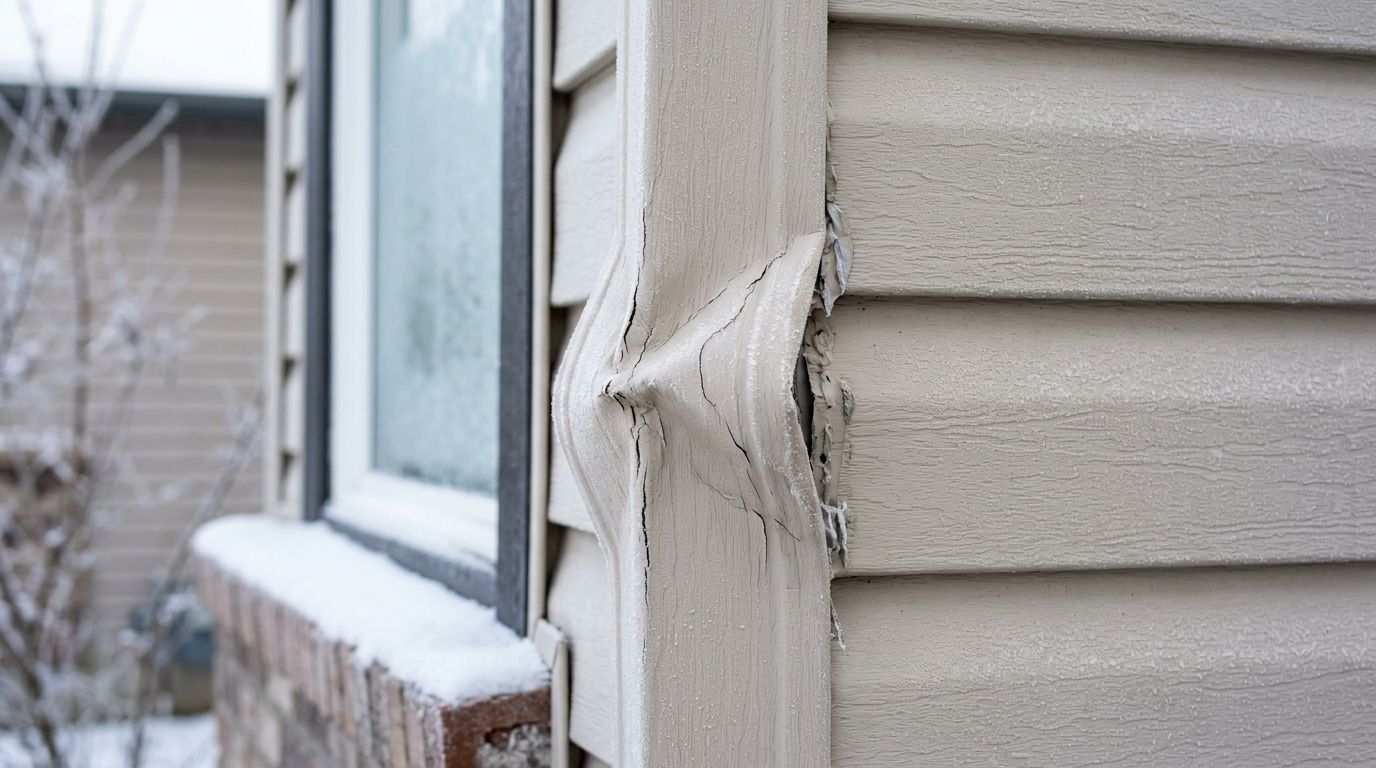
Most failed corner repairs don’t fail because the installer couldn’t cut vinyl. They fail because the corner was fastened too tight, fit too rigidly, or forced into place without accounting for seasonal movement.
Thermal movement is where most repairs fail
Vinyl moves. That’s not a minor detail. It’s the reason a corner that looks perfect in mild weather can buckle in heat or loosen when winter hits.
A frequently missed requirement is 1/8-inch nail exposure to allow for thermal shifts, a detail highlighted in this HGTV vinyl siding repair reference. That same source notes this issue contributes to 30% of DIY failures, especially in climates like Ohio with wide seasonal swings. If you clamp the material down hard, you take away its ability to move, and the corner eventually tells on you.
What this means in practice:
- Don’t cinch fasteners tight: The corner should be held, not crushed.
- Don’t eliminate movement gaps: A rigid fit is not a better fit with vinyl.
- Don’t judge the repair only by the day you install it: The test comes after temperature changes.
If a vinyl repair can’t move a little, it usually fails a lot.
Fit problems and cutting mistakes
Another common mistake is assuming every replacement corner matches what’s already on the house. It often doesn’t. Older siding profiles, faded colors, and mismatched face widths all show up at the corner first because the corner is highly visible and geometrically unforgiving.
A few habits help:
- Test-fit before fastening. If the new piece rocks, binds, or leaves one edge proud, solve that now.
- Cut warm vinyl when possible. It’s easier to score cleanly and less likely to crack.
- Keep the repair visually straight. A corner that is structurally attached but slightly twisted will look wrong from the driveway every time you see it.
Color match is its own issue. New vinyl may be close without being exact, especially on an older wall. On a single corner, close is often acceptable. On a highly visible front elevation, it may stand out more than expected.
When to Call a Professional Siding Contractor
A single damaged corner near the ground is a reasonable DIY project. A second-story corner, hidden wall damage, or tightly bound older siding is different. That’s where the repair stops being about trim and starts being about access, wall condition, and risk.
Situations that cross the DIY line
If you have to remove siding nails to gain access, the risk goes up quickly. According to this field discussion of corner repair access, panel distortion risk increases by 40% in hot or windy conditions if more than 4 nails per course are pulled. That’s one reason pros try hard to avoid unnecessary panel disturbance.

Call for help if any of these show up:
- The corner is above safe ladder height: Reaching high exterior corners without proper setup isn’t worth it.
- The sheathing feels soft: A trim replacement won’t fix rot behind the wall.
- The siding panels are also cracked or tightly locked: The corner may be only part of the problem.
- The wall already shows waviness or movement: You need diagnosis before repair.
When the safer call is a site assessment
A contractor can tell you whether the issue is isolated trim damage or a broader siding problem. That matters if you’re trying to compare a repair against a partial or full siding update. For budget planning, this page on vinyl siding replacement cost helps frame what larger work may involve.
For homeowners in Columbus and central Ohio, HIBCO ROOF LLC handles siding repair and replacement as part of its residential exterior work. The company is licensed and insured, offers free estimates, and can assess whether your damaged corner is a quick trim repair or a sign of deeper wall or siding issues.
If your vinyl corner is cracked, loose, or missing and you’d rather have an experienced crew handle it, HIBCO ROOF LLC serves Columbus and central Ohio with siding inspections, repairs, and full replacement work. Reach out for a free, no-pressure estimate and get a clear answer on whether your home needs a simple corner repair or a broader siding fix.