
The morning after a hailstorm, you step outside and see leaves, small stones, and roof granules scattered across the driveway. The gutters have dents, a window screen is torn, and you can't tell whether the roof has real damage or just looks dirty. Before you call your insurer or agree to a replacement, you need to answer a harder question: will a hail damage roof insurance claim produce enough value to justify the deductible, documentation, and repair process?
A worthwhile claim usually depends on more than hail reaching your neighborhood. Roof age, functional damage, policy terms, deductible size, adjuster findings, and the quality of your evidence all affect the result. The roof is usually the main loss location. One major insurance-data study found that 6,490 of 6,697 policies with claims, or 97%, were roofing-related, while more than 90% of claim dollars went toward roofing damage, as reported in the Journal of Weather, Climate, and Society study.
Table of Contents
- What to Do After Hail Hits Your Home
- How to Identify Roof Hail Damage
- How to Document Hail Damage Before Filing
- How to File and Track Your Roof Claim
- How to Work With the Insurance Adjuster
- How to Coordinate Roof Repairs With a Contractor
- A Practical Hail Claim Checklist
What to Do After Hail Hits Your Home
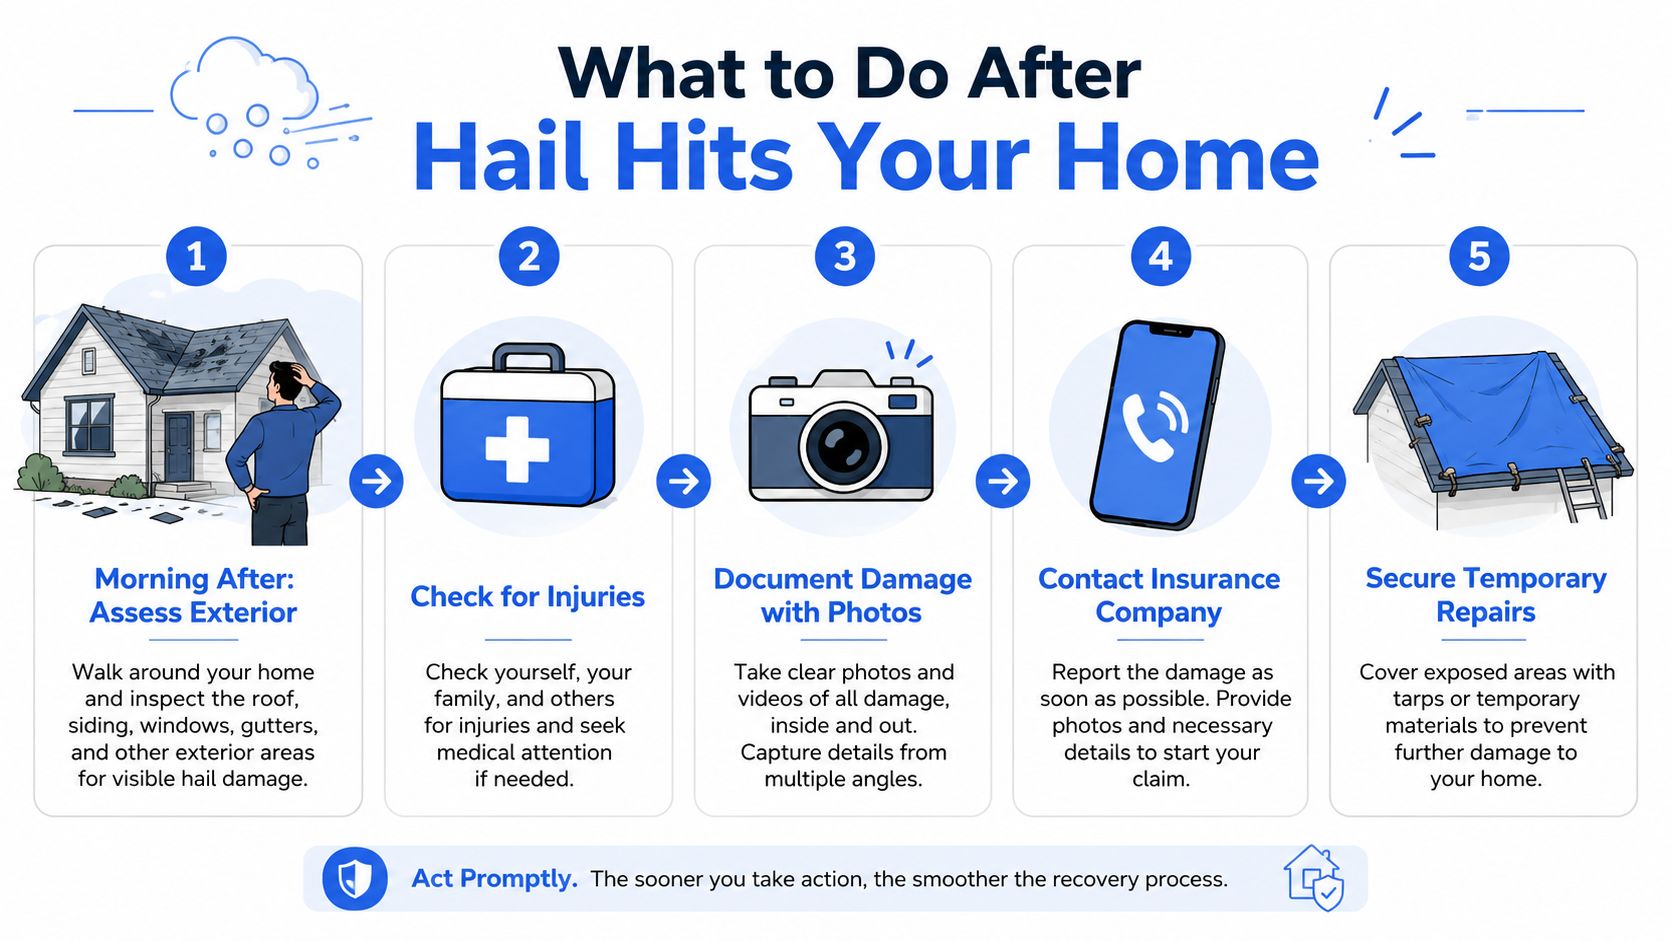
Start with safety, not the roof. Walk the property from the ground and stay away from downed power lines, broken glass, unstable tree limbs, and standing water near electrical equipment. Don't climb onto a wet, steep, or visibly damaged roof. Hail can loosen shingles and create fragile areas that aren't safe to walk on.
Check the ceilings, attic access, and upper-floor rooms for fresh stains, dripping water, or damp insulation. Move furniture and belongings away from active leaks, place containers under drips, and use temporary protection only if you can do so safely. A tarp or interior bucket limits secondary damage, but it doesn't establish what caused the loss.
Build the storm record first
Write down the apparent storm date and approximate time while the details are fresh. Save local weather reports, take phone photos of hail or debris, and preserve the original files with their timestamps. The hail claim documentation workflow from RoofVISTA recommends photographing the full roof from several angles, recording close-ups of impact points, and capturing collateral marks on gutters, screens, HVAC equipment, and siding.
Don't scrape granules from gutters, pull off shingles, or make permanent repairs before documenting the condition. Those changes can make it harder to show what existed immediately after the storm. If water is entering the home, arrange temporary mitigation and keep receipts, photographs, and contractor notes.
Get an inspection before making assumptions
A ground-level look can't confirm whether shingles are bruised, tabs are fractured, or flashing has been displaced. Contact a qualified roofing contractor for an on-site inspection and ask for photographs, a written condition report, and an honest opinion about whether the damage appears functional, cosmetic, pre-existing, or repairable.
That inspection doesn't guarantee claim approval. It gives you a technical record before the insurer's adjuster arrives, which is far more useful than telling the claims representative that “the whole neighborhood got hit.”
How to Identify Roof Hail Damage
Hail damage on asphalt shingles often appears as localized impact marks, not uniform aging. Look for circular bruises where the shingle surface feels soft or depressed, exposed dark mat where granules have been knocked away, concentrated granule loss, and fractured or creased tabs. A shingle can look intact from the ground while its weathering surface has been compromised.
Normal aging tends to show broader, more consistent wear. Granules may thin across exposed slopes, edges can curl, and surfaces may become brittle without distinct impact points. Wind can create lifted or missing shingles, but hail typically leaves impact evidence on the roof surface and nearby soft metal.
| Indicator | Likely Hail Damage | Likely Normal Roof Wear |
|---|---|---|
| Surface marks | Round bruises or localized depressions | Broad fading, dryness, or general brittleness |
| Granules | Concentrated loss at impact points | Gradual loss across exposed areas |
| Shingle tabs | Fractures, creases, or impact-related breaks | Curling, cracking, or deterioration along older edges |
| Metal components | Fresh dents on vents, flashing, or gutters | Corrosion, oxidation, or long-term weathering |
| Interior evidence | New stains or leaks after the storm | Older staining with no recent change |
Functional damage matters more than appearance
An insurer may distinguish between cosmetic marks and damage that affects the roof's ability to protect the structure. Cracked shingles, displaced flashing, dented vents, torn underlayment, and openings around penetrations deserve close attention because they can create water-entry paths or weaken the roof assembly.
Collateral evidence supports the storm connection. Check screens, siding, gutters, downspouts, patio furniture, skylights, and the outdoor air-conditioning condenser. Dented condenser fins don't prove roof damage by themselves, but they help establish the direction and severity of the event when combined with roof findings.
Practical rule: If you can see collateral hail marks but can't safely inspect the roof, schedule a professional inspection. Hidden bruising and subtle impact damage can be missed from the driveway, especially on shaded or less visible slopes.
A contractor should inspect every roof slope, flashing transition, vent, ridge cap, skylight, and accessible attic area. Don't accept a quick glance from a ladder as a complete assessment. The question isn't whether the roof looks old. It's whether the storm caused identifiable damage beyond ordinary wear.
How to Document Hail Damage Before Filing
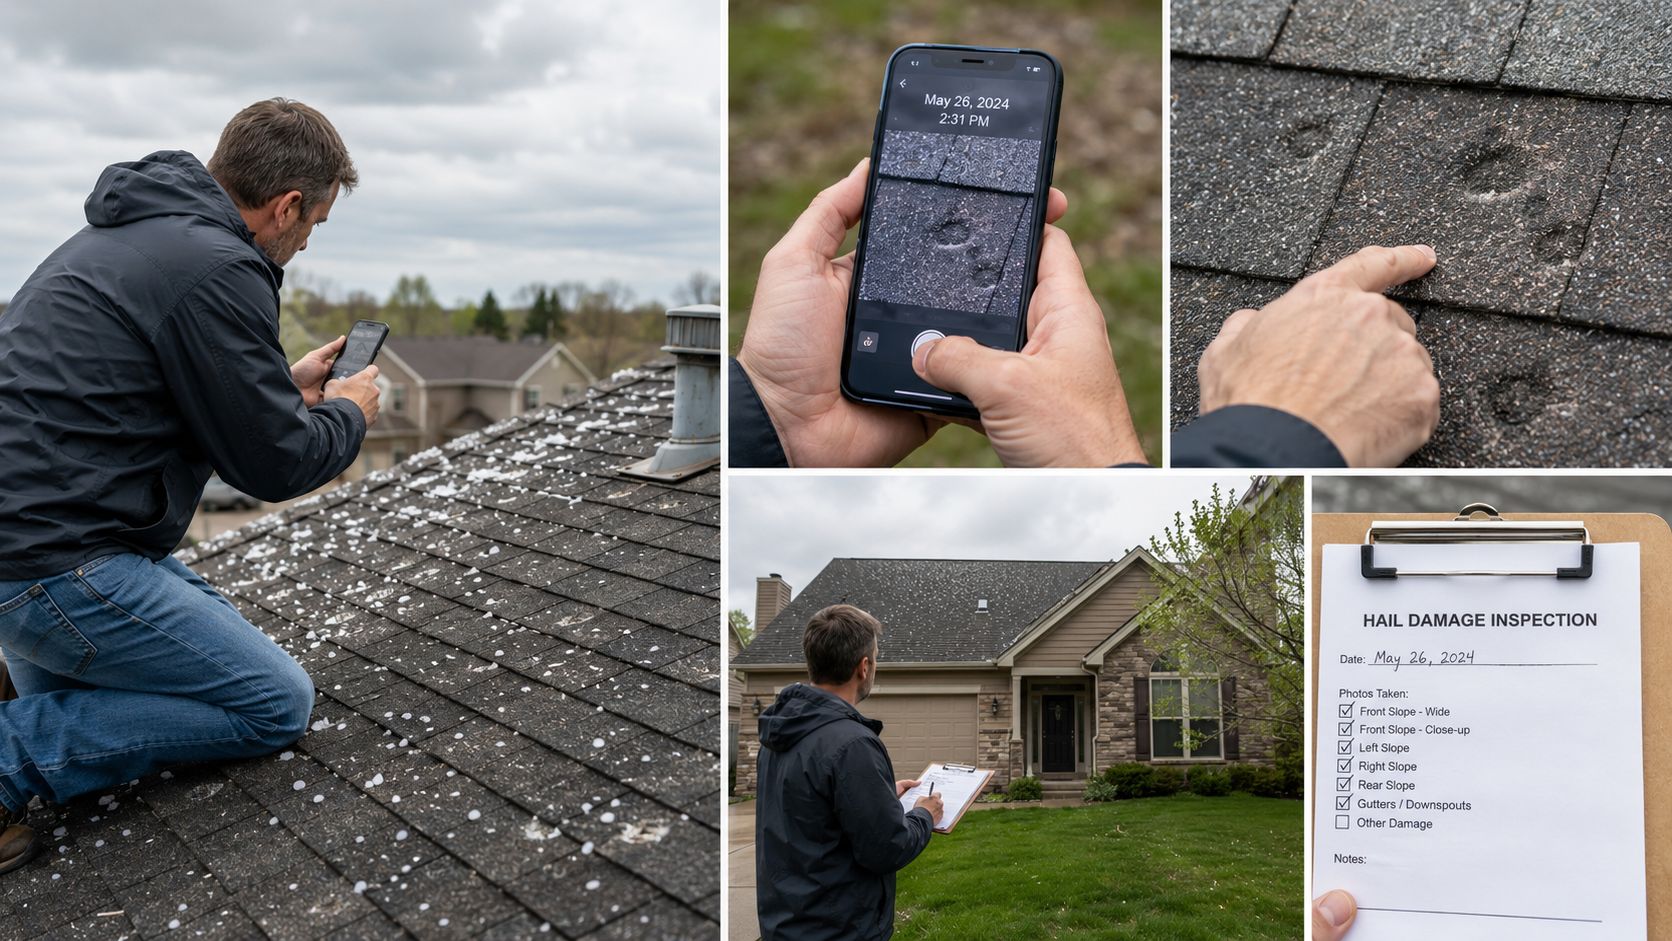
Good documentation connects four things: the storm, the location, the condition, and the repair scope. Start with wide, dated photographs from the ground. Photograph each visible roof slope, the elevations of the home, nearby structures, vehicles, fences, and exterior equipment. Wide images establish context, while close-ups show the alleged impact.
Take close-ups of suspected bruises, exposed mat, fractured tabs, displaced flashing, damaged vents, and granule accumulation. Don't rely on edited images or messaging-app copies that strip metadata. Keep the originals, back them up to cloud storage, and create a folder organized by date and area of the property.
Interior evidence belongs in the same packet. Photograph ceiling stains, wet drywall, drips, damaged insulation, and the location directly below the suspected roof area. Record when the leak appeared and whether it changed after later rainfall. Save weather reports that identify hail activity, the storm date, and the local property area.
Turn inspection findings into a claim packet
Ask the contractor for a photo report that labels each roof slope and identifies the observed condition. A chalk-marked roof diagram can show where impact points were found, while an itemized estimate explains what needs repair or replacement and why.
Useful file contents include:
- Storm record: Date, approximate time, local weather documentation, and photographs of hail or debris.
- Exterior evidence: Roof slopes, gutters, vents, siding, screens, HVAC equipment, and other collateral areas.
- Interior evidence: Stains, active leaks, damaged ceilings, attic conditions, and temporary mitigation.
- Professional report: Inspection findings, labeled photographs, damage diagram, and repair recommendations.
- Cost records: Itemized estimate, temporary repair invoices, receipts, and prior roof information if available.
Keep one master folder rather than scattering evidence across text messages and email threads. A preventive maintenance record can also help separate storm damage from prior deterioration, so preserve relevant roof maintenance documentation with the claim materials.
Organize the packet before the first insurer call. You may still add documents later, but starting with a coherent record prevents a common problem: filing a claim based on a vague impression and trying to reconstruct the facts after the adjuster has already inspected.
How to File and Track Your Roof Claim
A roof can show hail marks and still produce a poor claim outcome if the covered damage does not exceed your deductible. Start by calling the insurer's claims line with the storm date, observed damage, any active leak, and emergency protection already completed. Request the claim number, assigned adjuster's contact information, required forms, and preferred method for submitting photographs and estimates.
Read the declarations page and relevant policy sections before discussing settlement. Confirm dwelling coverage, wind and hail coverage, exclusions, any roof schedule or limitation, the deductible, and whether the roof is settled at actual cash value or replacement cost value. Your neighbor's result does not establish your coverage.
Decide whether the economics make sense
Compare the likely covered repair or replacement scope with the deductible. Also account for costs the policy may not pay, including upgrades, uncovered code-related work, and matching improvements beyond the damaged area. Functional damage matters more than a few cosmetic marks. If the roof remains watertight and the documented damage falls near the deductible, filing may create work without a meaningful payment.
Wind and hail deductibles can exceed a standard home deductible. They are often set at 1% or 2% of dwelling coverage, as explained in AmeriGuard's wind and hail deductible guide. A home with $300,000 in dwelling coverage would have a $3,000 deductible at 1%. Use your declarations page to calculate your threshold, not an online estimate.
| Deductible Type | Typical Amount | Effect on Claim | Best Use Case |
|---|---|---|---|
| Flat dollar | A stated dollar amount | Subtracts the listed amount from covered damage | Clear losses where the covered scope exceeds the deductible |
| Percentage wind or hail | Often 1% or 2% of dwelling coverage | Can create substantial out-of-pocket exposure | Larger functional losses with documented scope |
| 2% wind or hail | 2% of dwelling coverage | May make minor repairs poor claim candidates | Claims where repair or replacement clearly exceeds the deductible |
Read ACV and RCV carefully
Actual Cash Value, or ACV, pays replacement cost minus depreciation for age and condition. Replacement Cost Value, or RCV, commonly pays in stages. The initial payment reflects ACV, while recoverable depreciation is released after covered repairs are completed and invoices are submitted. The National Association of Insurance Commissioners explains the ACV and RCV distinction.
Ask whether depreciation is recoverable, non-recoverable, or limited by roof age. Older roofs can receive more depreciation under some policies. SGI CANADA describes depreciation beginning at age 16 for certain hail or wind claims, with listed annual rates of 10% for Class 1 to 3 asphalt or fiberglass shingles and 7% for Class 4 or architectural shingles after year 15. That example is not your policy. It shows why roof age and exact wording affect the settlement.
Track every call, email, inspection date, document request, and payment. Keep adjuster notes and the carrier's estimate together. When the carrier issues its scope, compare each line with the contractor's estimate. Ask about missing roof slopes, flashing, ventilation, disposal, and withheld depreciation. Coordinate those questions before authorizing repairs, so the contractor's work matches the approved scope or any documented revision.
How to Work With the Insurance Adjuster
Treat the adjuster's visit as a technical inspection, not a confrontation. The adjuster may walk the property, inspect accessible attic areas, examine roof surfaces, use chalk or tape to mark suspected damage, and photograph the findings. Be present if possible, and have your contractor available to explain roof-system components without turning the appointment into an argument.
Take parallel photographs of the areas the adjuster examines. Ask which damage criteria the adjuster is applying and whether the report distinguishes hail impact from age, wind, installation defects, or prior damage. Request a copy of the field report and the carrier's estimate when available.
Keep disagreements precise
If the adjuster misses soft-metal dents, bruised shingles, damaged gutters, or vent impacts, don't say only that the inspection was wrong. Identify the roof slope, component, photograph, and reason you believe the item is storm-related. A labeled contractor report gives the carrier something concrete to review.
The roof's age can create legitimate disagreement. Older shingles may contain both storm damage and pre-existing wear. Your contractor should separate those conditions instead of presenting every defect as hail damage. That credibility matters when the carrier evaluates causation and repairability.
A professional disagreement is stronger than an angry accusation. Ask for the carrier's written position, then answer it with photographs, measurements, policy language, and a clearly itemized scope.
If the report omits material damage, submit a formal written rebuttal with supporting documents. Request a reinspection when the first visit was incomplete or the evidence wasn't considered. If the dispute remains substantial, review the policy's appraisal or dispute-resolution provisions and consider whether a licensed public adjuster or insurance attorney fits the situation.
A public adjuster can help evaluate the claim, but fees and contractual terms matter. Read the agreement before signing and understand what services are included. Do not let a contractor promise approval or pressure you to exaggerate damage. For more detail on preparing for the site visit, review this guide to working with an insurance adjuster.
How to Coordinate Roof Repairs With a Contractor
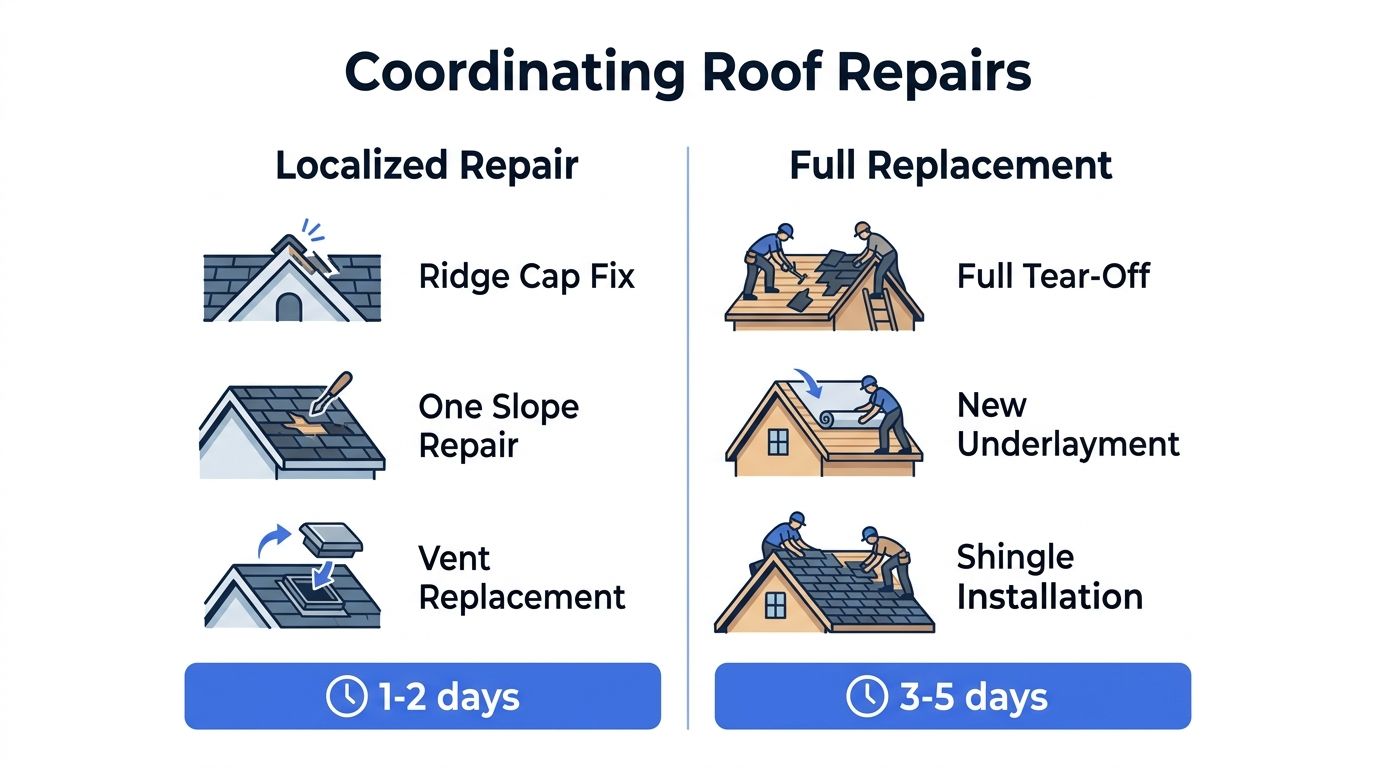
A partial repair and a full replacement are different projects, not smaller and larger versions of the same job. Suppose the inspection finds a damaged ridge cap, a few affected vents, and a repairable section on one slope. The estimate should address those specific components, confirm whether matching shingles are available, and explain how the repair will preserve water-shedding performance.
A full replacement requires a system-wide scope. It may include tear-off, underlayment, flashing, drip edge, vents, ridge materials, new shingles, and disposal. The contractor should inspect the deck and explain how concealed conditions will be handled if damaged materials are removed.
Match the scope to the roof
A localized repair can be sensible when the damage is limited and matching shingles, caps, and flashing can be sourced. If the existing material is discontinued or weathered, a repair may create an obvious mismatch and may not restore the roof uniformly. Ask how the repair affects the manufacturer's warranty and whether the contractor can document the installed materials.
For replacement, verify the underlayment condition, ventilation plan, flashing treatment, permit requirements, and manufacturer installation requirements. Don't accept an estimate that says “replace roof” without listing the work.
A written estimate should separately identify:
- Tear-off and preparation: Existing layers, protection, and cleanup.
- Roof assembly: Underlayment, ice and water protection where applicable, shingles, ridge materials, and ventilation.
- Metalwork: Step flashing, wall flashing, chimney flashing, drip edge, and vent flashings.
- Disposal: Containers, hauling, magnetic cleanup, and final debris removal.
- Supplements: Hidden damage or omitted items discovered during approved work.
Choose a contractor who can show licensing, insurance, local references, and relevant hail-claim experience. Use this roofing contractor selection guide before signing.
Protect the payment sequence
Avoid large upfront deposits and read every contract before authorizing work. Be especially careful with assignment-of-benefits language, which can transfer control of insurance payments or claim rights. You should understand who communicates with the carrier and who receives each payment.
The common replacement-cost sequence is an initial ACV payment, construction, submission of completion documents and invoices, then a recoverable depreciation payment if the policy provides it. The final invoice should reconcile approved work, supplements, deductible responsibility, and any homeowner-selected upgrades.
A contractor may identify items missing from the carrier's estimate. Submit supplements with photographs and line-item explanations before the work reaches that stage whenever possible. Don't assume the carrier must pay every requested item, and don't let anyone begin work on disputed scope without a clear written agreement.
A Practical Hail Claim Checklist
Use this list as a working claim file, not a substitute for reading your policy.
Immediate response
- Protect people: Avoid downed lines, broken glass, unstable surfaces, and wet or damaged roofs.
- Check the interior: Photograph stains, drips, damp areas, and damaged belongings.
- Record the event: Save the storm date, approximate time, local weather reports, and original phone photos.
- Prevent further damage: Arrange safe temporary protection and keep every receipt.
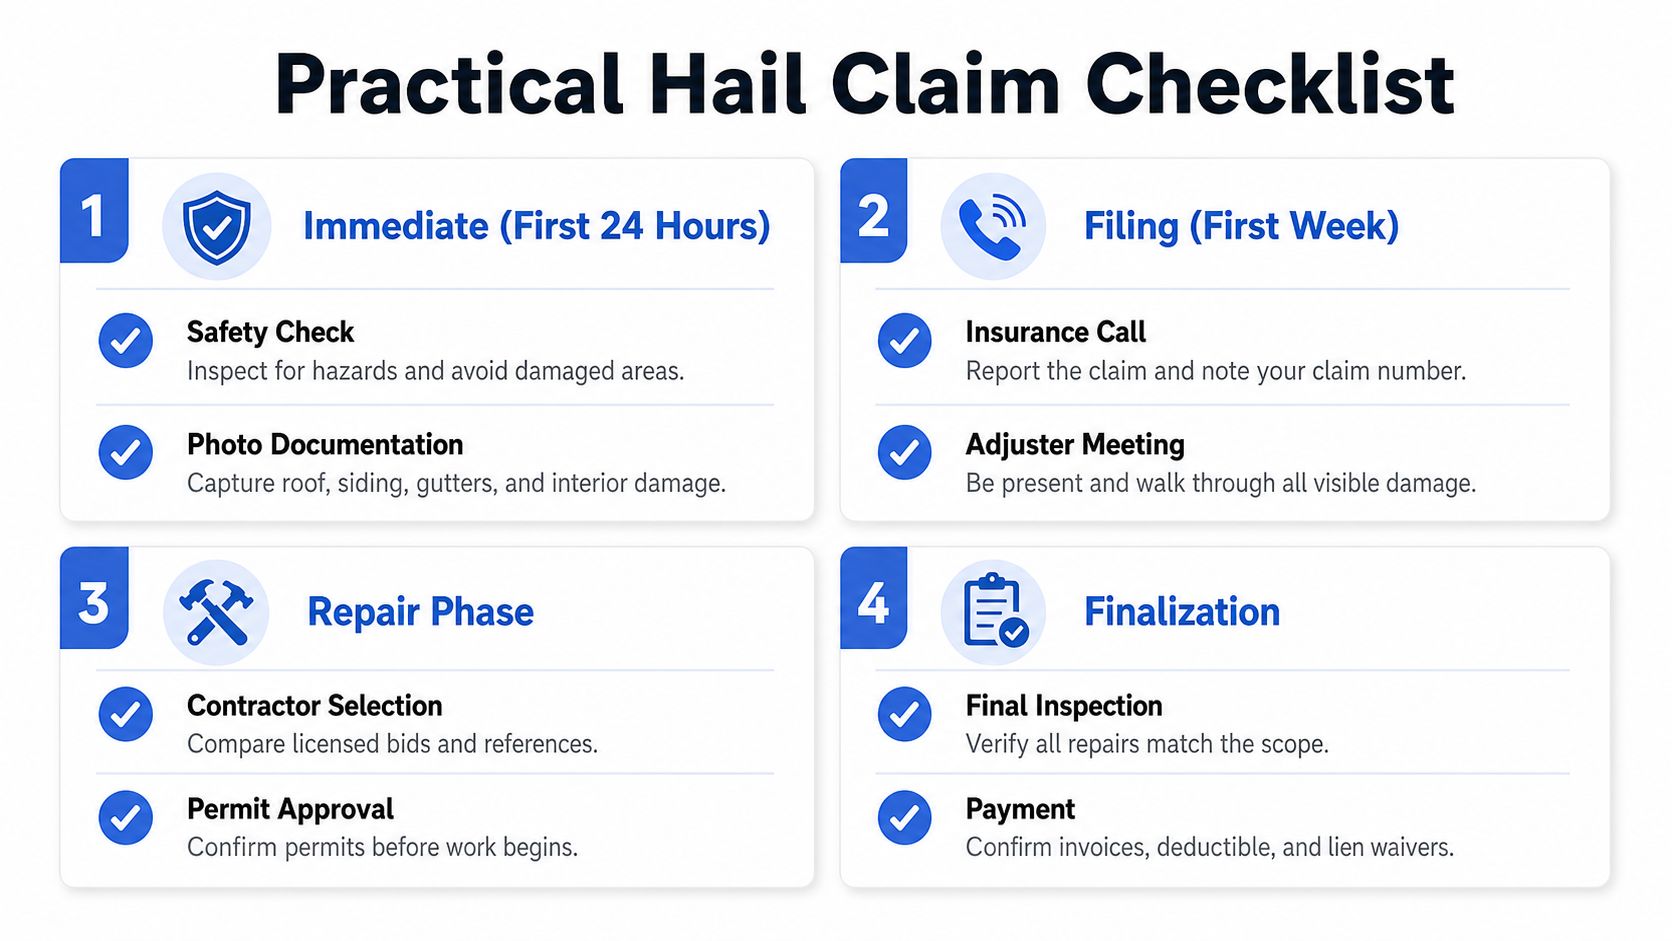
Inspection and filing
- Trigger a professional inspection: Schedule one when collateral marks exist, leaks appear, or the roof can't be safely checked from the ground.
- Assemble the packet: Include roof-slope photos, close-ups, collateral evidence, interior images, the contractor report, damage diagram, and itemized estimate.
- Review the policy: Confirm the wind and hail deductible, roof age provisions, exclusions, ACV or RCV terms, and notice requirements.
- Open and track the claim: Get the claim number, save correspondence, log calls, and follow up on each milestone.
Adjuster and repair decisions
- Attend the inspection: Take parallel photographs and ask which criteria the adjuster is applying.
- Challenge omissions with evidence: Identify the exact slope or component and submit a written rebuttal if needed.
- Screen the contractor: Verify licensing, insurance, references, contract terms, permits, and scope detail.
- Reconcile payment: Compare the carrier's estimate with the contractor's scope, confirm supplements, and verify withheld depreciation before final payment.
Pause when an estimate contains unexplained line items, depreciation is withheld without a clear policy basis, or a contractor pressures you to sign an assignment-of-benefits agreement.
Ask three questions before filing or authorizing work: Is the damage functional? Does the likely covered repair exceed the deductible and reasonable non-covered upgrades? Is the contractor's scope aligned with the carrier's estimate? If the answers are clear, proceed with organized documentation. If they aren't, obtain clarification before committing.
For Columbus and central Ohio homeowners, HIBCO ROOF LLC provides storm and hail inspections, damage documentation, roof repairs, full replacements, and assistance during the insurance process. Visit HIBCO ROOF LLC to request a no-pressure written estimate and discuss your roof's condition before you file or sign a repair contract.