
A hailstorm can leave a Columbus-area homeowner with a roof that looks mostly normal from the driveway, a ceiling stain that wasn't there yesterday, and an insurance estimate that doesn't cover what the contractor finds. The difficult part usually isn't opening the claim. It's proving, clearly and in order, what happened, which roof surfaces were affected, what emergency work was necessary, and what it will take to restore the home.
I've seen homeowners weaken their position by waiting, relying on a few phone photos, or assuming the adjuster's first estimate is the final scope. A strong roof replacement insurance claim works more like a documentation case. You build slope-by-slope evidence before the inspection, preserve the storm timeline, and compare every line item against the actual roof system.
In the United States, roof repair and replacement costs reached nearly $31 billion in 2024, up almost 30% since 2022, while roof-related line items represented more than a quarter of residential claim value, according to Verisk's analysis of U.S. roof claims. That scale helps explain why carriers scrutinize roof losses closely. Your job isn't to exaggerate damage. It's to make the legitimate scope difficult to overlook.
Table of Contents
- The First 72 Hours After the Storm
- What Your Policy Actually Covers
- Building a Documentation Package Adjusters Cannot Ignore
- Working With the Adjuster and Your Contractor
- Why Most Claims Are Underpaid Rather Than Denied
- After the First Check Disputes and Supplements
- Claim Checklist and Common Homeowner Questions
The First 72 Hours After the Storm
A Plain City homeowner once waited two weeks after a June hailstorm before calling anyone. She had moved the insurance call below cleanup, work, and family obligations. By the time she opened the claim, the ceiling stain had spread, wet insulation had stayed in place, and the original condition of the roof was harder to establish.
That delay didn't create the hail damage, but it created questions. Was the interior staining new? Had the roof been protected? Were damaged materials still available to inspect? Those questions can distract from the covered event.
A better first 72 hours starts with safety and preservation. Don't climb onto a wet or unstable roof. From the ground, photograph every elevation, fallen debris, missing shingles, damaged gutters, and visible openings. If water is entering, arrange professional emergency protection the same day and photograph wet ceilings or walls before cleanup begins.
What to preserve immediately
- Active leaks: Use buckets or move belongings away from water, then arrange temporary tarping or other emergency protection.
- Interior evidence: Photograph stains, damp insulation, damaged drywall, and affected flooring before removal. Place small damaged pieces in a labeled bag if they're removed for safety.
- Emergency receipts: Keep invoices for tarping, plywood, cleanup, drying equipment, insulation removal, and dumpster rental.
- Claim records: Call the carrier, open a claim, record the claim number, and save the date, time, and representative's name.
- Policy documents: Request the full policy, declarations page, and any wind or hail endorsement. The declarations page alone may not show every limitation.
The carrier's report date matters because it establishes when you notified the insurer. It doesn't decide coverage by itself, but prompt notice makes it easier to connect the condition to a defined storm and demonstrate that you took reasonable steps to prevent further damage.
For a broader explanation of the filing sequence, the roof insurance claim process guide can help you organize the first call, inspection, estimate, and follow-up. Homeowners dealing with a different regional policy environment can also compare the West Texas roof claim step-by-step guide, especially for its practical filing sequence.
Practical rule: Photograph first, protect second, remove only what creates a safety or health issue, and keep the paper trail for everything.
Don't wait for a ceiling stain before checking the attic. A storm claim gets harder when temporary repairs, drying, and cleanup erase the condition that originally connected the exterior damage to the interior loss.
What Your Policy Actually Covers
Your policy decides the payment before the adjuster arrives. Four mechanics deserve close attention: replacement cost value, actual cash value, the applicable deductible, and exclusions or limitations affecting the roof materials and scope.
Replacement cost value, or RCV, generally pays the cost to repair or replace damaged property with materials of similar kind and quality without subtracting depreciation. Actual cash value, or ACV, subtracts depreciation based on age and condition, leaving you responsible for more of the replacement cost. The Texas Department of Insurance explanation of RCV and ACV describes that fundamental distinction.
Suppose the covered replacement cost is $14,000. Under RCV, the carrier may calculate the covered amount, subtract the deductible, and withhold recoverable depreciation until the work is completed and the final invoice is submitted. Under ACV, the carrier subtracts depreciation immediately, then applies the deductible. The same roof can therefore produce very different checks under two policies.
| Policy Term | What It Means | Effect on a $14,000 Claim |
|---|---|---|
| RCV | Pays replacement cost for similar materials, subject to policy conditions | More of the documented replacement cost may be available, less the deductible, with some depreciation potentially released later |
| ACV | Pays replacement cost minus depreciation for age and condition | The initial payment is reduced before the deductible is applied |
| Wind or hail deductible | A separate deductible may apply to the storm peril | The amount you pay can be substantially higher than the standard deductible |
| Cosmetic exclusion | Some policies exclude appearance-only damage, particularly for certain metal components | Dents may not qualify unless they affect function or the policy provides broader coverage |
| Matching or code limitation | The policy may limit payment for matching materials or upgrades | The carrier may scope a damaged section rather than the entire roof |
In central Ohio, homeowners often see percentage-based wind or hail deductibles ranging from 1% to 5% of the dwelling limit. A $7,500 deductible on a $300,000 policy can absorb a smaller loss entirely, even when hail damage is real. Check whether the declarations page lists a separate storm deductible and whether it applies to the whole dwelling limit.
The details that change the check
Look for cosmetic-damage exclusions on metal roofs, limitations for code-required upgrades, and matching language for discontinued or unavailable shingles. Matching is especially important on an older roof. A carrier may argue that one slope can be repaired, while the homeowner sees an obvious color or profile mismatch across the roof. Coverage for a full replacement or matching may depend on policy language and applicable state requirements.
A plain-language guide to actual cash value versus replacement cost is useful before you approve work. For another regional perspective on coverage questions, review this explanation of Front Range roof replacement coverage, then return to your own policy rather than assuming another state's rules apply in Ohio.
Depreciation and the deductible are separate reductions. Insurance guidance explains ACV as replacement cost minus depreciation, with the deductible applied as another reduction. An insurer's example shows a 10-year-old roof receiving a 40% depreciation deduction at 4% per year, though your policy's calculation may differ. Read the estimate line by line instead of judging the check by its total.
Building a Documentation Package Adjusters Cannot Ignore
The strongest file I see isn't the one with the most dramatic photograph. It's the one that lets an adjuster verify location, condition, timing, and scope without guessing.
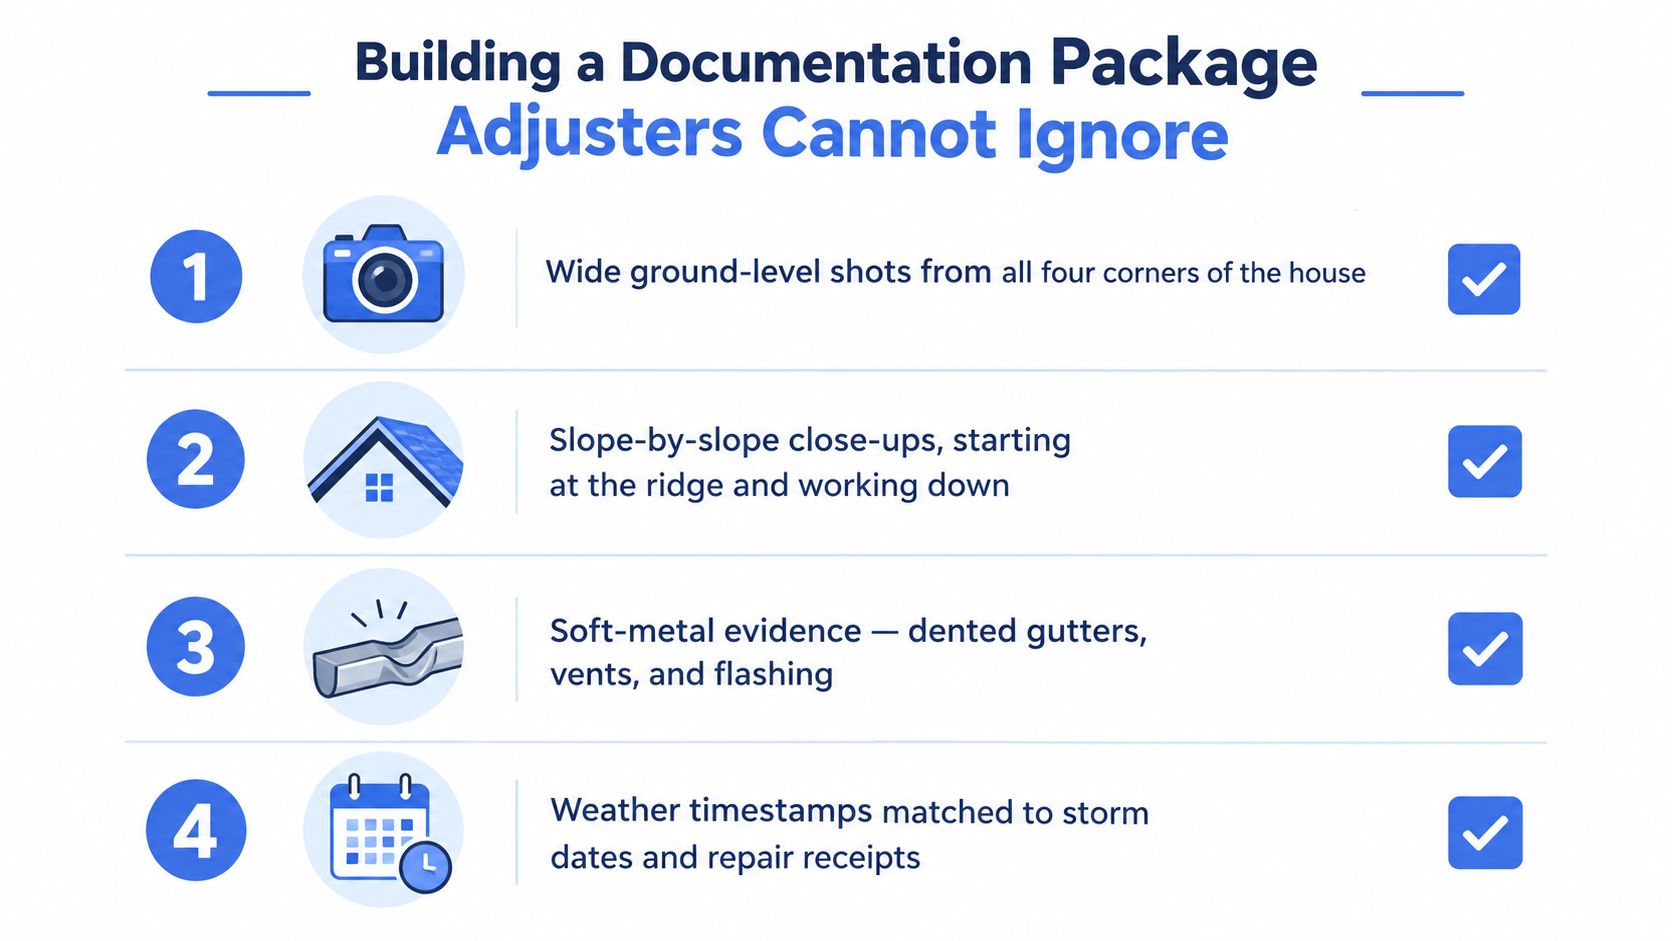
Start from the ground. Take wide photographs from all four corners of the house, then photograph each elevation and nearby structures such as a detached garage. Include enough of the building to identify where each close-up belongs. A close-up of a bruised shingle without context is weak evidence. The same bruise tied to the rear-left slope, a marked roof diagram, and a storm date is much easier to map.
Use a repeatable field routine
- Establish context: Photograph all four corners, each elevation, roof penetrations, detached structures, and interior rooms with visible effects.
- Work slope by slope: Start at the ridge and move downward. Use chalk to mark hail bruises, and include a ruler or familiar object for scale.
- Capture representative areas: A 10-by-10 test square can turn a vague statement about hail into an auditable count. Record where the square sits and repeat the method across roof planes.
- Preserve supporting damage: Photograph gutters, downspouts, vents, flashing, chimney metal, air-conditioning fins, window screens, and electric meter bases.
Soft-metal damage often provides some of the clearest evidence that hail struck the property. It can support the roof findings, but it doesn't replace roof-surface documentation. Photograph the item before straightening, cleaning, or replacing it.
A practical documentation target is roughly 5 to 10 context photos, 10 to 20 roof-overview photos, and 15 to 40 close-up damage photos, based on NRCIA's hail-damage inspection guidance. Those figures are a useful benchmark, not a substitute for coverage requirements. A complex roof may need more images, while a small repair may need fewer.
Match weather to the roof condition
Save NOAA storm reports, local weather alerts, and local news clips that show the event. Write down the storm date, approximate time, wind or hail observations, and when you first noticed the damage. Then place emergency receipts in the same chronological folder as the photos.
Keep a dated damage log and a notes file for every carrier call. Record who called, what they said, which documents they requested, and when you sent them. A roof inspection for an insurance claim should produce more than a verbal opinion. Ask for labeled photos, affected-slope identification, a written condition report, and a repair or replacement estimate.
The file should answer four questions: What happened, where is the damage, when was it documented, and what does restoration require?
Don't send a loose phone gallery and expect the adjuster to build the case for you. Create a numbered folder, a roof sketch, a photo index, and a written timeline before the inspection.
Working With the Adjuster and Your Contractor
The adjuster's visit is not a casual walk around the house. The adjuster is comparing observed conditions with a claim estimate, policy terms, and estimating software. A homeowner who arrives with loose photographs on a phone makes the adjuster sort the evidence. A homeowner with a printed, indexed package makes the comparison faster and more precise.
Schedule the appointment when there's good daylight. Clear ladder access, open the attic, move vehicles away from the work area, and make sure the adjuster can see interior damage. Choose one household point of contact. Three family members giving three versions of when the leak started can create confusion even when everyone is acting in good faith.
What the adjuster is checking
The adjuster may inspect each roof plane for functional damage, distinguish cosmetic conditions from damage that affects water-shedding performance, test shingle mats with a lift test, and count damaged vents, flashing points, and other roof components. The inspection may also include gutters, downspouts, siding, screens, air-conditioning fins, ceilings, and attic framing.
Bring the evidence in the order the adjuster can use it:
- Indexed slope photographs: Label the front, rear, left, and right planes, plus detached structures.
- Soft-metal photographs: Identify each vent, gutter, flashing section, and other impact point.
- Weather confirmation: Place storm reports and local coverage beside the damage timeline.
- Emergency records: Include tarping, plywood, water mitigation, and cleanup receipts.
- Contractor scope: Separate observed damage from proposed work, and identify code or system requirements.
A contractor on site changes the quality of the conversation because roofing details get addressed while the roof is visible. The contractor can point out missed line items, explain why a repair may not restore the roof system, and identify code upgrades that may require separate consideration. The contractor shouldn't coach anyone to claim damage that isn't there. The useful role is technical translation, backed by photographs and measurements.
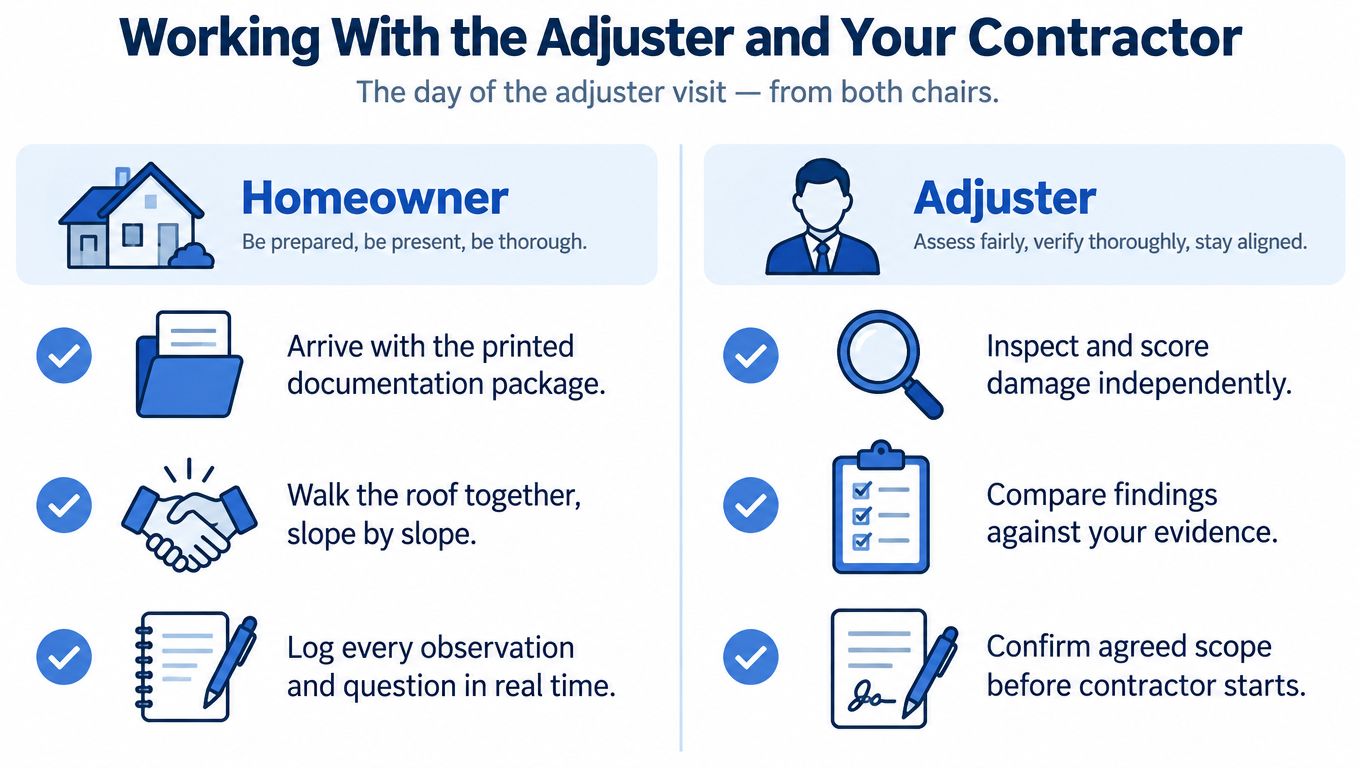
I've watched a short inspection become productive when the homeowner and contractor walked the roof in the same sequence as the photo index. The adjuster could compare each slope, ask about a marked impact, and address ancillary items without relying on memory afterward.
The meeting should end with clarity, not pressure. Ask which areas were accepted, which were questioned, what documents remain outstanding, and when the written estimate will arrive. Take notes in real time.
Why Most Claims Are Underpaid Rather Than Denied
A claim can receive approval and still leave enough of the roof unpaid to create a serious gap. Recent benchmark data from a 2026 roof-claim dataset shows 31% of hail-and-wind claims were approved for full replacement on the first pass, while 34% were approved but short-paid, 16% were limited to repair, 14% were denied, and 5% were withdrawn before a decision, as reported in the 2026 roof-claim outcomes report.
Those outcomes change the homeowner's strategy. A short-paid claim may have a coverage issue, but it may also reflect missing slopes, incomplete accessory counts, a low material allowance, or an estimate that does not match the existing roof system. The documentation package should make each gap visible before the claim is treated as settled.
| Outcome | Approximate Share of Claims | Typical Documentation Gap |
|---|---|---|
| Full replacement approval | 31% | The file clearly established storm timing, affected slopes, and replacement scope |
| Approved but short-paid | 34% | Missing rear slopes, detached structures, flashing, code items, or complete line-item pricing |
| Repair-only decision | 16% | Limited close-ups, no representative slope evidence, or insufficient proof that repair won't restore function |
| Denied claim | 14% | Late reporting, weak weather connection, missed inspection requirements, or evidence consistent with wear and maintenance |
| Withdrawn before decision | 5% | The homeowner or carrier ended the process before a coverage decision |
Underpayment often starts with an incomplete property record. A front slope may be photographed because it is visible from the driveway, while the rear slope, porch roof, or detached garage never enters the file. The estimate then reflects the evidence received rather than the full condition of the property.
Trace the outcome back to the evidence
A short-pay commonly follows an incomplete scope. Gutter sections, roof-to-wall flashing, ridge components, ventilation, and interior repairs may be omitted because nobody documented or discussed them clearly. Compare the carrier's estimate with a slope-by-slope contractor scope, then identify each difference by roof plane, material, quantity, or policy issue.
Repair-only decisions need evidence showing a broader, functional problem. A representative test square, chalk-marked bruises, soft-metal impacts, and a written explanation of why isolated repairs will not restore the roof give the carrier specific facts to evaluate. Photographs should show both the marked damage and its location on the roof sketch.
Denials call for a different review. Long-term deterioration, poor maintenance, improper installation, and prior hidden issues are commonly excluded, as explained in Progressive's guidance on roof-damage coverage. If roof age, prior leaks, or visible wear is disputed, keep those conditions separate from the storm evidence and provide maintenance records where available.
The FBI estimates that false or inflated roof-claim schemes cost insurers more than $1 billion annually, a figure cited in the 2026 roof-claim outcomes report. Accurate, itemized documentation protects the homeowner as well as the carrier. It shows which damage is present, where it is located, and why each requested line item belongs in the scope.
After the First Check Disputes and Supplements
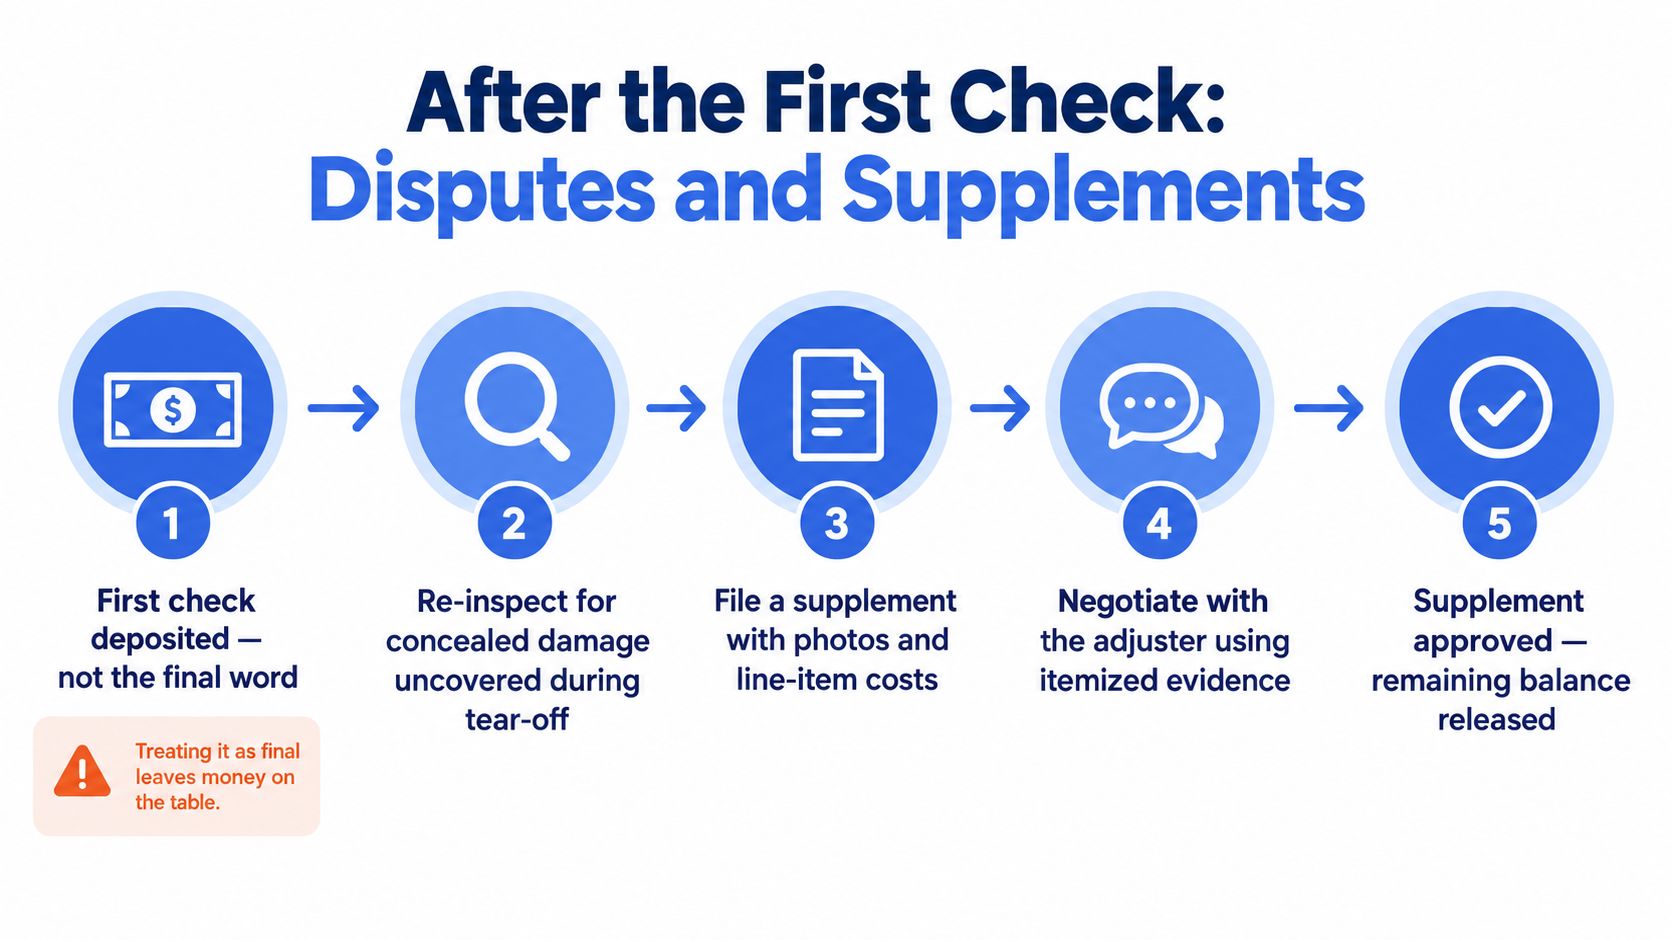
Depositing the first check doesn't necessarily close the file. It may represent the undisputed amount, the initial ACV payment, or an RCV payment with recoverable depreciation held back. Treating it as the final scope is how homeowners accept a partial roof decision without testing the estimate against the actual work.
The most common post-estimate disputes involve scope. The carrier may approve one slope while the contractor documents damage across all roof planes. It may price three-tab shingles when the home has laminated shingles, omit flashing or ventilation, or exclude code-required work that becomes visible during tear-off.
Build the rebuttal around line items
Start with a written comparison. Put the carrier's estimate beside the contractor's scope and identify each disagreement by roof plane, material, quantity, or policy issue.
- Partial scope: Attach photographs showing the omitted slope or component, with labels matching the roof sketch.
- Material mismatch: Document the existing shingle profile, color, manufacturer if known, and whether a matching product is reasonably available.
- Concealed damage: Photograph damaged decking, underlayment, flashing, or substrate during tear-off. Submit the images with itemized costs.
- Code requirements: Provide the applicable written requirement and explain which work is necessary to complete the replacement lawfully.
- Depreciation release: Submit the completion invoice and required proof of work when the policy allows recoverable depreciation.
Replacement-cost payments can arrive in stages. State insurance guidance explains that RCV settlements may include materials of similar quality, labor, permits, and inspections, while ACV coverage doesn't provide enough to fully replace the roof. Review Iowa's insurance guidance on roof replacement settlements for a clear illustration of why labor and project requirements matter in the calculation.
If the first estimate misses legitimate work, request a reinspection in writing and attach the evidence before the appointment. Keep the request factual. State what was observed, where it appears, what the original estimate omitted, and which document supports the addition.
Escalate in measured steps
A contractor's supplement should be specific, not a demand for a larger check. If the carrier disagrees, ask for the coverage position and estimate explanation in writing. The policy's appraisal clause may provide a formal path for resolving valuation disputes, but it isn't a substitute for understanding exclusions or causation. For a significant dispute, consider advice from a qualified public adjuster or attorney familiar with Ohio insurance law.
Florida provides a useful example of why payment records can matter. Florida law allows an insurer to limit a roof claim payment to ACV until it receives reasonable proof that the policyholder paid the roof deductible, with examples including a canceled check, money order receipt, credit card statement, or financing contract, as set out in Florida Statute 627.7011. Ohio homeowners must follow their own policy and applicable law, but the broader lesson is practical: retain proof of deductible payment and every project expense.
Claim Checklist and Common Homeowner Questions
A useful claim file follows the roof from its pre-storm condition through final payment. Keep the sequence simple enough that someone unfamiliar with roofing can understand it.
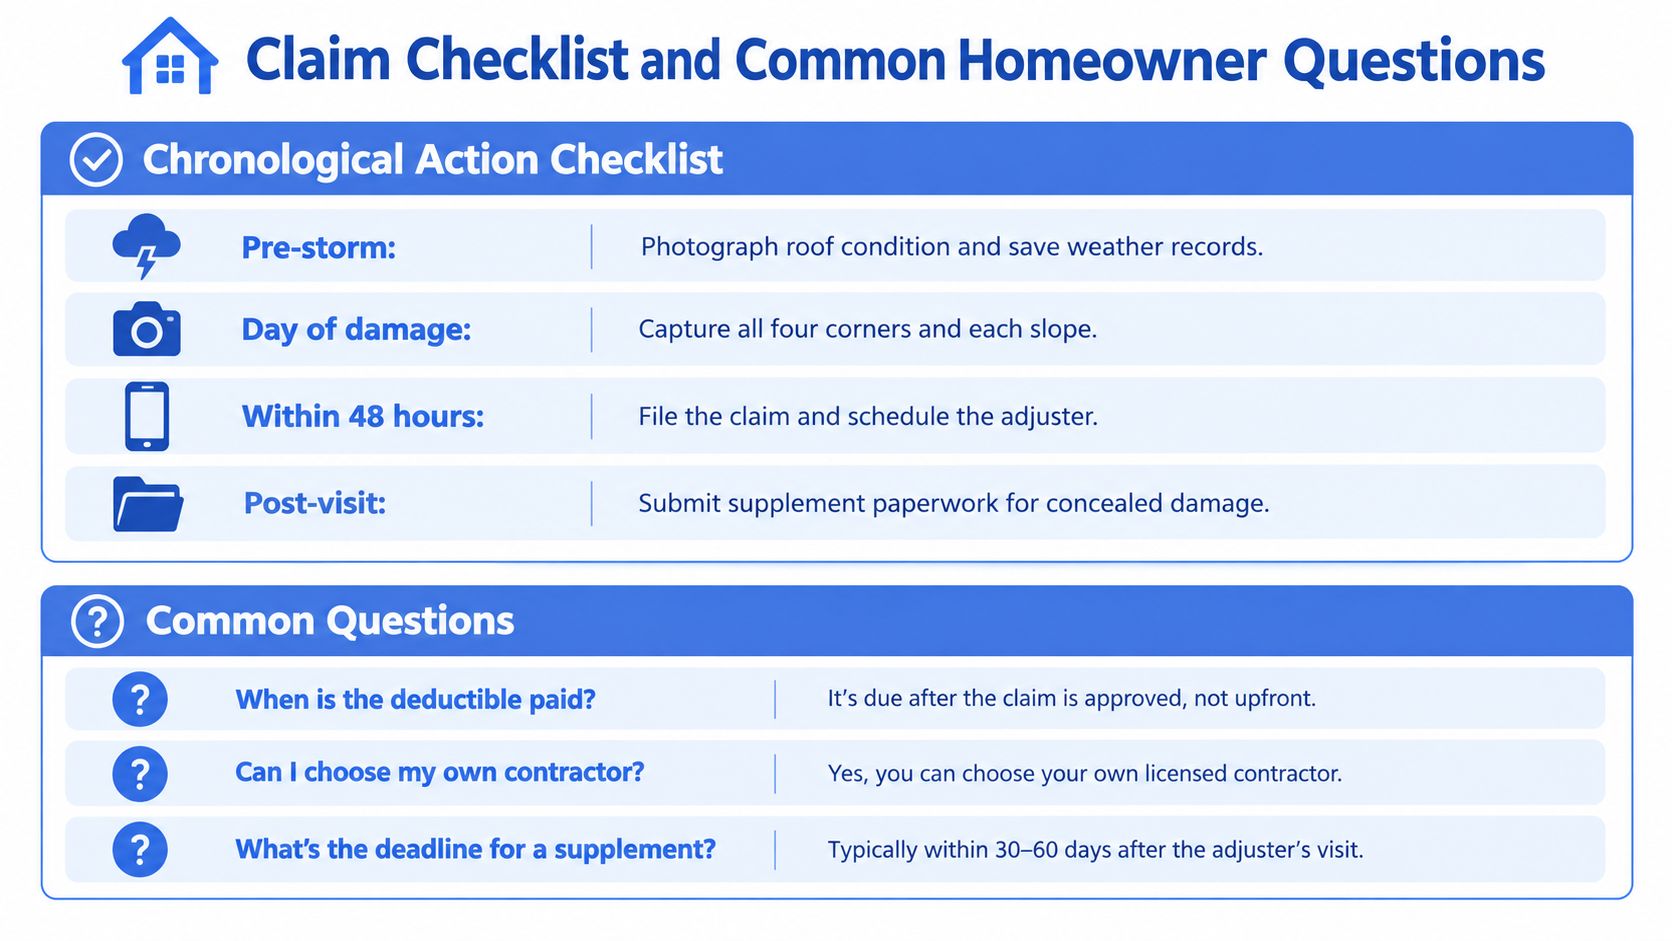
Chronological action checklist
- Before a storm: Photograph the roof, gutters, exterior elevations, attic, and ceilings. Save maintenance records and weather sources in a dedicated folder.
- Within the first 72 hours: Photograph the condition from the ground, preserve interior evidence, protect active leaks, save receipts, and contact the carrier.
- Before the adjuster visit: Obtain an independent inspection and organized scope. Label photos by slope and prepare a written timeline.
- During the inspection: Provide ladder and attic access, walk the roof with the adjuster and contractor when safe, and record open questions.
- After the estimate: Compare every line item with the documented scope. Request a written reinspection or submit a supplement for omitted work.
- At completion: Keep the contract, final invoice, permits, inspection records, warranty documents, and proof needed to release any withheld depreciation.
Common questions
Is RCV always better than ACV?
RCV generally provides more protection for a covered replacement because it doesn't deduct depreciation from the replacement-cost calculation, subject to the policy and completion requirements. ACV pays the depreciated value, so roof age and condition can leave a larger balance for the homeowner.
Why does my wind or hail deductible differ from my standard deductible?
Some policies assign a separate storm deductible, often calculated as a percentage of the dwelling limit rather than a flat amount. Pull out the declarations page and confirm which deductible applies to the reported peril.
How long does a claim take?
The timeline depends on carrier scheduling, weather, policy requirements, documentation quality, and whether the estimate needs a reinspection or supplement. Filing promptly helps preserve the storm connection, but final depreciation release may wait until the work is complete and the required invoice or completion documents are submitted.
What happens if my mortgage company is listed on the policy?
The lender may appear on the payment as a mortgagee and may require endorsement, review, or controlled disbursement before funds are released. Ask the carrier and lender exactly how they handle claim checks before depositing or scheduling work.
Can I choose my contractor?
Start with a contractor who can provide a written inspection, labeled photographs, an itemized scope, proof of insurance, and clear communication about supplements. Don't sign under pressure or accept a promise of guaranteed coverage.
For Columbus and central Ohio homeowners, HIBCO ROOF LLC provides roof inspections, storm-damage documentation, repair and replacement estimates, adjuster meeting support, and related exterior work including gutters, siding, windows, and skylights. Visit HIBCO ROOF LLC to request a free, no-pressure estimate and discuss the documentation needed for your claim.