A ceiling stain appears after a central Ohio thunderstorm, and the rain has already stopped. You can see where the water showed up inside, but not where it entered the roof. That gap is why a useful inspection looks beyond the shingles to the flashing, attic, decking, ventilation, and drainage.
Good roof inspection and repair starts with a diagnosis, not a quick patch or a replacement pitch. The aim is to identify the actual failure, understand what can be repaired, and document the roof's condition clearly enough to make informed decisions about the work and any insurance claim.
Table of Contents
- What a Professional Roof Inspection Actually Covers
- The Inside-Out Inspection Sequence
- Reading the Inspection Report Without the Jargon
- Repair or Replace and When the Math Is Not Simple
- Timeline and Process for Common Repairs and Replacements
- Estimates, Insurance Claims, and Getting Paid
- Putting It All Together and Your Next Steps
What a Professional Roof Inspection Actually Covers
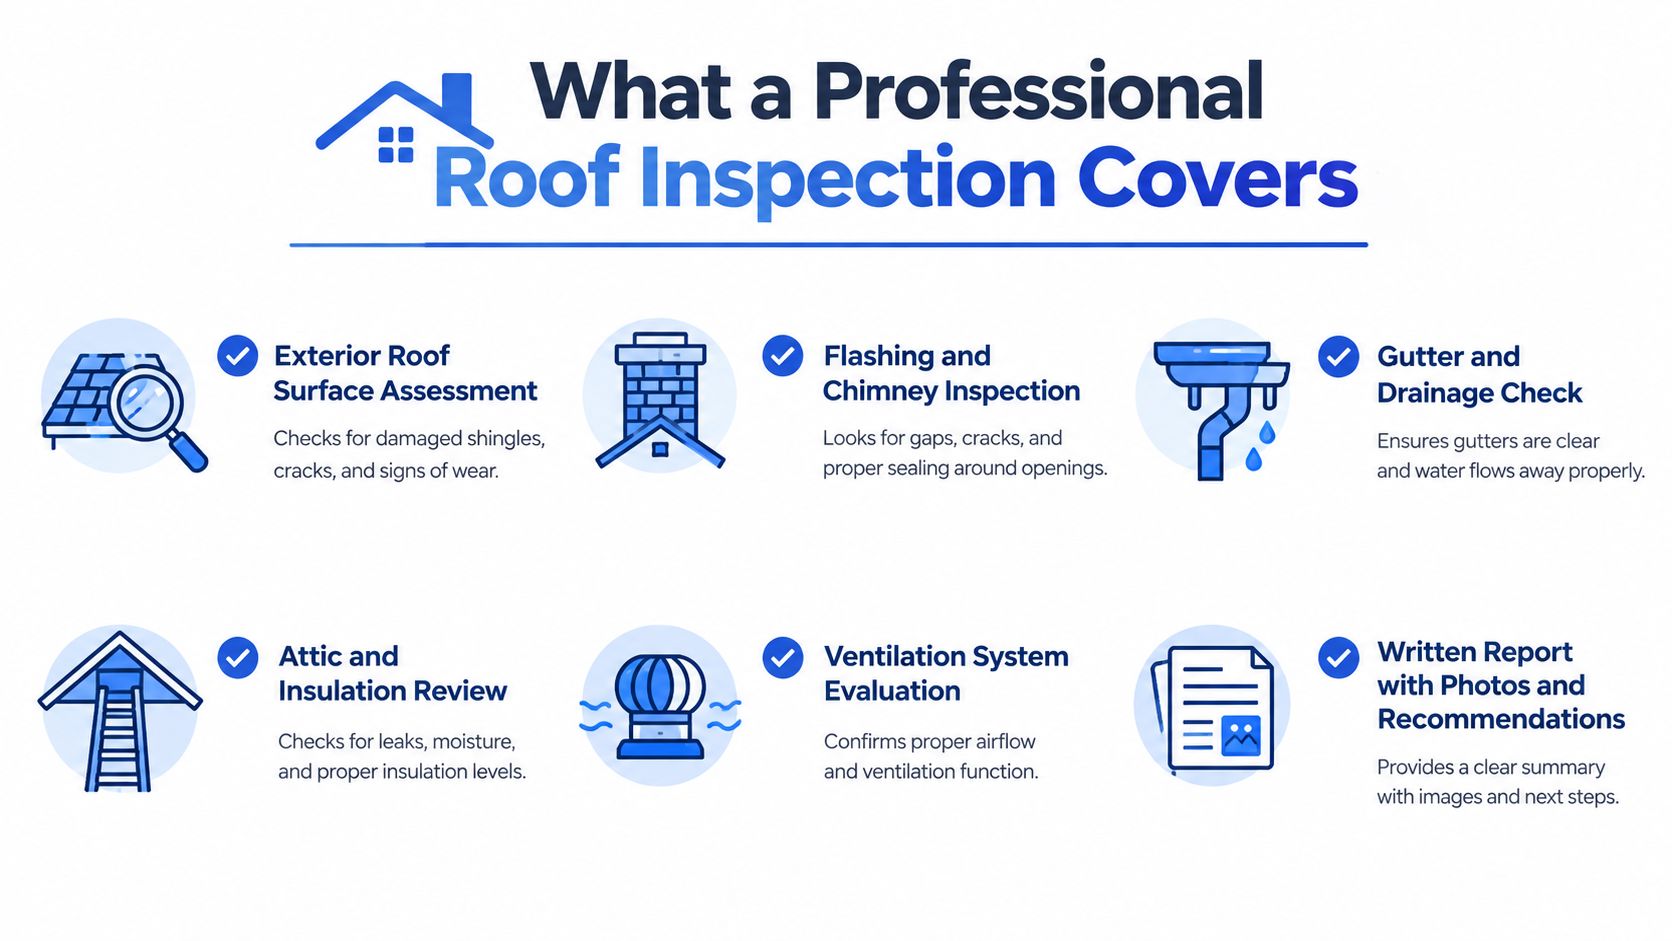
A homeowner may expect a contractor to climb up, photograph a few loose shingles, and return with a quote. A thorough inspection takes a wider view. A ceiling stain can point to a leak, but water may have traveled along a rafter from a failed pipe boot, valley, or roof-to-wall transition before dripping into the room.
Start with the whole roof system
On the exterior, the inspector evaluates shingles and other surface materials, then checks flashing at penetrations and roof-to-wall intersections. Valleys, chimney details, skylights, pipe boots, exposed fasteners, and shingle edges all deserve attention because water can enter where components meet, not just through a visibly damaged field shingle.
Drainage matters, too. The inspector should look for clogged or poorly pitched gutters, disconnected downspouts, and signs that runoff is collecting beside the home. The U.S. Department of Energy's Building America Solution Center recommends directing downspouts onto a grade sloping away from the house at least 5 feet from the foundation, or into an underground catchment system at least 10 feet away. Its guidance also recommends gutter slope of at least 1/16 inch per foot of run. These are useful reference points when evaluating drainage, not a substitute for checking the conditions around a particular home. DOE Building America guidance on gutters and downspouts
The inspection should also include the attic. Wet insulation, darkened sheathing, daylight, fungal growth, or blocked airflow can indicate a problem that roof photographs alone won't reveal. In central Ohio, ventilation, insulation, and roof details work together: attic heat can melt snow, which may refreeze at colder eaves and push water under shingles. Building America guidance emphasizes integrated flashing, eave protection, attic air sealing and insulation, and clear airflow paths from soffits toward ridge vents. Building America guidance on asphalt-shingle roofs
Ask for a system report: A useful written record identifies the roof plane and defect, includes dated photographs, notes attic and drainage observations, and separates urgent repairs from maintenance recommendations.
A quick reference to the Fort Worth roof leak checklist can help homeowners recognize the kinds of details a leak check should include, even though local roof conditions differ. For a plain-language look at the layers below shingles, see what goes under roof shingles. A report that only says “shingles are damaged” leaves important questions unanswered: where, how, and what else in the roof system may have failed?
The Inside-Out Inspection Sequence
A dependable leak investigation starts indoors and works outward. Water can move along rafters before it appears on a ceiling, so the stain marks where water became visible, not necessarily where it entered.
Follow the water trail
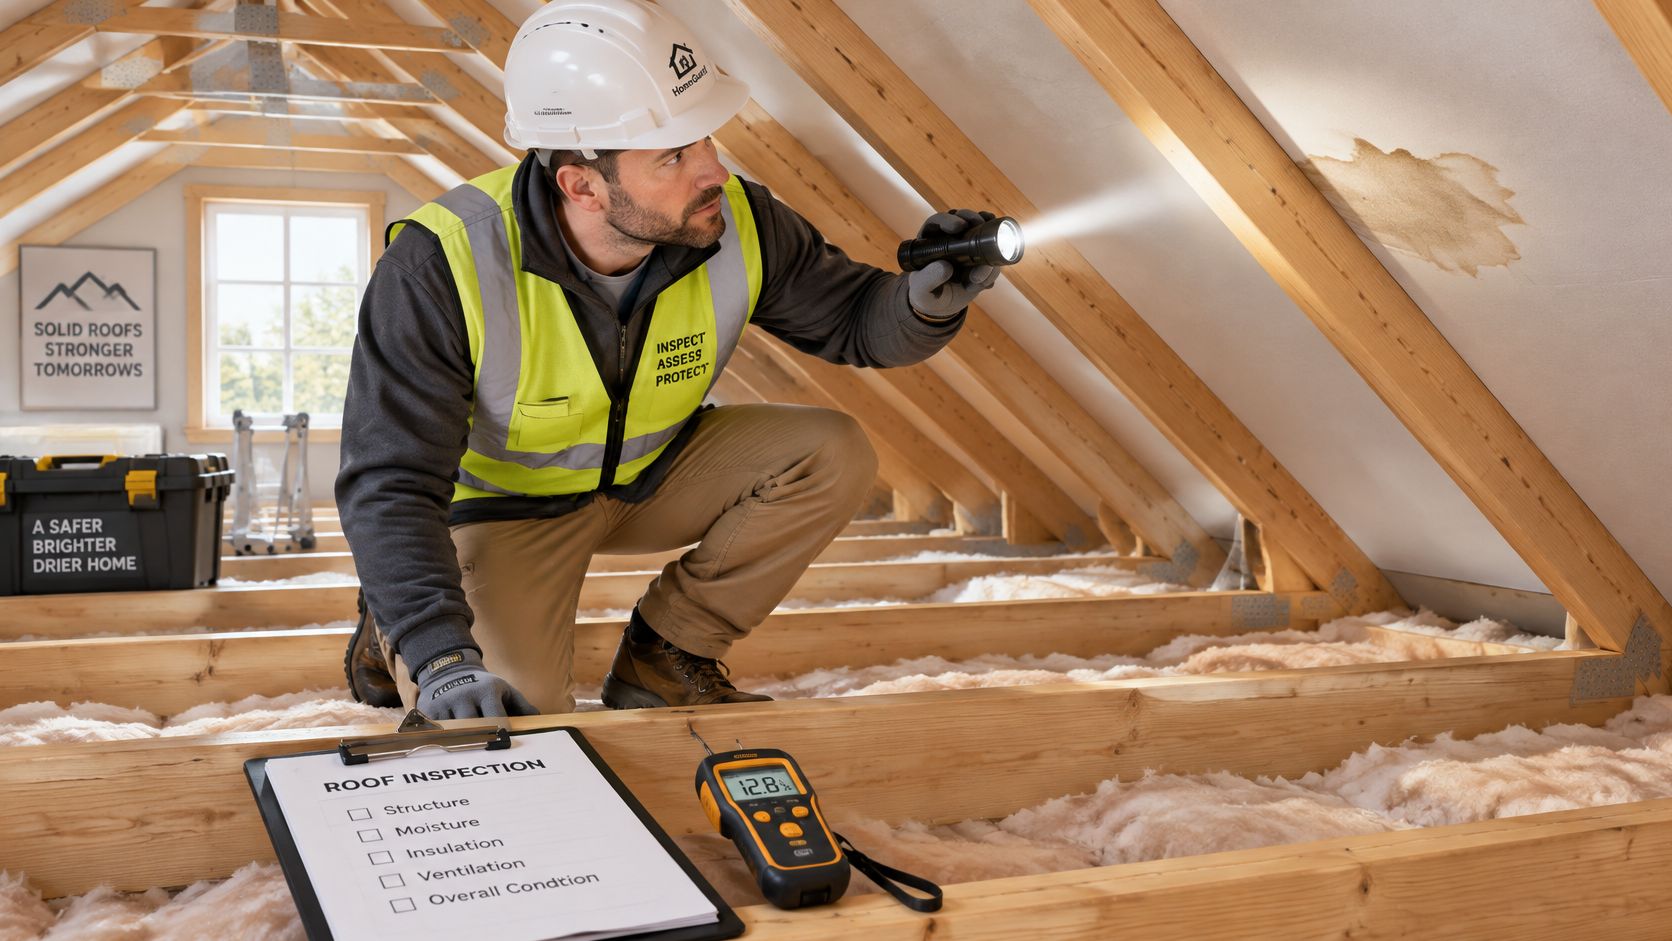
Map the interior symptoms. Record each stain, drip point, and damp area. Photograph the condition and note whether it appears active or dry. This gives the crew a starting point and a way to compare the interior with the attic above it.
Inspect the attic. Check insulation for dampness, sheathing for dark marks or softness, and roof framing for signs of water travel. Look for daylight at gaps and fungal growth where moisture has lingered. The attic can reveal whether the problem is limited to a leak or accompanied by ventilation or insulation concerns.
Trace the path upslope. Because water may run along framing before dripping, inspect above the symptom rather than assuming the entry is directly overhead. Note likely pathways and any transition or penetration that could admit water.
Check the exterior without disturbing materials. Inspect penetrations, roof-to-wall transitions, valleys, exposed fasteners, shingle seating, and flashing terminations. Document defects before removing or shifting shingles. Applying cement or mastic too soon can conceal the original entry path and make a sound diagnosis harder.
If rainfall isn't available, a controlled hose test can help isolate a leak. Wet small areas, beginning at the lowest suspected point, and allow time for water to migrate before moving uphill. Testing several areas at once makes it difficult to identify which detail is leaking.
The inspection record should connect the interior symptom to the exterior finding. It should include dated photographs, the roof-plane location, symptoms inside, suspected entry point, any affected decking, temporary protection, and recommended permanent repair. FEMA guidance also advises evaluating storm damage before repair and inspecting exposed sheathing, replacing it if water-damaged. FEMA guidance on evaluating and repairing disaster damage
A resource on how to spot roof leaks early can help homeowners understand why prompt observation matters. The practical standard is simple: find and document the failure before covering it up.
Reading the Inspection Report Without the Jargon
An inspection report should tell you what the contractor observed, where it is, and what action makes sense. It shouldn't leave you guessing whether a mark means an active leak, an old stain, or a cosmetic issue.
Active leakage means moisture is entering now or the evidence suggests an ongoing pathway. Historic staining may be dry, but it still needs context: the inspector should check the attic and nearby materials rather than assuming the roof is currently sound. Soft decking is more serious than a surface blemish because it can indicate damaged sheathing that needs attention before the roof is covered.
A note about “bruised shingles” usually refers to suspected impact damage, but the report should identify the location and what the inspector saw. Don't treat a label alone as proof of storm causation. Ask for photographs and a clear distinction between observed damage and the contractor's interpretation.
| Finding | What It Means | Typical Priority |
|---|---|---|
| Active drip or wet insulation | Water is entering or has recently reached the interior or attic | Prompt investigation and protection |
| Historic ceiling stain | A past leak may have left a mark; attic and roof details need checking | Confirm whether moisture is still present |
| Loose or missing shingles | The roof surface may be exposed to further water entry or wind damage | Timely repair, especially before more severe weather |
| Defective flashing | A joint or transition may be allowing water behind the roofing | Prompt repair if leakage or deterioration is present |
| Granule loss | The shingle surface is wearing; the report should note extent and affected roof planes | Assess alongside shingle condition and roof age |
| Soft or water-damaged decking | The roof deck may not provide a sound base for new materials | Address before covering |
| Blocked attic airflow | Insulation or other obstructions may interfere with intended ventilation | Correct as part of system work |
South-facing slopes often receive more direct sun exposure, but the amount and significance of granule loss depend on the roof's materials, age, and exposure. Ask the inspector to compare affected areas rather than treating granule loss by itself as proof that replacement is necessary.
A useful follow-up question: “Which findings need work now, which can be monitored, and what evidence supports each recommendation?”
That question can clarify whether the proposed work addresses a leak, a structural concern, normal wear, or appearance. It also gives you a better basis for comparing estimates and discussing storm damage with an insurer.
Repair or Replace and When the Math Is Not Simple
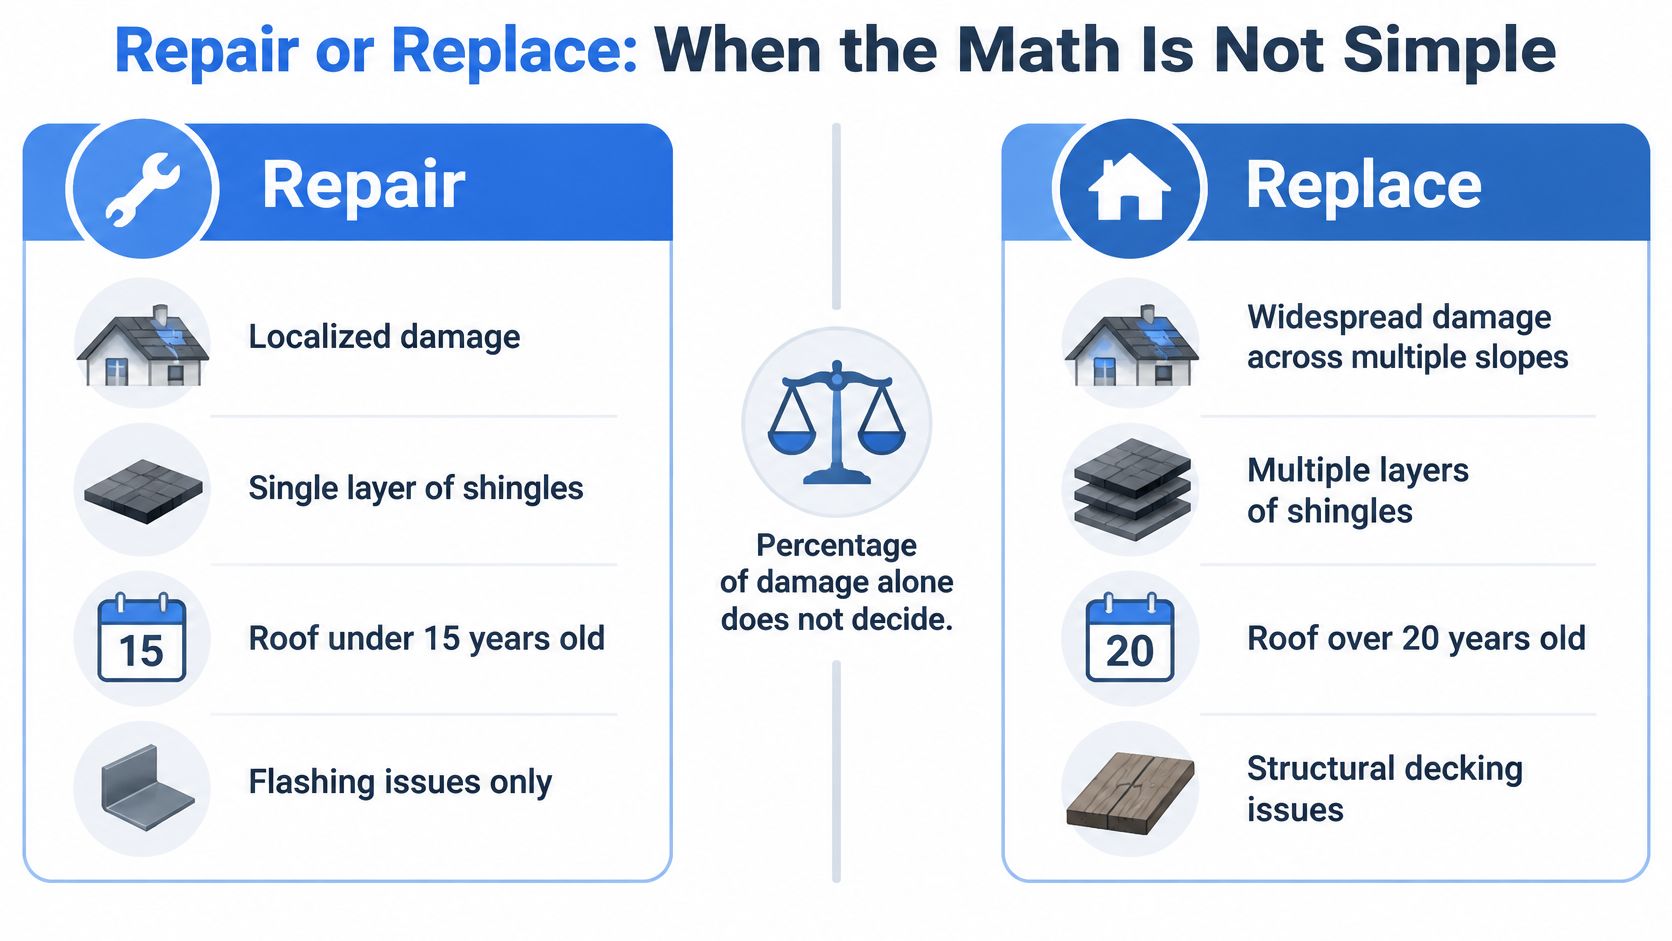
A fixed percentage of damaged roof area doesn't automatically determine whether repair or replacement is the right call. The better test is whether the roofing system can be restored reliably, and whether a targeted repair will integrate with the materials already in place.
Start with the pattern and location of damage. Is it concentrated in one area or scattered across several roof planes? Can suitable shingles be sourced? Are the flashing and underlayment sound? Is the decking firm? Do earlier repairs help the system, or have they left layers of mismatched materials and recurring weak points? Roof age matters, but it doesn't answer those questions on its own.
A localized repair can make sense when the damage is limited, the surrounding materials remain serviceable, and the contractor can correctly restore the affected details. Replacement becomes more compelling when damage is widespread, several underlying components are failing, or repeated patches won't restore dependable protection. The trade-off is cost and disruption now versus the risk and expense of continued repairs later. A repair-versus-replacement overview can help frame the questions to ask, but the actual decision should rest on the roof's condition.
Keep physical damage separate from coverage
In central Ohio, hail is part of the local storm backdrop. NOAA's Storm Events Database recorded 1,584 hail reports statewide from 2016–2025, including 1,027 reports involving hail at least 1 inch in diameter. Thunderstorm-wind reports were more common. These reports provide context, not proof that a particular roof was damaged in a specific storm. NOAA Storm Events Database context for Ohio hail reports
Repairability and insurance coverage are separate questions. An insurer may cover sudden wind or hail damage while excluding ordinary wear. Some policies use actual cash value for older roofs, while others provide replacement-cost coverage subject to policy terms. A contractor's conclusion that replacement is technically appropriate does not, by itself, establish what the policy will pay.
Ask for two distinct answers: what is damaged and technically repairable, and what the policy appears to cover. Keep pre-existing wear separate from storm-created damage in photographs and conversations. If an adjuster's scope differs from the observed conditions, ask what evidence supports the difference and whether missing work should be reviewed. The percentage of the roof affected can be relevant context, but it isn't a substitute for assessing the system or reading the policy.
Timeline and Process for Common Repairs and Replacements
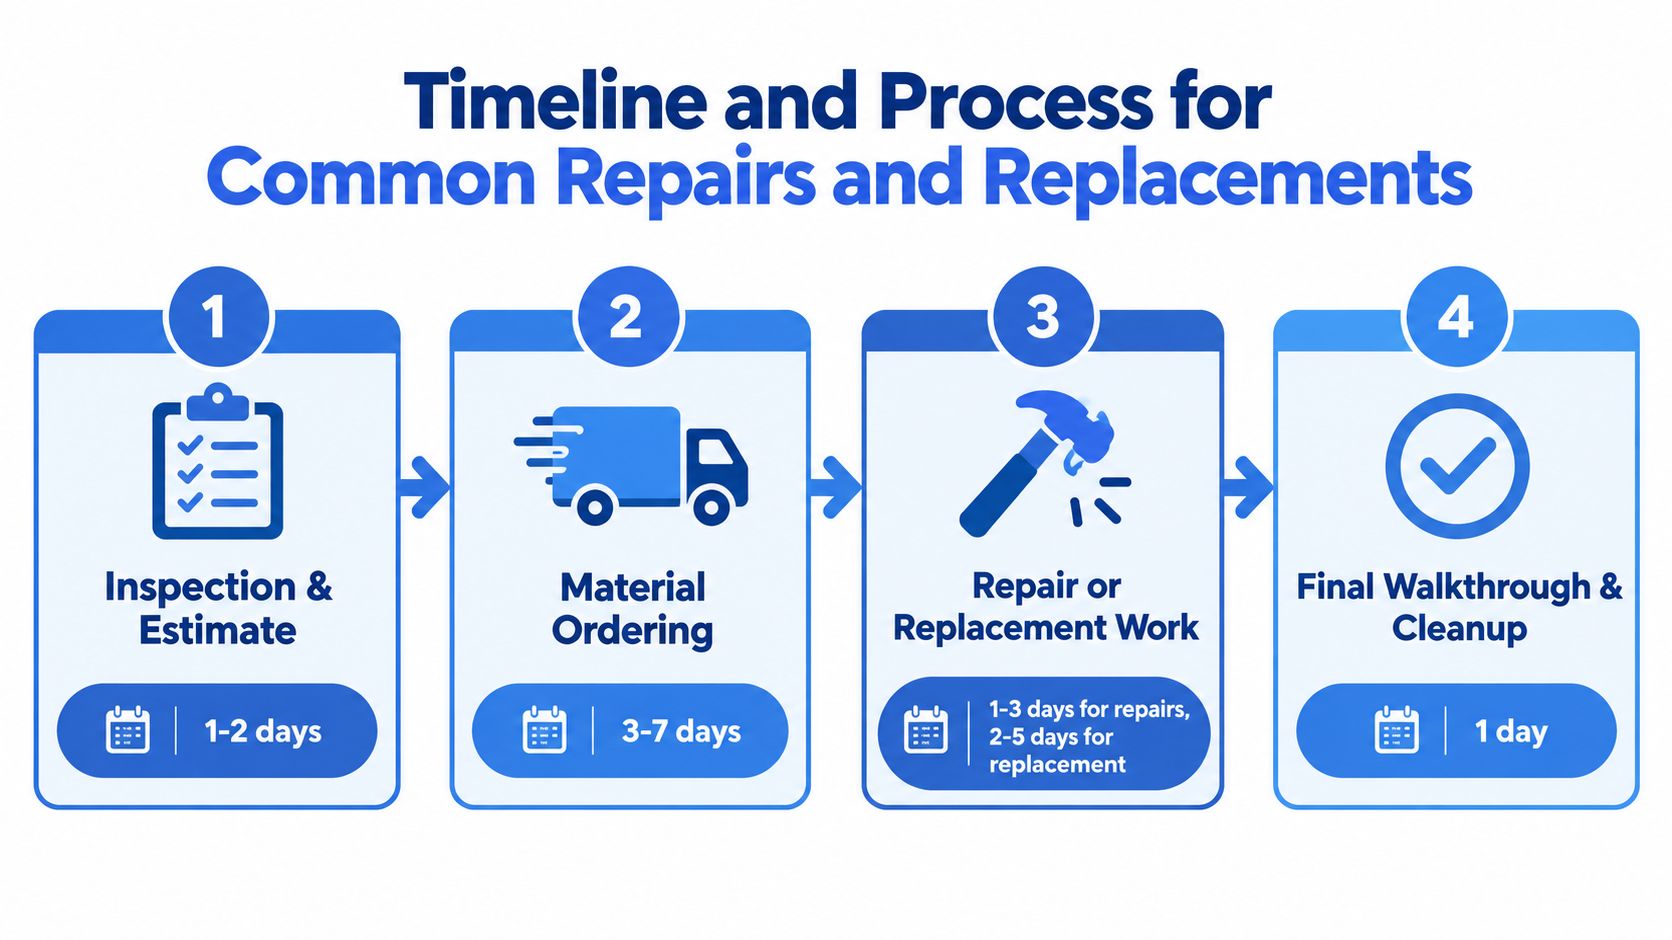
The work schedule depends on the repair's scope, material availability, roof complexity, and weather. A targeted leak repair may involve a limited visit, while skylight flashing, a partial re-shingle, or gutter work requires different preparation. Ask the contractor to explain what must happen before the crew arrives and which site conditions could change the schedule.
What happens on replacement day
A replacement described as a single-day job still involves a sequence of separate tasks. The crew protects the property, removes old roofing, inspects the exposed deck, replaces damaged sections as agreed, installs underlayment and eave protection, integrates flashing, and lays the new shingles. Then the crew cleans up and checks the ground for debris and stray fasteners.
Those steps shouldn't be compressed at the expense of the concealed work. In a cold-climate roof system, the crew should verify deck condition before covering it, check underlayment and eave protection, and make sure flashing is integrated correctly. Ventilation also deserves attention: insulation shouldn't block the intended airflow from soffit vents toward ridge vents.
Before work starts, walk the job with the contractor. Confirm the scope, material choices, access and property protection, and what could prompt a change order. If the crew finds damaged sheathing, ask how they'll document it and confirm any additional work before it's completed.
Before shingles cover the work: Ask for photographs of the deck, underlayment, eave protection, and flashing interfaces. Concealed details are harder to review once installation is complete.
After the crew finishes, walk the property with the contractor. Confirm that cleanup is complete, discuss any work that differed from the estimate, and ask for the final documentation and care guidance. For skylight or flashing repairs, check that the estimate describes how the connection will be restored, rather than just promising a surface patch. For gutters, confirm that the system will carry runoff away from the home and that downspouts connect and discharge appropriately.
Estimates, Insurance Claims, and Getting Paid
A contractor's estimate describes proposed work. An insurance decision describes what the policy may pay. Treating them as the same document can leave you unsure who is responsible for an item, or why a repair is missing from the claim scope.
Read the estimate for specific materials and work areas, not just a total. For an asphalt-shingle replacement, look for the planned removal, deck inspection, underlayment, eave protection, flashing, shingles, ventilation work if needed, cleanup, and how concealed damage will be handled. Vague wording such as “repair roof as needed” doesn't tell you what the crew will do or how changes will be approved.
A written scope should make clear what is included, what isn't, and which conditions could add work. Ask how the contractor will document decking once the old roofing is removed, and whether you'll be contacted before work beyond the agreed scope proceeds.
Keep the claim process evidence-based
File a claim according to your insurer's instructions and keep your dated photographs, inspection report, estimates, and communications together. When the adjuster visits, share the documented findings and ask how the insurer's scope accounts for the observed damage. Compare the contractor's scope and the adjuster's scope item by item; a difference calls for explanation, not an assumption that either document is automatically complete.
If concealed damage or applicable code requirements are absent from the scope, ask the contractor and insurer what documentation is needed to review them. A contractor can explain repair methods and provide records, but policy interpretation and payment remain subject to the policy and insurer's decision. A guide to roof inspections for insurance claims can help you prepare questions before that conversation.
Check whether the settlement accounts for depreciation and whether payment depends on completing approved work. If some cost will remain your responsibility, clarify the amount and timing before authorizing the project. Homeowners considering financing can ask about pre-qualification before work begins, so the funding plan doesn't depend on an insurance estimate that may change. The strongest position is a clear record of roof condition, proposed repairs, and the insurer's written scope.
Putting It All Together and Your Next Steps
After an inspection, focus on system condition, repairability, and coverage as separate decisions. Ask what failed, whether the proposed work restores the surrounding components, and what the insurer has agreed to pay. Keep photographs of existing wear distinct from evidence of storm damage.
Use this short checklist:
- This week: Address active leakage or exposed areas, and keep the inspection report and photographs together.
- At the estimate walkthrough: Confirm materials, flashing and ventilation scope, concealed-damage procedures, cleanup, and any exclusions.
- Before the next storm: Check that gutters and downspouts are clear and discharge away from the house; don't climb onto a wet or damaged roof.
- Between professional visits: Watch for new indoor stains, attic moisture, blocked vents, and drainage problems.
Treat the attic, flashing, deck, and drainage as part of the roof, not as unrelated details. A clear report and a specific work scope make it easier to schedule the right repair, plan a replacement when warranted, and discuss insurance without confusing physical need with policy coverage.
For Columbus and central Ohio homeowners, HIBCO ROOF LLC offers free roof inspections, written estimates, leak repairs, storm-damage documentation, and full roof replacements. To discuss what your inspection found and plan a practical next step, visit HIBCO ROOF LLC.