The most common advice about replacement windows is too simple: if they're old, replace them. Age is useful for planning, but it doesn't tell you whether a window has failed. A sound older window may need maintenance, while a newer one may need replacement if water is damaging the frame or wall. The practical question is whether the problem is the window itself, a repairable component, or moisture and air leakage elsewhere in the home.
If you're deciding when to replace windows in home, start with what you can see and test: the frame's condition, how the sash operates, where condensation appears, and whether drafts persist after basic repairs. Then compare repair, retrofit, and replacement options before committing to a whole-house project.
Table of Contents
- Window Age Milestones and What They Really Mean
- Replace, Repair or Wait by Situation
- Warning Signs That Show a Window Has Failed
- Fog Inside the Room or Between the Glass
- How Much Energy Loss Justifies Replacement
- Repair First or Replace Outright
- Sequence Window Work With Roof and Siding
- Resale, Comfort and Benefits of New Windows
- Next Steps Before You Commit
Window Age Milestones and What They Really Mean
Age sets a planning milestone; condition triggers the decision. Lifespan estimates can help you decide when to inspect, but they're not deadlines for removing a working window.
| Frame material | Typical service life | What to do at that age |
|---|---|---|
| Aluminum | About 15–20 years | Schedule a condition assessment |
| Wood | More than 30 years | Inspect; keep it if painted, maintained, and watertight |
| Single-pane glass in any frame | No fixed lifespan; insulation is weak at any age | Judge by energy loss and comfort first |
| Newer unit of any frame | Varies with installation and weather | Replace only if rot, water, or seal failure is present |
These planning figures come from a life-expectancy study based on expert input and industry sources. Installation quality, maintenance, paint, weather exposure, and climate all affect service life, so two windows made from the same material can age differently. Treat the figures as prompts to inspect, not as a rule that every unit should be replaced at the same age (window lifespan study).
A 15–20-year-old aluminum window deserves a close condition assessment, even if it still looks presentable. A wood window more than 30 years old may remain serviceable if it's been painted, maintained, and kept watertight. In either case, check for drafts that persist when the sash is closed, water intrusion, rot, failed glazing seals, and trouble opening or locking.
The reverse is also true. A newer window may need replacement when deterioration is letting water into the wall or causing structural damage. Don't let the installation date distract you from active moisture.
You don't have to replace every window at once. Prioritize units that have failed, leak air, or show water damage. Leave sound windows in place while you address the openings with the clearest problems. An inspection should also distinguish between a repairable hardware, seal, or glazing issue and a failed frame or sash that calls for full replacement.
Replace, Repair or Wait by Situation
| Situation | Verdict | First step |
|---|---|---|
| Single-pane windows with sound frames | Add storm windows or replace, based on payback | Compare storm-window payback with replacement |
| Failed seal in an otherwise sound frame | Replace the unit | Confirm seal failure and check indoor humidity |
| Rotted frame or sill, or recurring leaks | Replace, after fixing the water source | Inspect the wall, sill, and flashing |
| Drafts with sound glass and frame | Repair first | Reseal and retest before replacing |
| Aluminum windows at 15–20 years, no visible defects | Assess condition; no automatic replacement | Book a condition assessment |
| Home being sold within a year | Fix visible failures before listing | Get a current inspection report |
Use the table as a starting point, not a final diagnosis. A single symptom rarely settles the question. The case for replacement is stronger when several signs point to the same underlying failure.
Follow this order before making a decision:
- Pin down the symptom. Note where you feel a draft, whether fog is between panes or on the room side, and whether the sash opens and locks.
- Check the likely cause. Look at weatherstripping and hardware for air leaks. For stains or soft wood, inspect the sill, wall, and exterior drainage before assuming the window alone is responsible.
- Compare the options. Ask for repair, storm-window, and replacement approaches where each is technically suitable. Compare the project cost with the expected energy savings, rather than relying on advertised payback.
- Act on the most serious failure first. Rot, recurring leaks, or a failed frame calls for more urgency than an older but sound unit.
For example, fog between the panes of a double-pane window may indicate a failed glass seal. If the frame remains sound, that doesn't automatically mean the entire opening needs a new frame and installation. Check indoor humidity and confirm the fog is inside the sealed glass unit before choosing a replacement.
When the cause isn't clear, a free condition assessment can help identify whether the trouble is in the glass, hardware, frame, or surrounding wall. Ask for the findings in writing so you can compare what needs attention now with what can wait.
Warning Signs That Show a Window Has Failed
| Sign you can see or feel | Usual cause | Replacement signal? |
|---|---|---|
| Condensation between the glass panes | Failed insulating-glass seal | Yes, usually |
| Drafts around a closed sash | Worn weatherstripping or gaps in the frame | Only if the frame or sash is damaged |
| Soft, spongy, or rotted frame or sill | Long-term water exposure | Yes |
| Window painted shut or hard to lock | Swollen or distorted frame, or failed hardware | Replace if the frame is distorted; otherwise repair |
| Single-pane glass in a cold room | Thermal performance far below modern units | Yes, for energy and comfort |
| Water stains below the sill | Flashing or drainage failure, or condensation | Inspect the wall before deciding |
| Fog on the room-side glass | Indoor humidity meeting a cold surface | No; fix humidity first |
Several signs together carry more weight than one alone. A window that's hard to open may need new hardware. A hard-to-open window with a distorted, soft frame and recurring water stains points to a more serious failure. The next step is to find out whether the frame can be repaired and whether moisture is coming through the window or the wall around it.
For energy performance, compare the whole-window U-factor, not just a glass-only rating. U-factor measures non-solar heat transfer through the full assembly, including glazing, frame, and spacers. Lower values mean better insulation. The U.S. Department of Energy says residential window U-factors commonly range from about 0.20 to 1.20 Btu/(h·ft²·°F), so a high-U-factor or single-pane unit can place a greater heating and cooling load on a home than a modern insulated window (DOE guide to energy-efficient windows).
If you're comparing products in Columbus or a similar cold-winter climate, check that the proposed model meets the applicable ENERGY STAR climate-zone criteria. Don't choose based only on appearance or a glass description. Record dated photos, note drafts and unusually cold or hot areas near the frame, and state whether each condensation sign is between the panes or on the room side. That record helps an inspector separate a failed unit from a room-level humidity problem.
Fog Inside the Room or Between the Glass
Fog between panes is like moisture trapped inside a sealed container: it usually signals that the insulating-glass seal has failed. Fog on the room side is different. It's moist indoor air meeting a cold surface, much like a bathroom mirror fogging after a shower. Interior fogging isn't automatically proof that the window needs replacement.
Use these checks in order:
- Locate the fog. See whether it wipes off the room-side glass or remains trapped between panes. If it's between the panes, the sealed glass unit is the likely problem. If it's on the room side, start by checking the room's moisture and air circulation.
- Check indoor humidity and ventilation. An inexpensive hygrometer can help you monitor relative humidity. Run bathroom and kitchen exhaust fans during showers and cooking, and check that they vent as intended.
- Look at airflow near the glass. Furniture pushed against an exterior wall can block warm room air from reaching the window. Move it back enough to allow circulation, then observe whether the surface still fogs.
- Inspect the wall and sill. Staining, peeling paint, damaged wallpaper, or marks below the window may come from either condensation or water infiltration. Check the sill, flashing, drainage path, and surrounding wall rather than assuming the glass is the source.
Storm windows need their weep holes to allow controlled ventilation in the space between the storm panel and the main window. If those openings are blocked, moisture can become trapped. At the same time, adding too much air leakage can undermine energy performance, so don't alter the assembly without understanding how it's meant to manage water and air.
If the fog is between the panes and remains after you've checked humidity and air movement, the insulating-glass seal has most likely failed. The window is then a replacement candidate, though the soundness of the frame still matters when deciding whether to replace the glass unit or the entire window. For homeowners weighing double-pane options, this overview of double-pane windows provides additional context.
How Much Energy Loss Justifies Replacement
Old windows do not automatically need replacing. ENERGY STAR says replacing single-pane windows with ENERGY STAR-certified models can reduce household heating and cooling costs by up to 13% (ENERGY STAR residential windows). That is a potential savings figure, not a promise for every home.
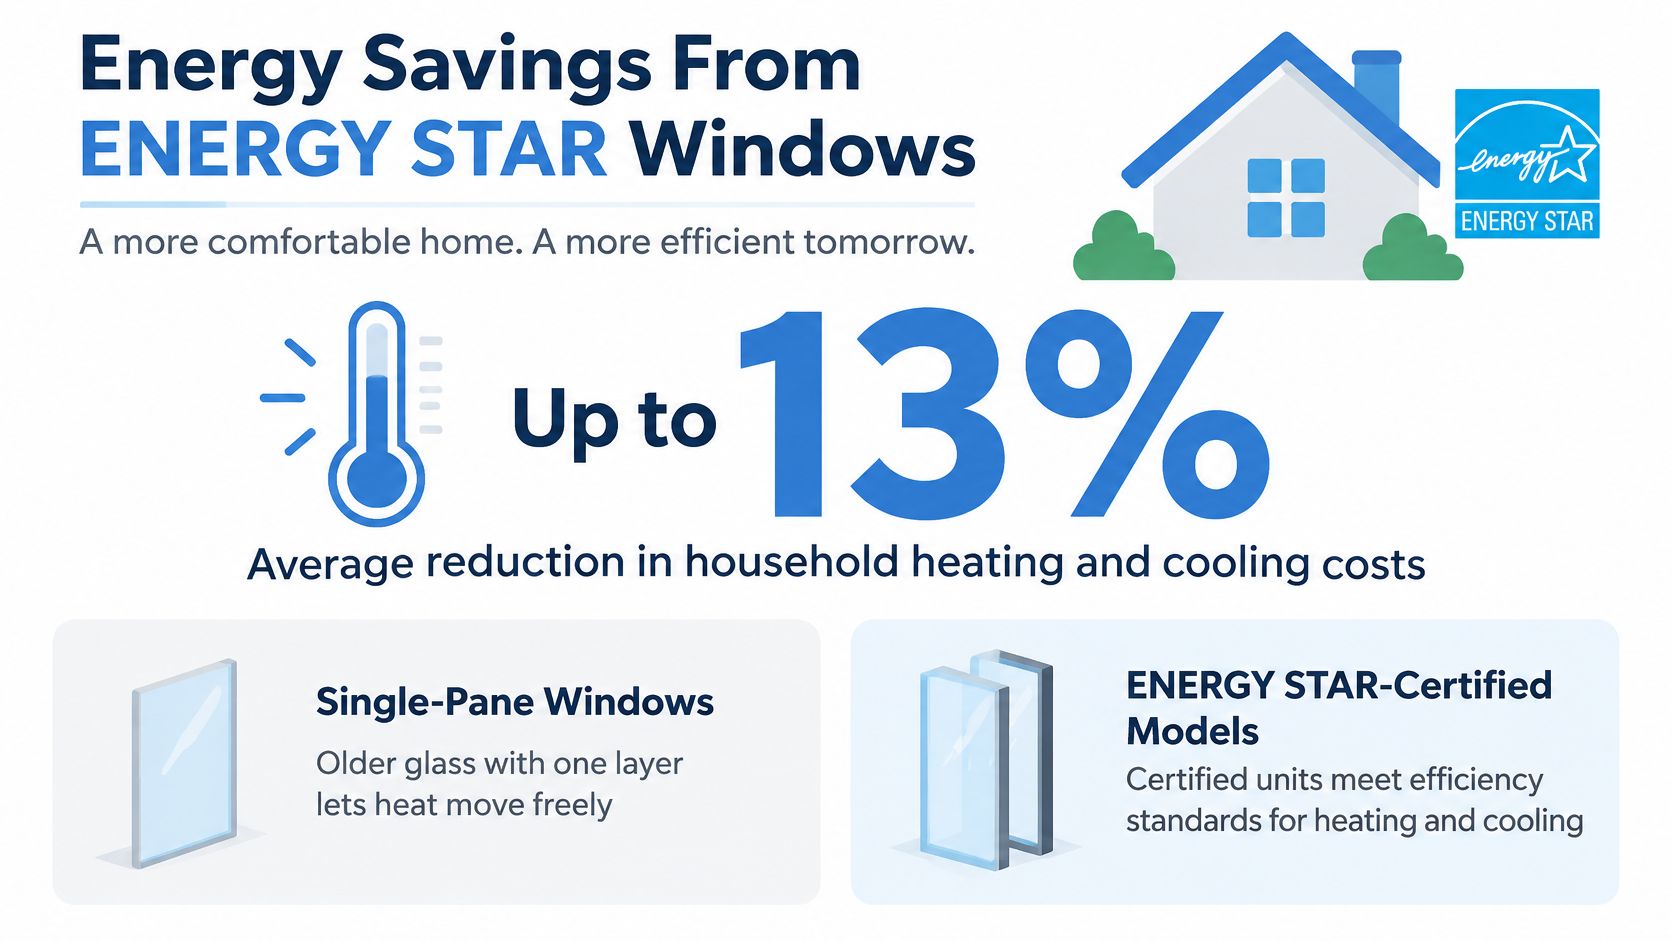
The estimate applies to a specific comparison: replacing single-pane windows with certified models. It does not establish the savings from replacing newer double-pane windows, or from changing windows that are still in good condition. Your result depends on climate, window area, utility rates, air leakage, installation quality, and whether your existing windows are single- or double-pane.
Use your bills and a written quote to judge the project. A simple payback calculation divides the added project cost by the annual savings you reasonably expect. For example, a $1,200 premium divided by $300 in annual savings gives a four-year payback. Those are example figures, not a forecast. Ask the contractor which assumptions support any savings projection.
Energy savings alone rarely justify replacing sound windows immediately. First identify where the loss comes from. A draft may reflect worn weatherstripping or air leakage around the opening, while a high heating bill can have causes beyond the windows. Addressing a repairable leak may cost less and preserve a functioning unit.
Replacement makes more sense when measured comfort problems or visible deterioration accompany energy loss, and inspection shows the window itself has failed. Compare the expected savings with the quote, but do not treat a national estimate as a household guarantee.
Repair First or Replace Outright
Old windows are not automatically bad windows. Before replacing one, check whether the frame is sound and the problem can be fixed. The U.S. Department of Energy's Building America guidance presents total replacement as one of several efficiency options, alongside rehabilitation (DOE Building America window rehabilitation guidance).
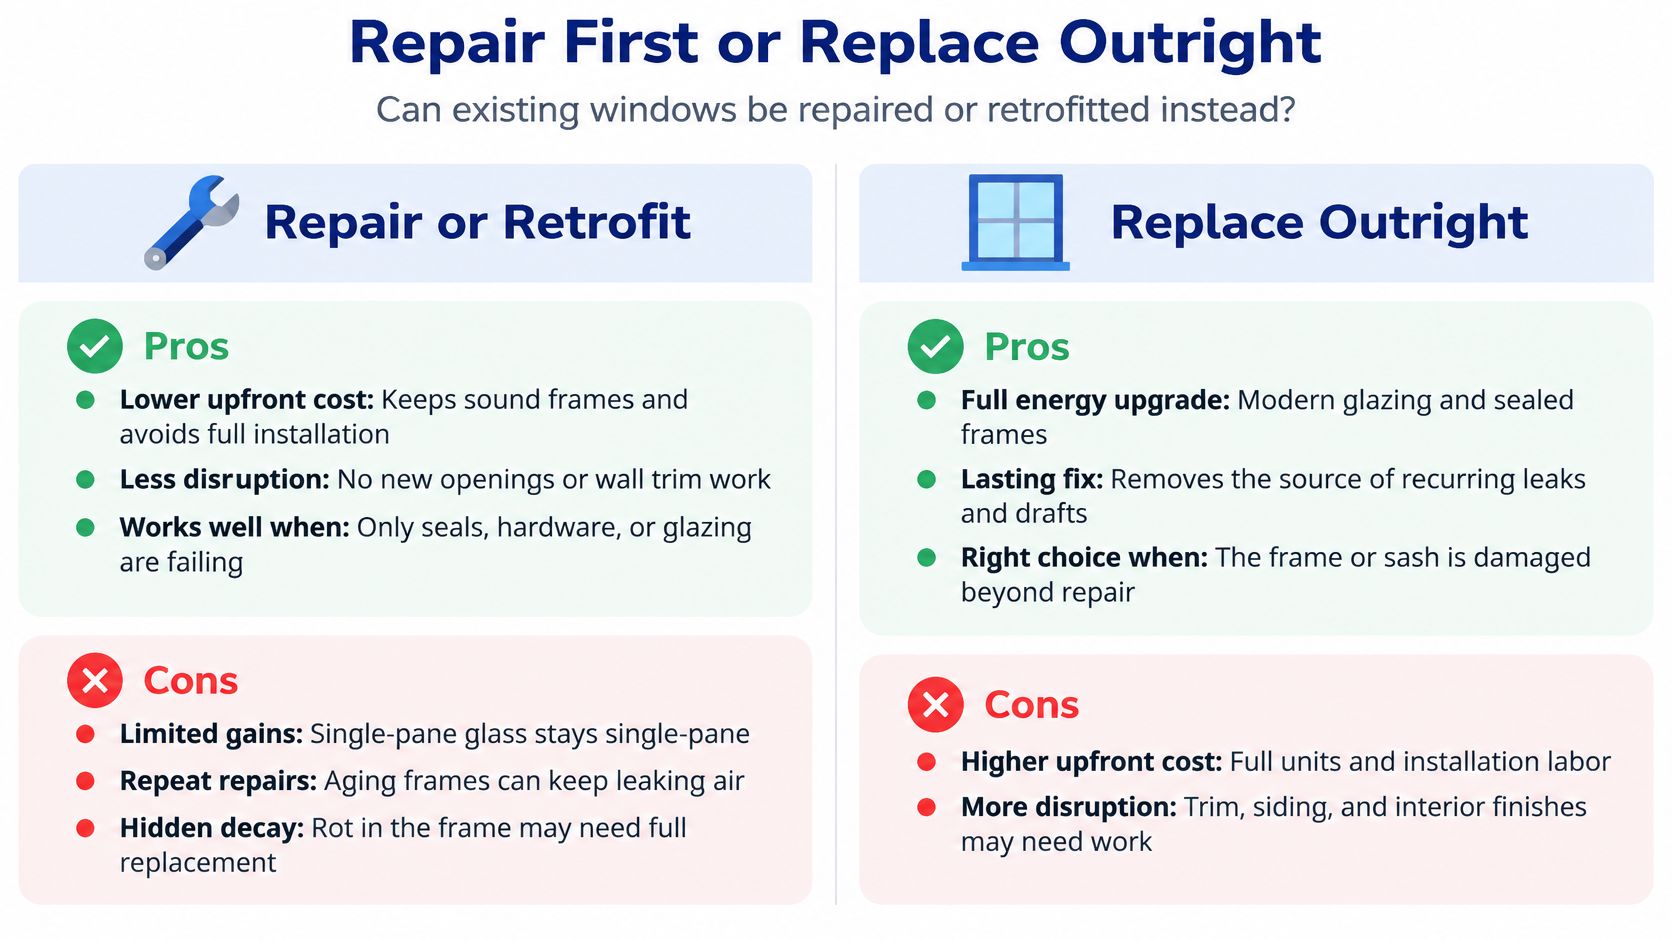
Repair or retrofit is a reasonable choice when the frame is intact and the trouble is worn weatherstripping, loose trim, faulty hardware, a sticking sash, or a repairable seal. A technician may reduce air leakage and improve water management without removing the entire unit. Sash rehabilitation, new seals, and clearing blocked weep holes can also help. If indoor humidity is causing condensation, replacing the window will not fix the moisture source.
Full replacement gives more control over thermal performance and installation, but costs more and causes more disruption. It makes sense when the frame or sash is rotten or distorted, water continues to enter after repairs, or failed glazing and persistent drafts cannot be corrected reliably with targeted work. Replacement may also be justified when the existing glazing is the main performance limitation and a retrofit cannot deliver the improvement you need.
Storm windows can improve serviceable single-pane windows without removing them. ENERGY STAR estimates that low-emissivity certified storm windows installed over single-pane clear glass with no existing storm windows can save an average of about $350 per year, or roughly 10%, with a payback of about three years (ENERGY STAR storm windows). Treat that as an estimate, not a promise. Results vary, especially for air-leakage savings, so compare the storm-window quote with full replacement.
The practical trade-off is clear. Repair can reduce drafts and improve water management, but it does not change how the existing glass transfers heat or admits solar energy. Replacement can address those glazing limits, at a higher cost. If air leakage elsewhere in the house is the main issue, replacing windows may not address the source. For a repair-first option, review this guidance on resealing windows and ask a contractor to identify the leak before choosing the scope of work.
Sequence Window Work With Roof and Siding
Water should be handled before a new window goes in. Replacing a window while the roof, siding, or flashing still directs water into the opening can leave the underlying problem in place and damage the new work. Use this order:
- Stop water first. Repair roof leaks, flashing, gutters, and siding defects that wet the wall around the opening. The reason is simple: a new window can't compensate for water coming from above or around it.
- Investigate the wall and sill. Look for rot, staining, and the path water takes before installation. This helps catch a flashing or drainage failure rather than concealing it behind new trim.
- Air-seal and insulate the accessible opening. Address gaps around the opening while the work area is exposed. That gives the installer a chance to improve the connection between the window and the surrounding wall.
- Replace the failed or drafty windows first. Prioritize openings with rot, recurring leaks, or persistent drafts, and leave sound units for later. Phasing the work lets you address the clearest risks without automatically replacing every window.
- Coordinate installation with siding and flashing. Window work is often easier before siding replacement because removing siding exposes the opening. When the projects are scheduled together, the installer can integrate the flashing and exterior finish more directly.
- Finish interior trim and humidity controls. Complete the trim, check that ventilation works, and watch for condensation through the next heating season. This helps distinguish a remaining moisture problem from an installation issue.
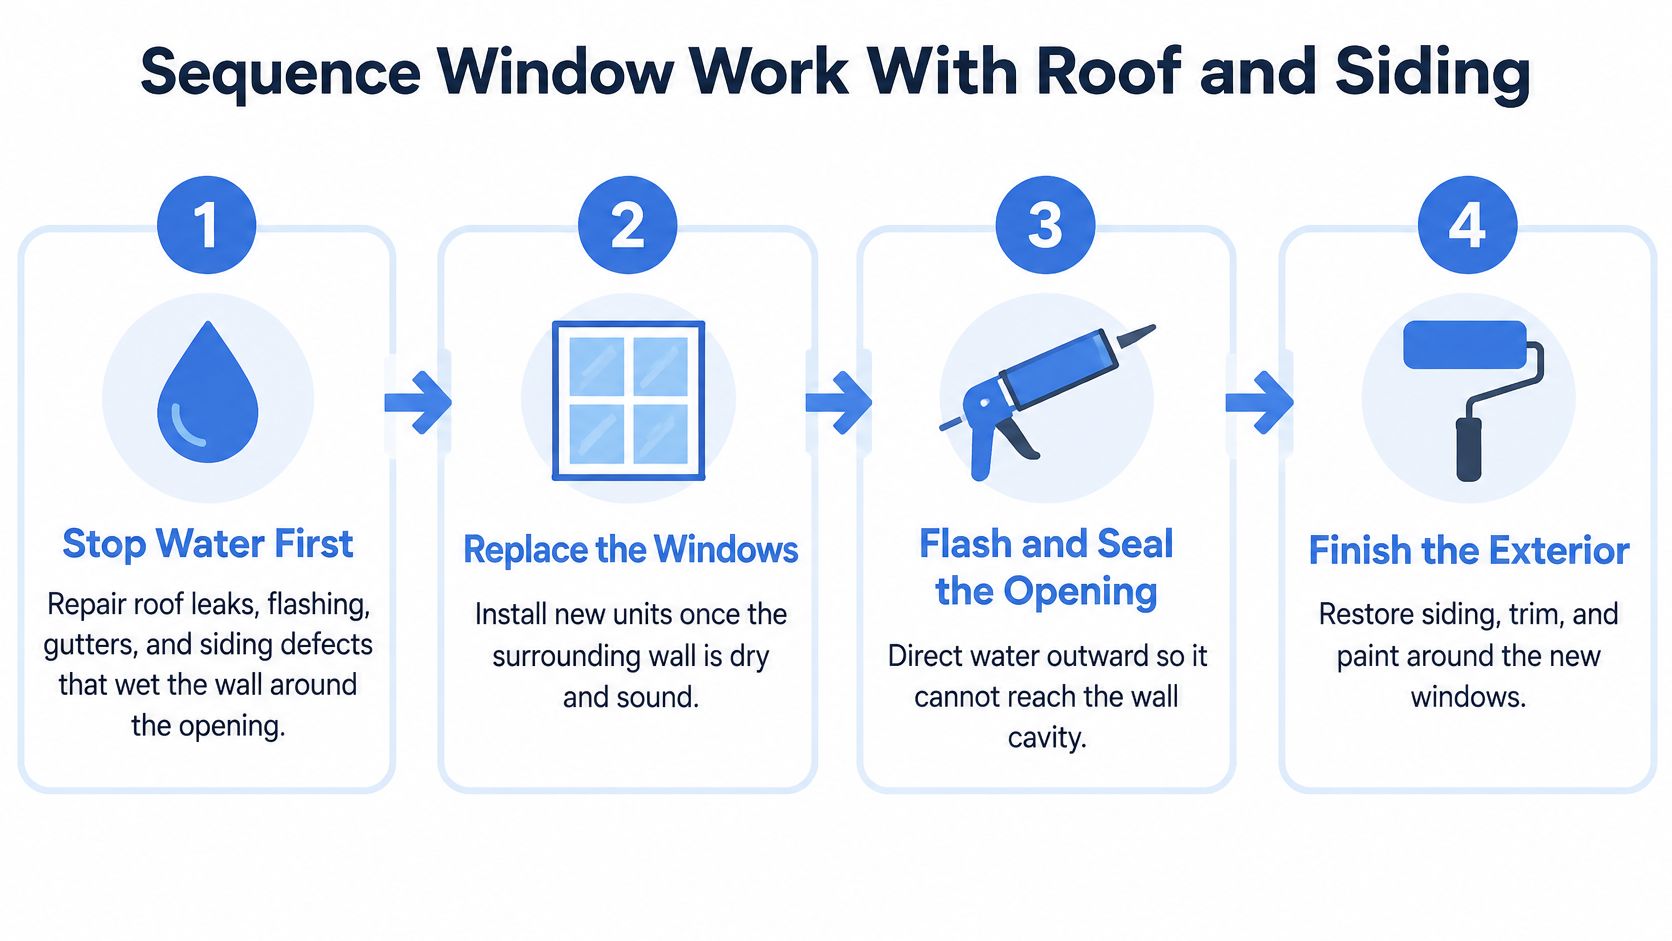
The sequence only works when the roofing, siding, and window plans are coordinated. If a roof leak or damaged siding is still sending water toward the opening, deal with that source before treating the window as the sole cause.
Resale, Comfort and Benefits of New Windows
Old windows can still work well. Age or appearance alone does not establish that a unit needs replacement, and a draft may come from air leakage around the frame rather than failed glass. Comfort improves when the actual source of the problem is addressed.
A replacement that fits and seals properly can reduce drafts and the cold feeling near glass. Yet condensation on the room-side surface can point to indoor humidity or limited ventilation, not a failed window. Fog trapped between panes is different: it indicates a failed insulated-glass seal. That distinction matters when weighing comfort improvements against the cost of new units. The ENERGY STAR window factsheet provides product information, but the cause of discomfort still needs to be identified at the opening.
Ventilation is another practical benefit. A window that will not open limits natural airflow when outdoor conditions are suitable. Before assuming the unit must be replaced, consider whether paint, a latch, or other hardware is preventing operation. A stuck sash and a distorted frame do not call for the same work.
For resale, visible problems such as fog between panes, rotted sills, water stains, or a window that will not open may prompt buyer questions. Addressing a documented defect can make its condition clearer to prospective buyers. There is no reliable national dollar return established here for replacement; resale effects depend on the home, local market, existing window condition, and project scope. Do not assume the project cost will be recovered in the sale price. See whether new windows increase home value for more on how that value question is assessed.
Next Steps Before You Commit
Old windows can still be sound. Use this checklist to identify whether the unit has failed before authorizing replacement.
- Record the signs. Take dated photos, note drafts and cold spots, and identify whether fog is between the panes or on the room side. This gives contractors observable details to assess.
- Check humidity and ventilation. Use a hygrometer and make sure bathroom and kitchen exhaust fans run during showers and cooking. Room-side condensation may point to indoor moisture, not window failure.
- Inspect water-damaged areas. Stains, peeling paint, or soft wood warrant a check of the wall, sill, and flashing before you choose a repair or replacement.
- Compare written options. Where appropriate, ask for repair, storm windows, and replacement as separate options. Request a project-specific payback estimate and the assumptions behind it.
- Check product performance. Ask for the proposed product's NFRC whole-window U-factor and SHGC, and confirm it meets ENERGY STAR criteria for central Ohio's cold winters and humid summers.
- Get a condition assessment. A contractor can check the roof, flashing, and siding around the opening during the same visit. This helps distinguish a window problem from water entry or air leakage elsewhere.
Ask HIBCO ROOF LLC for a free written estimate that separates window repair, replacement, and related exterior concerns, so you can decide what needs attention first. HIBCO ROOF LLC serves Columbus and central Ohio with window and exterior work, including inspections, repairs, and roof and siding services.