

You notice it on a damp morning, coffee in hand, sitting in the window seat that sold you on the house. There's a faint brown ring on the ceiling above the trim, a cool draft along your ankles, and paint bubbling where the frame meets the siding. The glass looks fine. That gap between what you can see and what's failing is exactly why windows that stick out from the house confuse so many homeowners.
Table of Contents
- Why Homeowners Ask About Projecting Windows in the First Place
- Understanding Bay, Bow, and Oriel Windows
- Why These Windows Project From the Wall
- Common Problems With Projecting Windows
- Repair, Reflash, or Full Replacement
- What a Contractor Actually Checks on Site
- Maintenance Habits and a Pre-Call Checklist
- Questions Homeowners Ask Before Signing a Project
Why Homeowners Ask About Projecting Windows in the First Place
Most calls don't start with a request for a new window. They start with a symptom. A stain appears after wind driven rain but not after a gentle shower. The seat board feels cold all winter. Caulk cracks in the same corner every year, no matter how carefully you redo it.
That pattern points to something a flush window doesn't have. A projecting window isn't just glass and frame set into a wall. It's a small structure hanging off your house, with its own roof or cap, sidewalls, supports, and a long perimeter of joints where different materials meet. Treat it like a decorative unit and you'll chase the symptom. Treat it like part of the building envelope and the diagnosis gets clearer.
What You're Really Trying to Figure Out
Homeowners usually want answers to a short list of practical questions, even if they phrase them differently.
- Is this a window problem or a roof problem: Because the projection has its own small roof, water can enter above the glass and show up below it.
- Can it be repaired: Or has concealed rot made a surface patch pointless.
- Why does it feel drafty: When the glass itself is double paned and looks sound, the leak is often around the unit, not through it.
- What will a contractor do: Beyond smearing new sealant over old sealant and hoping.
A projecting window fails at its edges first. If you're only looking at the glass, you're looking at the last place trouble starts.
You're also weighing whether to keep the feature at all if you're planning one. That's a fair trade off to name early. These windows add light, a wider view, and interior space you can sit in. They also add exposed joints, a maintenance burden, and a roof to wall transition that needs periodic attention. Neither side cancels the other. A well built projection that's maintained performs fine. A neglected one becomes a recurring leak source that damages framing you can't see.
The goal isn't to turn you into an inspector. It's to help you recognize early warning signs, understand what a thorough assessment involves, and judge whether a proposed scope of work matches the cause. When you can describe where the stain sits, when it appears, and which way the wind was blowing, you're already giving a contractor useful diagnostic information instead of just pointing at wet drywall.
Understanding Bay, Bow, and Oriel Windows
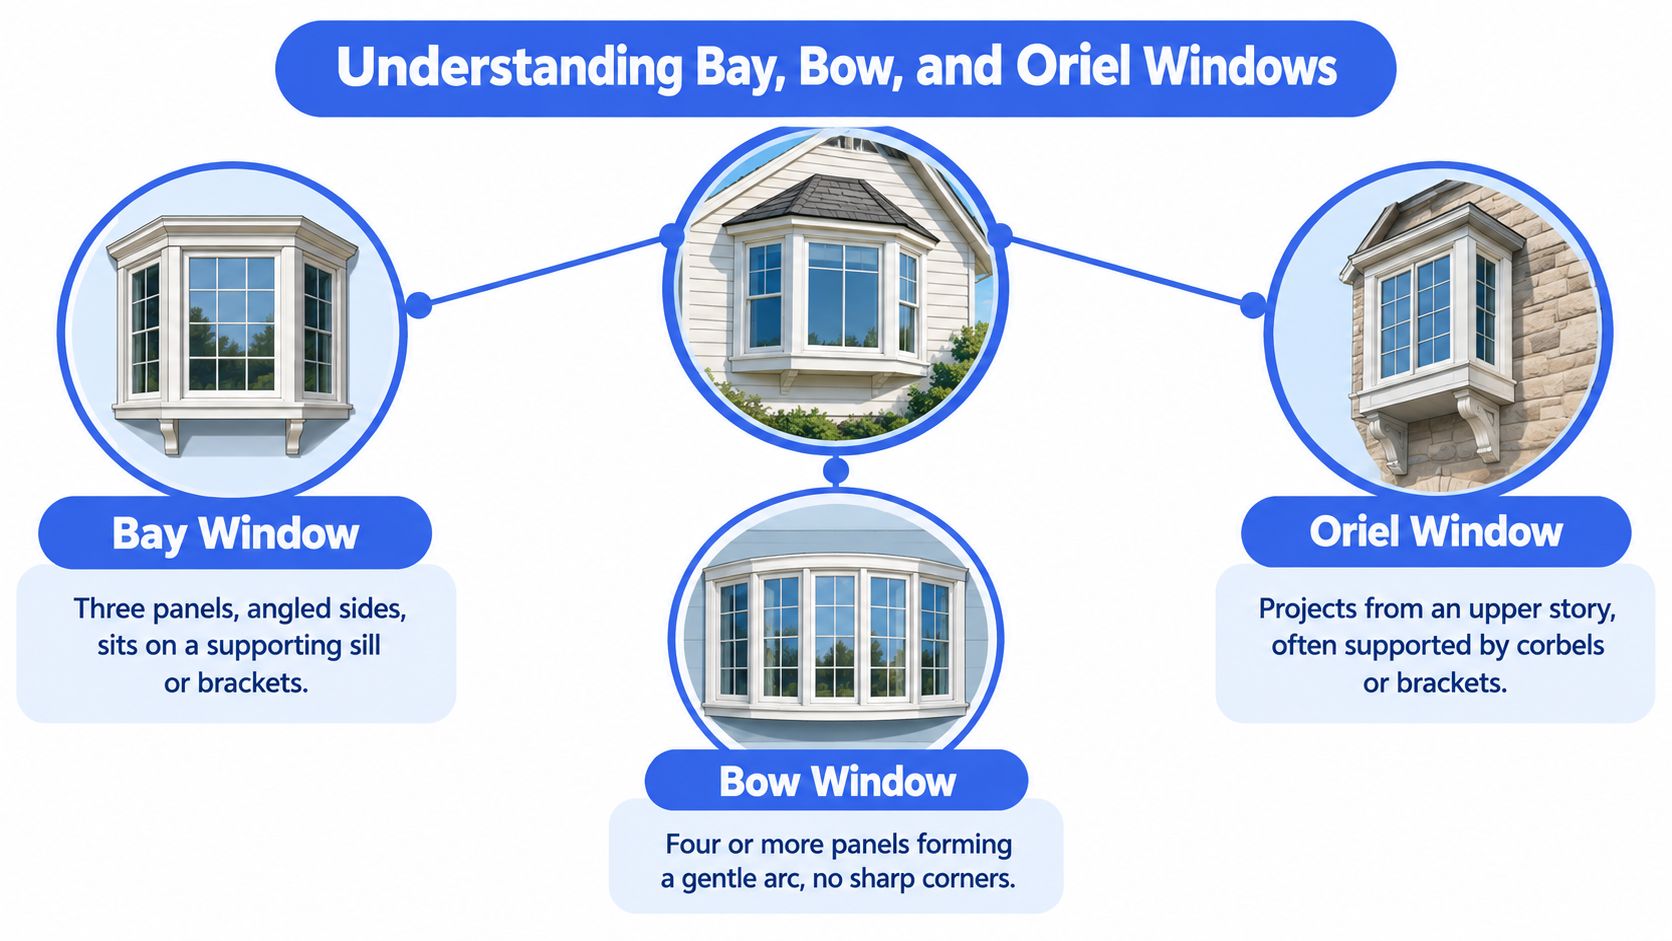
All three project outward from the main wall, but shape determines everything that follows, from how the roof cap is built to how many seams you maintain. Getting the name right matters because contractors price and flash these assemblies differently.
A bay window uses angled sections, often three sides, while a bow window forms a smoother curve using multiple narrower window units, and projecting windows historically appeared in prominent medieval and early English Renaissance buildings before becoming especially influential in Victorian and Edwardian residential architecture. Think of a bay as a faceted corner and a bow as a gentle arc. That single difference changes the joint count across the whole assembly.
The Three Forms in Plain Terms
- Bay window: Typically a large center panel flanked by two angled side panels. The sharp angles create distinct roof to wall joints at each side, and the interior usually has a flat seat.
- Bow window: Four or more narrower units joined at shallow angles to approximate a curve. You gain a broader view, but you also gain more vertical joints between units.
- Oriel window: A projection on an upper story that doesn't reach the ground, carried on brackets or corbels. Because it's raised, safe access for inspection and repair becomes part of every maintenance decision.
Rectangular boxed out projections exist too, especially over kitchen sinks, and they behave the same way. Anything that leaves the wall plane needs support below and weather protection above.
For a clear visual walkthrough of how the center and side panels differ in daily use, it's worth reading expert advice from South Mountain Window Cleaning alongside your own measurements, since operable side units and fixed center units age at different rates.
Why Shape Drives Maintenance
A bay concentrates water at fewer, sharper corners. When flashing fails there, it fails decisively. A bow spreads the projection across more facets. Each joint moves a little with temperature and framing, so sealant gets worked harder across the whole curve. Neither is better. The bay is simpler to roof. The bow gives a softer interior arc and wider sightlines, at the cost of more seams to inspect.
Two neighboring homes can look nearly identical from the street and still have very different upkeep needs. Count the vertical joints, look at how the cap roof meets the wall, and check whether the underside is enclosed or open to the weather. Those three observations tell you more about future maintenance than the style name alone.
Why These Windows Project From the Wall
The projection exists for a practical reason that predates curb appeal marketing. A window pushed beyond the wall catches light from three directions instead of one, and it creates usable interior space, a seat, a plant shelf, a reading corner, without moving the foundation wall. In dense historic streets that extra daylight and expanded view were worth the added construction.
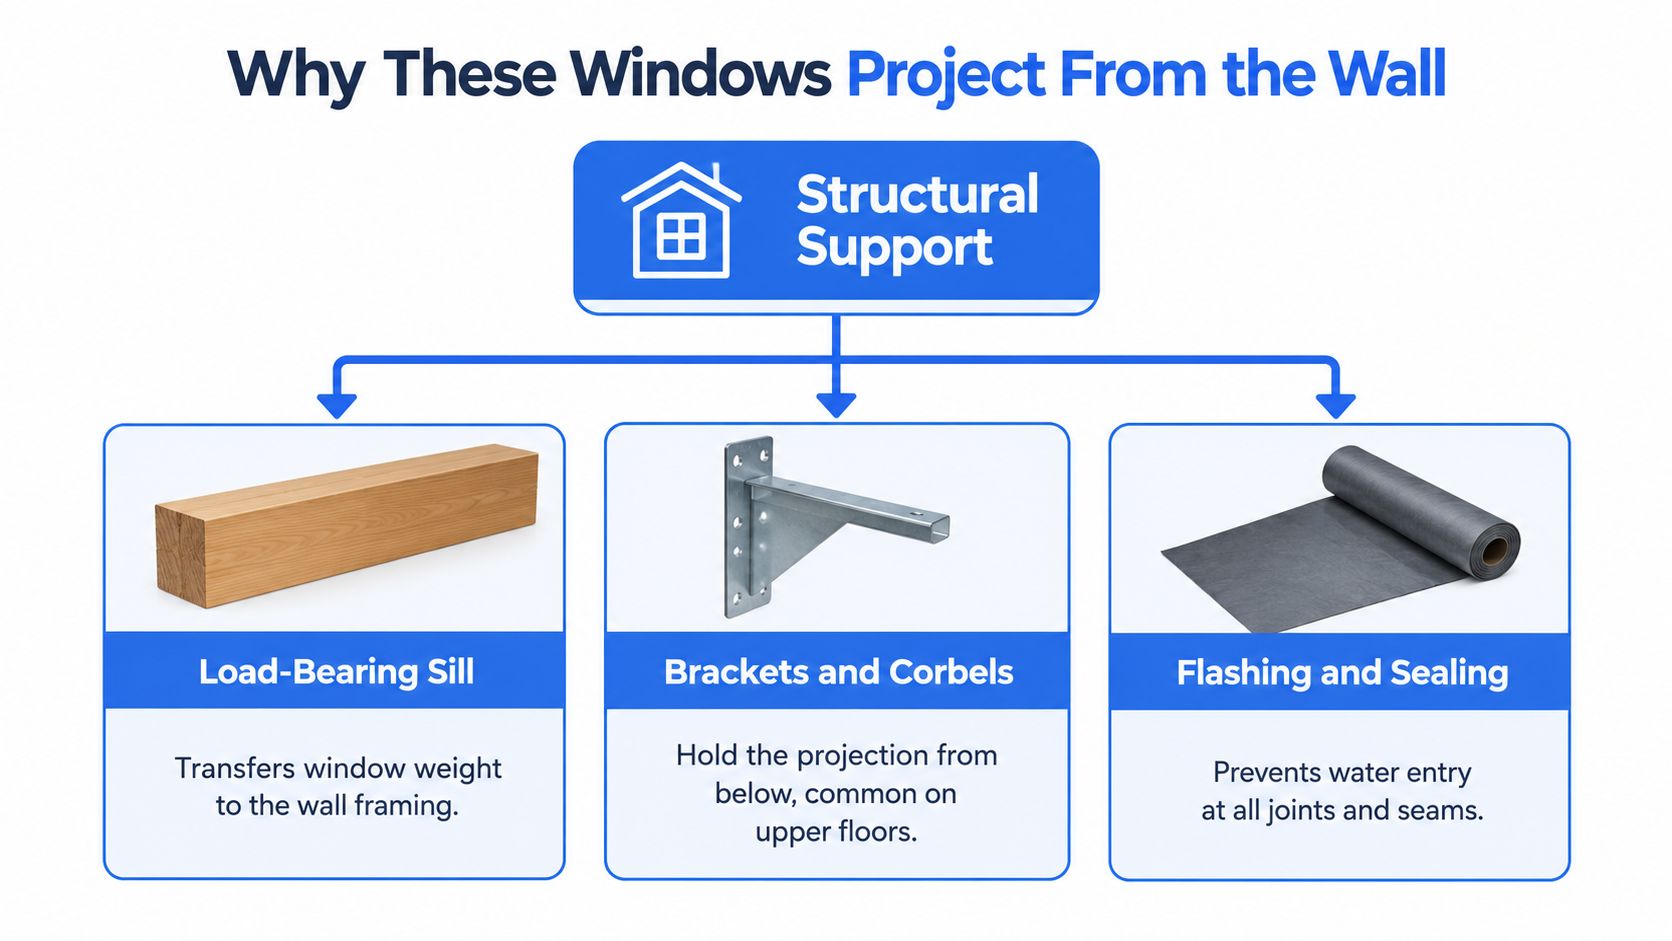
That benefit comes with structure you can't see from the sidewalk. Bow windows are a curved subtype of bay window generally distinguished by four or more window facets rather than the three sided configuration of a standard bay, and because the window extends beyond the wall, the assembly typically includes a roof or cap, support structure, sidewalls, trim, and joints vulnerable to water entry if deteriorated or improperly maintained.
What Holds It Up and Keeps It Dry
- Header and framing above: The wall opening is larger than a standard window, so the header carries load around it while the projection cantilevers or hangs from that framing.
- Seat and supports below: Hidden joists, brackets, or a framed knee wall transfer weight back to the foundation or wall. Sagging here opens joints above, which is why a sloped seat board is a structural clue, not a cosmetic quirk.
- Roof or cap on top: Whether it's standing seam metal, shingles, or a flat membrane, this small roof must shed water and tie into the wall's drainage plane with flashing, exactly like a full sized roof to wall intersection.
- Enclosed underside: The soffit below the seat needs insulation and an air barrier, or it becomes a cold cavity that chills the seat board and invites condensation.
Practical rule: Every projection creates at least two transitions a flush window doesn't have, one where the cap meets the wall and one where the underside meets the wall. Both need flashing and air sealing, not just exterior caulk.
Modern homeowners want the same things historic builders wanted, more light and a room that feels larger. The engineering trade off hasn't changed. You're adding perimeter, exposed horizontal surfaces, and drainage points. When those are detailed correctly, the assembly works as a small, well integrated addition. When they're treated as trim details, water and air find the gaps the design created.
Common Problems With Projecting Windows
Walk a failing projection in order, top to bottom, and the failures follow gravity. Most service calls trace back to four locations, and the visible symptom is rarely at the entry point.
At the head, flashing should slope outward and extend at least 50 mm (2 inches) beyond each jamb so water doesn't concentrate at the corners, and below the sill there should be a sloped pan flashing with end dams that laps over the drainage plane, as described in building science guidance on window rough opening drainage. When either detail is missing, water that gets behind trim has nowhere to go except into framing.

Where to Look and What It Means
- Roof to wall intersection: Cracked sealant, lifted cap flashing, or siding that traps water against the joint. Staining high on the interior head trim usually starts here, not at the glass.
- Sill corners and trim joints: Peeling paint, swollen wood, and soft spots when probed with a screwdriver. These often signal concealed drainage failure rather than an isolated caulk defect.
- Underside of the projection: Staining or sagging soffit material points to water traveling through the seat cavity, sometimes from a leak several feet away.
- Perimeter air seal: Drafts at the jambs and seat board on windy days, even with the sash locked, indicate the air barrier isn't continuous between wall and frame.
On air leakage, ratings matter but installation matters more. Guidance tied to the U.S. Department of Energy recommends selecting windows with an air leakage rating of 0.30 cfm/ft² or lower, yet installation leakage around a poorly sealed rough opening can exceed leakage through the unit itself. Fiberglass stuffed into the gap isn't an air barrier. Compatible sealant with backer rod or low expansion foam, connected to the wall's air control layer, is what stops the draft and reduces condensation risk inside the cavity.
Fog between panes is a separate failure, a broken glazing seal, and it's useful to understand how double paned windows lose their insulating seal before assuming a fogged unit caused a wall leak. The two problems often coexist on an aging assembly but need different fixes.
Moisture trapped in wall cavities around a projection also interacts with insulation in ways homeowners underestimate. If your home has filled cavities, the Corinthian Surveyors London homeowner guide explains how wet insulation and blocked drainage paths can hold moisture against framing, which is why opening up a suspect seat cavity tells you more than another coat of paint.
For masonry veneer homes, add one more check. Through wall flashing and drainage openings around the projection must route water that gets behind the veneer back outside. Blocked weeps send that water into the seat framing instead, and the first sign is often rot you find by touch, not by sight.
Repair, Reflash, or Full Replacement
Three scopes cover most projects, and the right one depends on whether the window unit, the surrounding envelope, or both have failed. Pricing follows that distinction, which is why two quotes for the same leak can legitimately differ.
Choosing the Right Scope of Work for a Projecting Window
| Option | Best When | Typical Disruption | Adds to Lifespan |
|---|---|---|---|
| Targeted repair | Sealant and minor trim have failed but flashing and framing are sound | Low, exterior only, often one visit | Short term if the underlying details are correct |
| Reflash and rebuild cap | Unit is sound but head, sill, or roof to wall flashing has failed | Moderate, trim and cap opened, siding disturbed locally | Substantial, resets the drainage details |
| Full replacement | Unit is fogged, rotting, hard to operate, or framing is damaged | High, interior seat and trim often removed | Longest, new unit plus new perimeter details |
Targeted repair fails when it's used to hide a drainage problem. Fresh caulk over a joint that's supposed to be flashed will crack again, usually within a season or two of movement. If a contractor proposes it, ask what they found behind the trim. Learning how to reseal windows correctly helps you tell a proper backer rod and sealant joint from a surface smear.
Reflashing is the underused middle option. The crew removes the cap and trim, installs pan and head flashing correctly, repairs localized rot, and rebuilds the roof to wall tie in. Your sound window stays. This pairs naturally with siding or roof work, when those layers are already open and the flashing can be integrated in the right sequence instead of retrofitted behind finished materials.
Full replacement earns its cost when the unit itself is done, failed seals, warped sash, hardware that no longer pulls the window tight. If only the glass has failed on an otherwise sound frame, Yorkshire glazing replacement help outlines the glass only route worth pricing before committing to a whole unit. Whichever scope you choose, get the flashing and air sealing details in writing. A new window installed into a failed opening repeats the leak with newer materials.
What a Contractor Actually Checks on Site
A typical call in central Ohio goes like this. The homeowner reports a stain above a living room bay after storms from the west, plus a cold seat in January. The glass is clear, the sash locks, and a previous handyman already recaulked the exterior twice. That history alone suggests the problem isn't the visible joint.
The Inspection Sequence
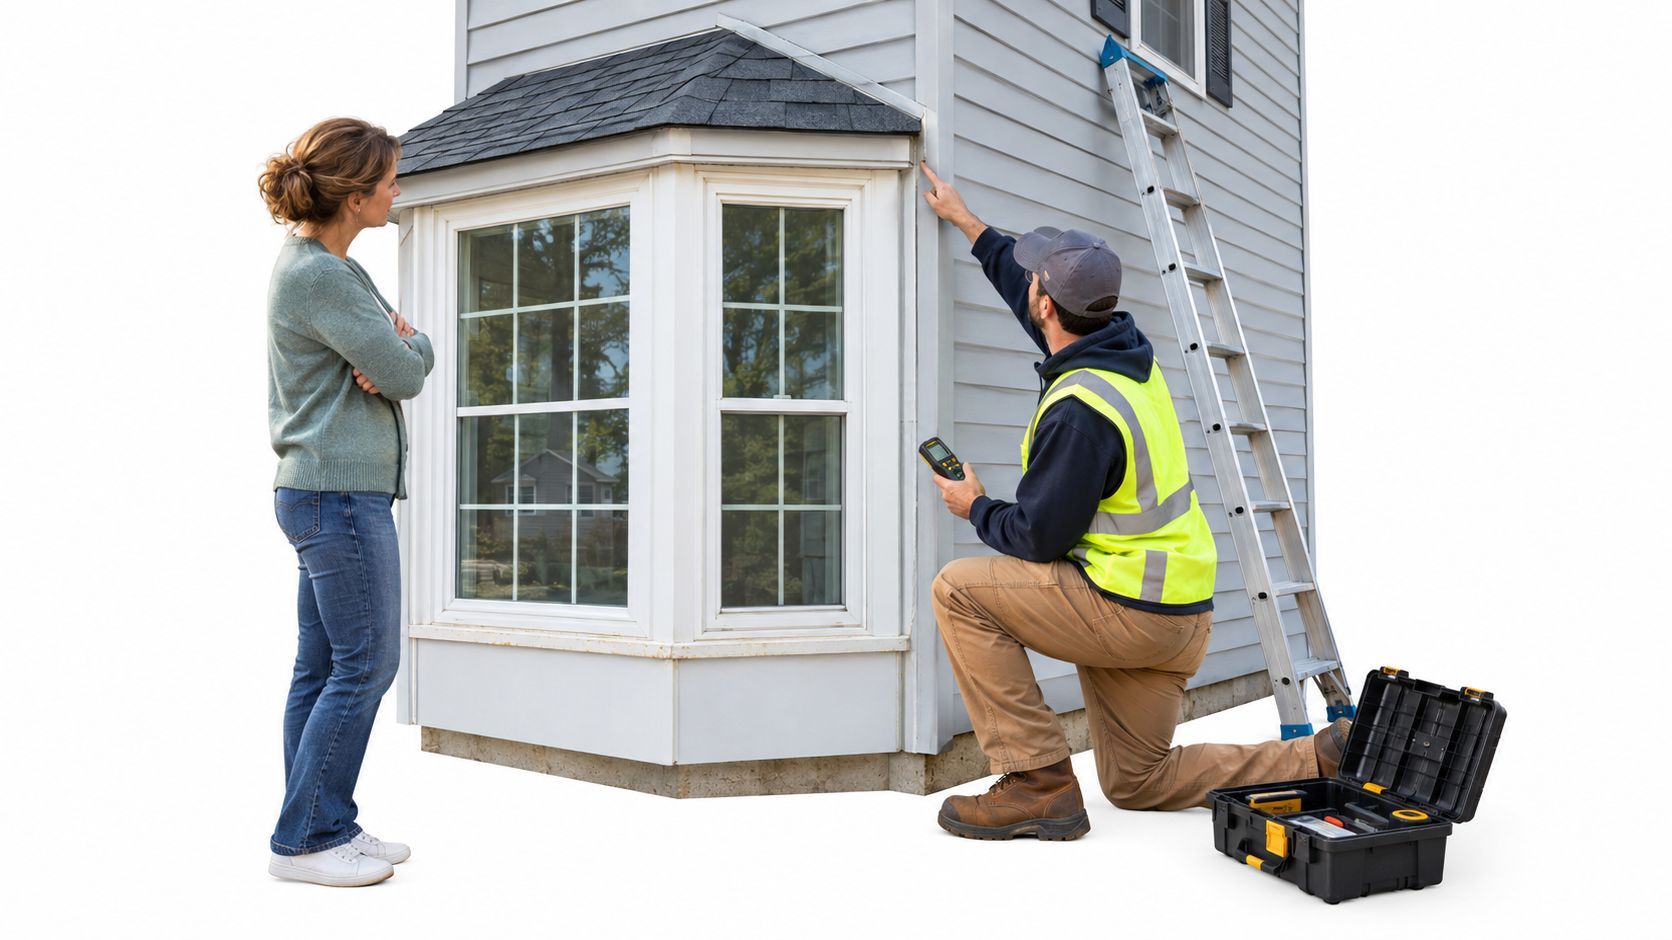
- Exterior walk around first: Cap roof condition, flashing at the wall, trim joints, siding clearances, and whether gutters dump water toward the projection. Binoculars help, but a ladder check at the cap finds lifted edges a ground view misses.
- Probe the suspect wood: Sill corners, lower trim, and the underside get checked with an awl. Sound paint over soft substrate means the scope just changed.
- Interior inspection: Stain patterns on the head and seat, moisture meter readings in the trim, and a hand along the jambs on a windy day to feel perimeter air leakage.
- Underside and cavity clues: Access panels or a borescope through a small hole reveal whether the seat cavity is insulated, wet, or open to the wall cavity.
In the example above, the likely finding is a cap flashing that was face sealed instead of lapped behind the siding. Wind driven rain gets behind it, runs down inside the projection framing, and shows up at the interior head. The cold seat is a second, separate finding, an uninsulated cavity below with no continuous air barrier.
A thorough diagnosis names two or three specific failed details, not one vague leak. If the explanation is just old caulk, ask what was checked behind the trim.
Coordination matters here. The cap is roofing work, the unit is window work, and the tie in is siding work. A single crew that handles the envelope as one system, or two trades that agree on sequence before starting, prevents the classic gap where each blames the other's layer. Expect photos of what's found once trim comes off, and a revised scope if concealed rot appears. That isn't upselling. It's the honest limit of what a surface inspection can confirm.
Maintenance Habits and a Pre-Call Checklist
Projecting windows don't need constant attention. They need brief, regular attention at the joints, timed to the seasons that stress them. Fifteen minutes twice a year catches most failures while they're still cheap.
A Simple Seasonal Routine
- After major storms: Check the interior head and seat for new staining while it's still damp. Fresh marks photograph better and date the event.
- Twice a year: Clear leaves and debris off the cap roof, especially where it meets the wall. Standing debris holds moisture against the flashing joint.
- Annually: Inspect exterior sealant at trim joints and sill corners. Look for cracking, pulling away, or sealant smeared over weep openings that should stay open.
- Every few years: Press along the seat board edges and lower trim for softness, and confirm the underside soffit is intact and not sagging.
Don't seal every horizontal joint you find. Some gaps are drainage paths. Blocking the bottom edge of siding or the weeps in masonry traps the water the assembly was designed to release.
What to Document Before You Call
Contractors diagnose faster when you bring specifics. Note when the stain or draft first appeared, whether it follows rain, wind from a particular direction, or just cold weather, and any recent roof, siding, or gutter work nearby. Take dated photos from the same angle after each storm. Mention whether operable sash still lock tightly, since a sash that won't pull closed mimics a perimeter air leak.
That record turns a vague complaint into a testable pattern. It also protects you, because a scope of work written against documented symptoms is easier to verify when the next storm tests the repair.
Questions Homeowners Ask Before Signing a Project
Can a Bay or Bow Window Count as Bedroom Egress
Not automatically. Franklin County guidance requires a sleeping room egress window that opens from inside without a key or tool, with a sill no higher than 44 inches, a minimum net clear opening of 5.7 square feet, and minimum clear dimensions of 22 inches high and 20 inches wide, as set out in Franklin County building permit guidance for homeowners. A large fixed center panel doesn't count. Measure the finished clear opening of the operable sash after installation, not the frame size.
Do Permits and Setbacks Apply to a New Projection
Often, yes. A new or enlarged projection extends toward your lot lines, and some Ohio municipal rules measure projection distance from the façade to the outermost part and restrict how close it may sit to lot lines, as illustrated in Ohio municipal projection code language. Dimensions vary by municipality, so confirm setbacks, zoning, and permit needs before design, not after pricing. Like for like repair of an existing cap usually sits in a different category than altering the exterior wall.
How Do You Tell a Roof Leak From a Window Leak
Location and timing give it away. Water that appears during wind driven rain against that wall, or only above the projection head, often enters at the cap to wall flashing. Water that shows up on the ceiling beyond the projection, or during any rain, points higher, to the main roof or upper siding. A controlled hose test, starting low and working up in sections, confirms it without guesswork.
Is Siding Replacement the Right Time to Reflash
Usually it's the best time. With siding off, flashing can lap correctly over the drainage plane in sequence. It's also a sensible moment to weigh the broader return, and reviewing whether new windows increase home value helps you decide if pairing the reflash with unit replacement fits your plans for the house. Get the sequence, flashing details, and any concealed damage allowance in writing before you sign.
If your bay or bow window is staining, drafting, or shedding caulk every season, HIBCO ROOF LLC inspects the whole assembly, cap roof, flashing, siding tie in, and window unit, as one envelope system for Columbus and central Ohio homeowners. Visit HIBCO ROOF LLC to request a free estimate and get a written scope that names the failed details before any work begins.